Animate one SVG in multiple steps
One vector does not need to be copied four times just because its parts should draw at different moments. In Scribe Animator, several Draw Steps can target the same object. Each step can own a different reveal range, start time, duration, hand and tool preset, and stroke material while the completed parts remain visible.
This tutorial builds one four-part SVG—idea, connection, process, result—and reveals it in four contiguous sections. The percentages were chosen after inspecting the real drawable route; Scribe did not guess what the shapes meant.
This workflow was reproduced on 9 August 2026 in the Desktop web editor on macOS with frontend@2.0.0. One object ID was shared by all four Draw Steps. Live playback switched hands at the step boundaries without a stale previous hand, and the completed scene was exported and independently inspected as H.264, 1280 × 720, 30 fps, and 15.000 seconds.
The key idea: one object, several Draw Steps
A Draw Step does not create another copy of the artwork. It tells the timeline which normalized portion of an existing drawable object should reveal during a time range.
The tested scene contained one vector object named Idea to result drawing and four Draw Steps with the same internal targetObjectId:
| Step | Time | Reveal | Visual region |
|---|---|---|---|
| 1 | 0–2s | 0.00 → 0.42 | Lightbulb / idea |
| 2 | 2–4s | 0.42 → 0.54 | Connection / arrow |
| 3 | 4–6s | 0.54 → 0.77 | Process / chart |
| 4 | 6–8s | 0.77 → 1.00 | Result / check |
The step-specific presentation was:
- Step 1: inherited Left photoreal pen hand + Black Fountain Pen; Solid material.
- Step 2: Right photoreal marker hand + White Marker (Black Cap); Marker material.
- Step 3: Left photoreal pen hand + Yellow Pencil (Standard); Pencil material.
- Step 4: Right photoreal full hand + Silver Ballpoint Pen; Ink Brush material.
The scene holds the completed image after eight seconds. No duplicate SVG object is needed.
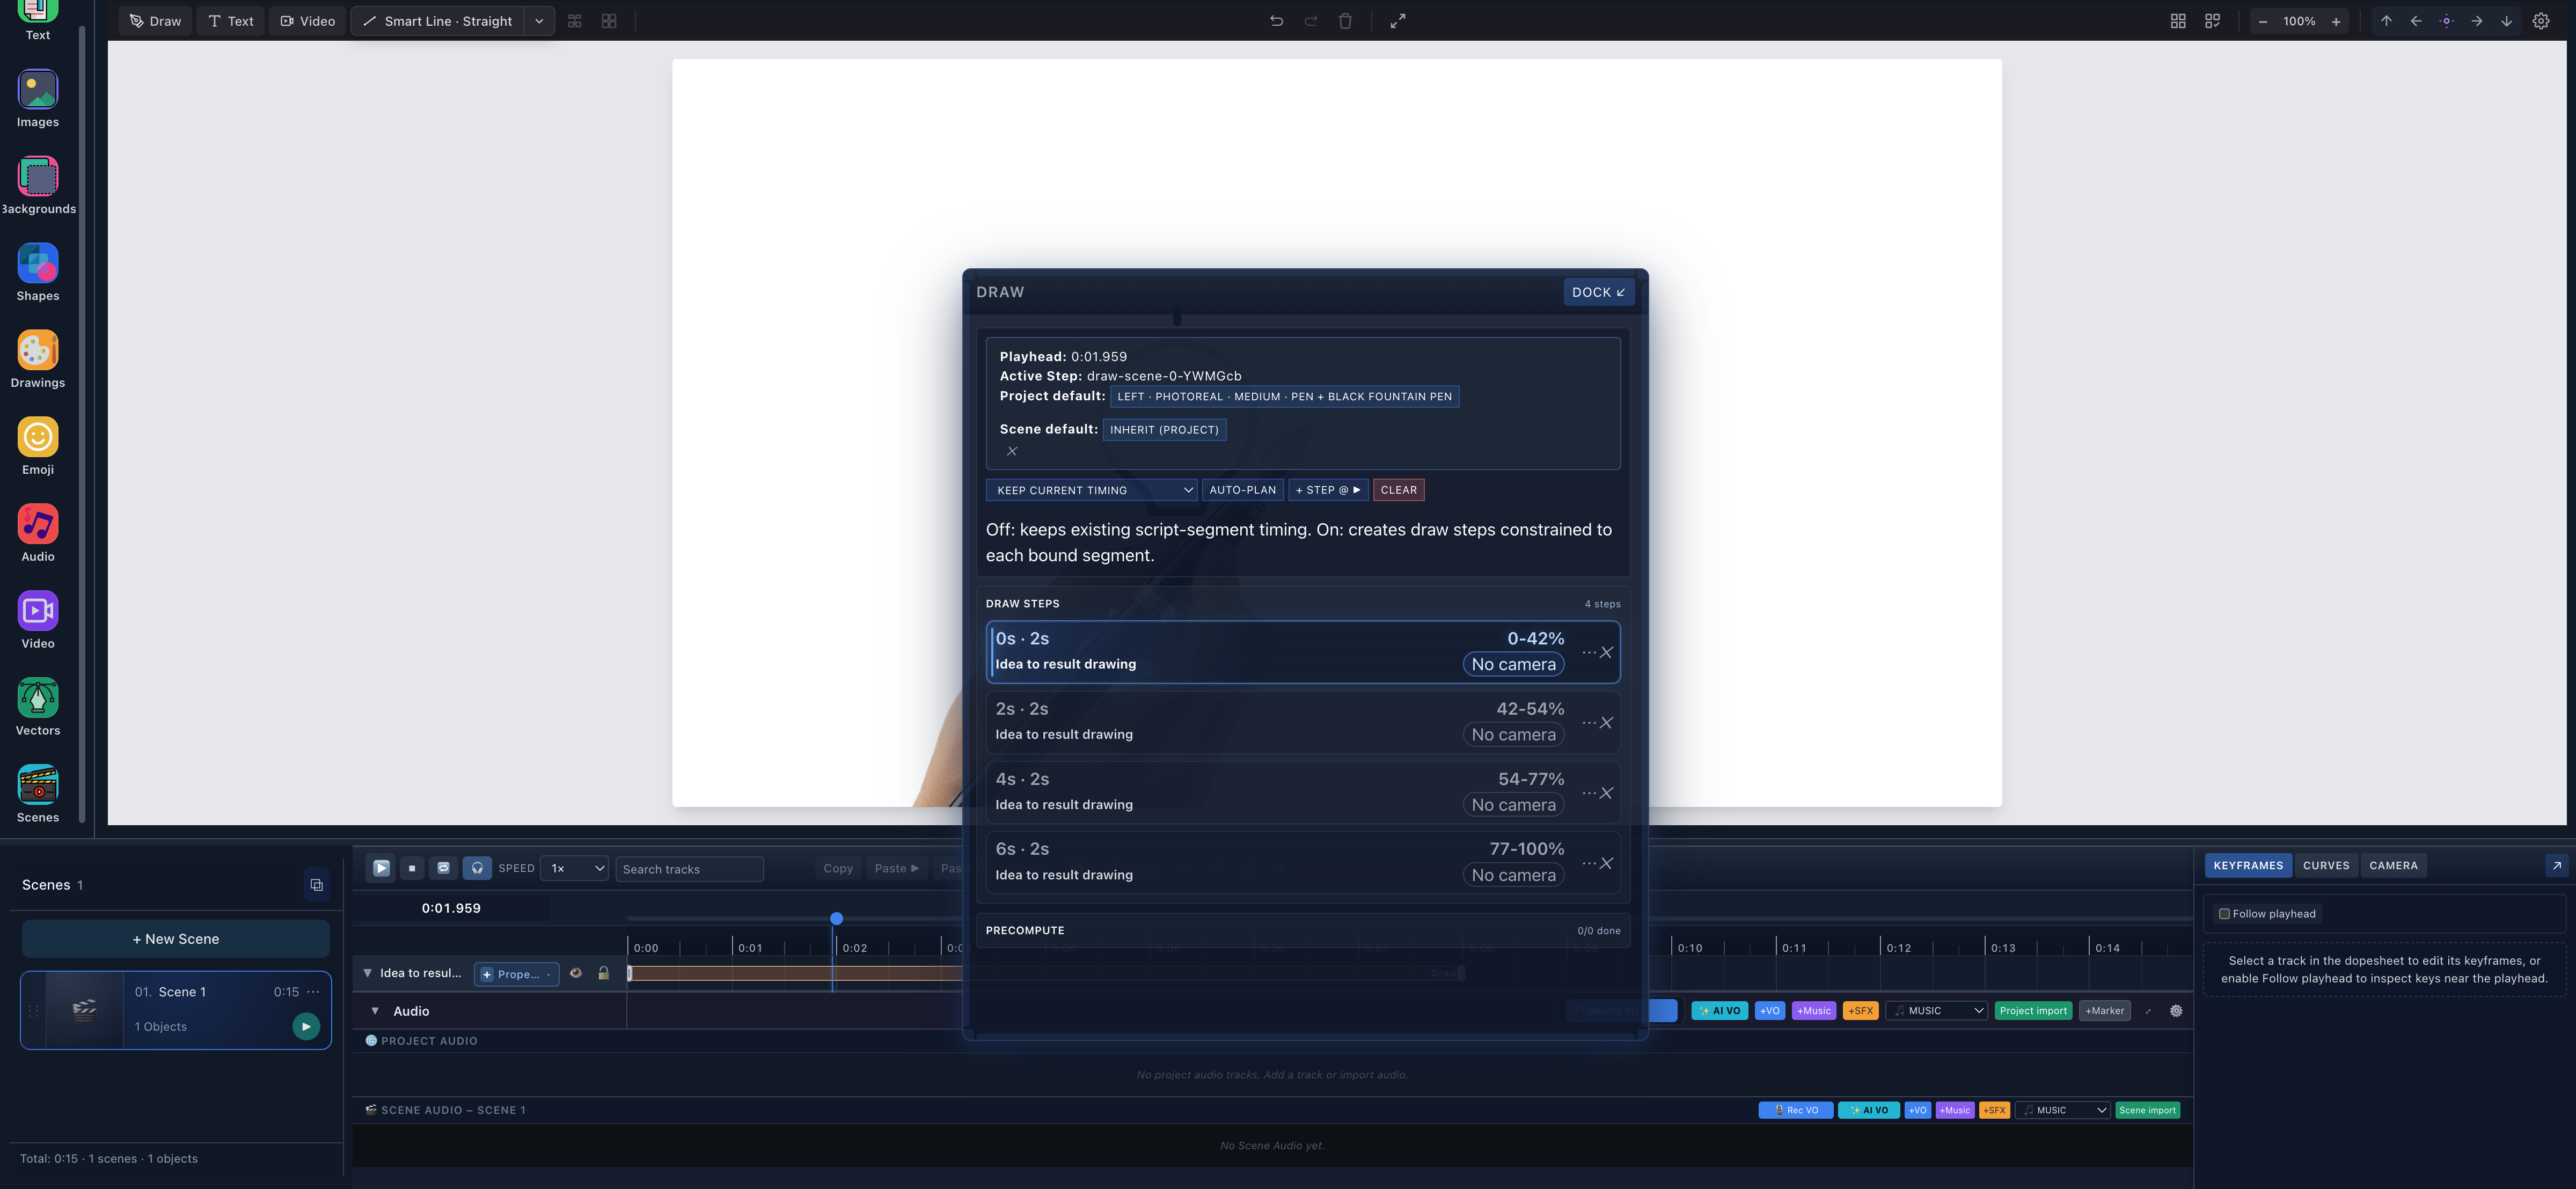
- Same targetIdea to result drawing is repeated on every row because every step points to the same vector object.
- Contiguous revealThe ranges end where the next begins: 42, 54, 77, then 100 percent.
- One timeline objectThe project contains one relevant object row, not four duplicated vectors.
Download the practice SVG
Download multi-step-hands-practice.svg
This first-party file contains 15 ordered paths and four recognizable regions. It has no script, external CSS, animation markup, embedded raster image, or third-party artwork. Its path order is deliberately suitable for this exercise.
The approximate cumulative drawable-route boundaries are:
Lightbulb complete: 0.41532
Arrow complete:     0.53829
Chart complete:     0.76759
Result complete:    1.00000
The editor values use the clearer rounded boundaries 0.42, 0.54, and 0.77. Those values are specific to this file. Your SVG needs its own inspected boundaries.
1. Import the SVG as one object
Open Vectors, choose the downloaded SVG, and wait for Vector Import - SVG to Paths to finish. Inspect the processed preview before adding it to the canvas.
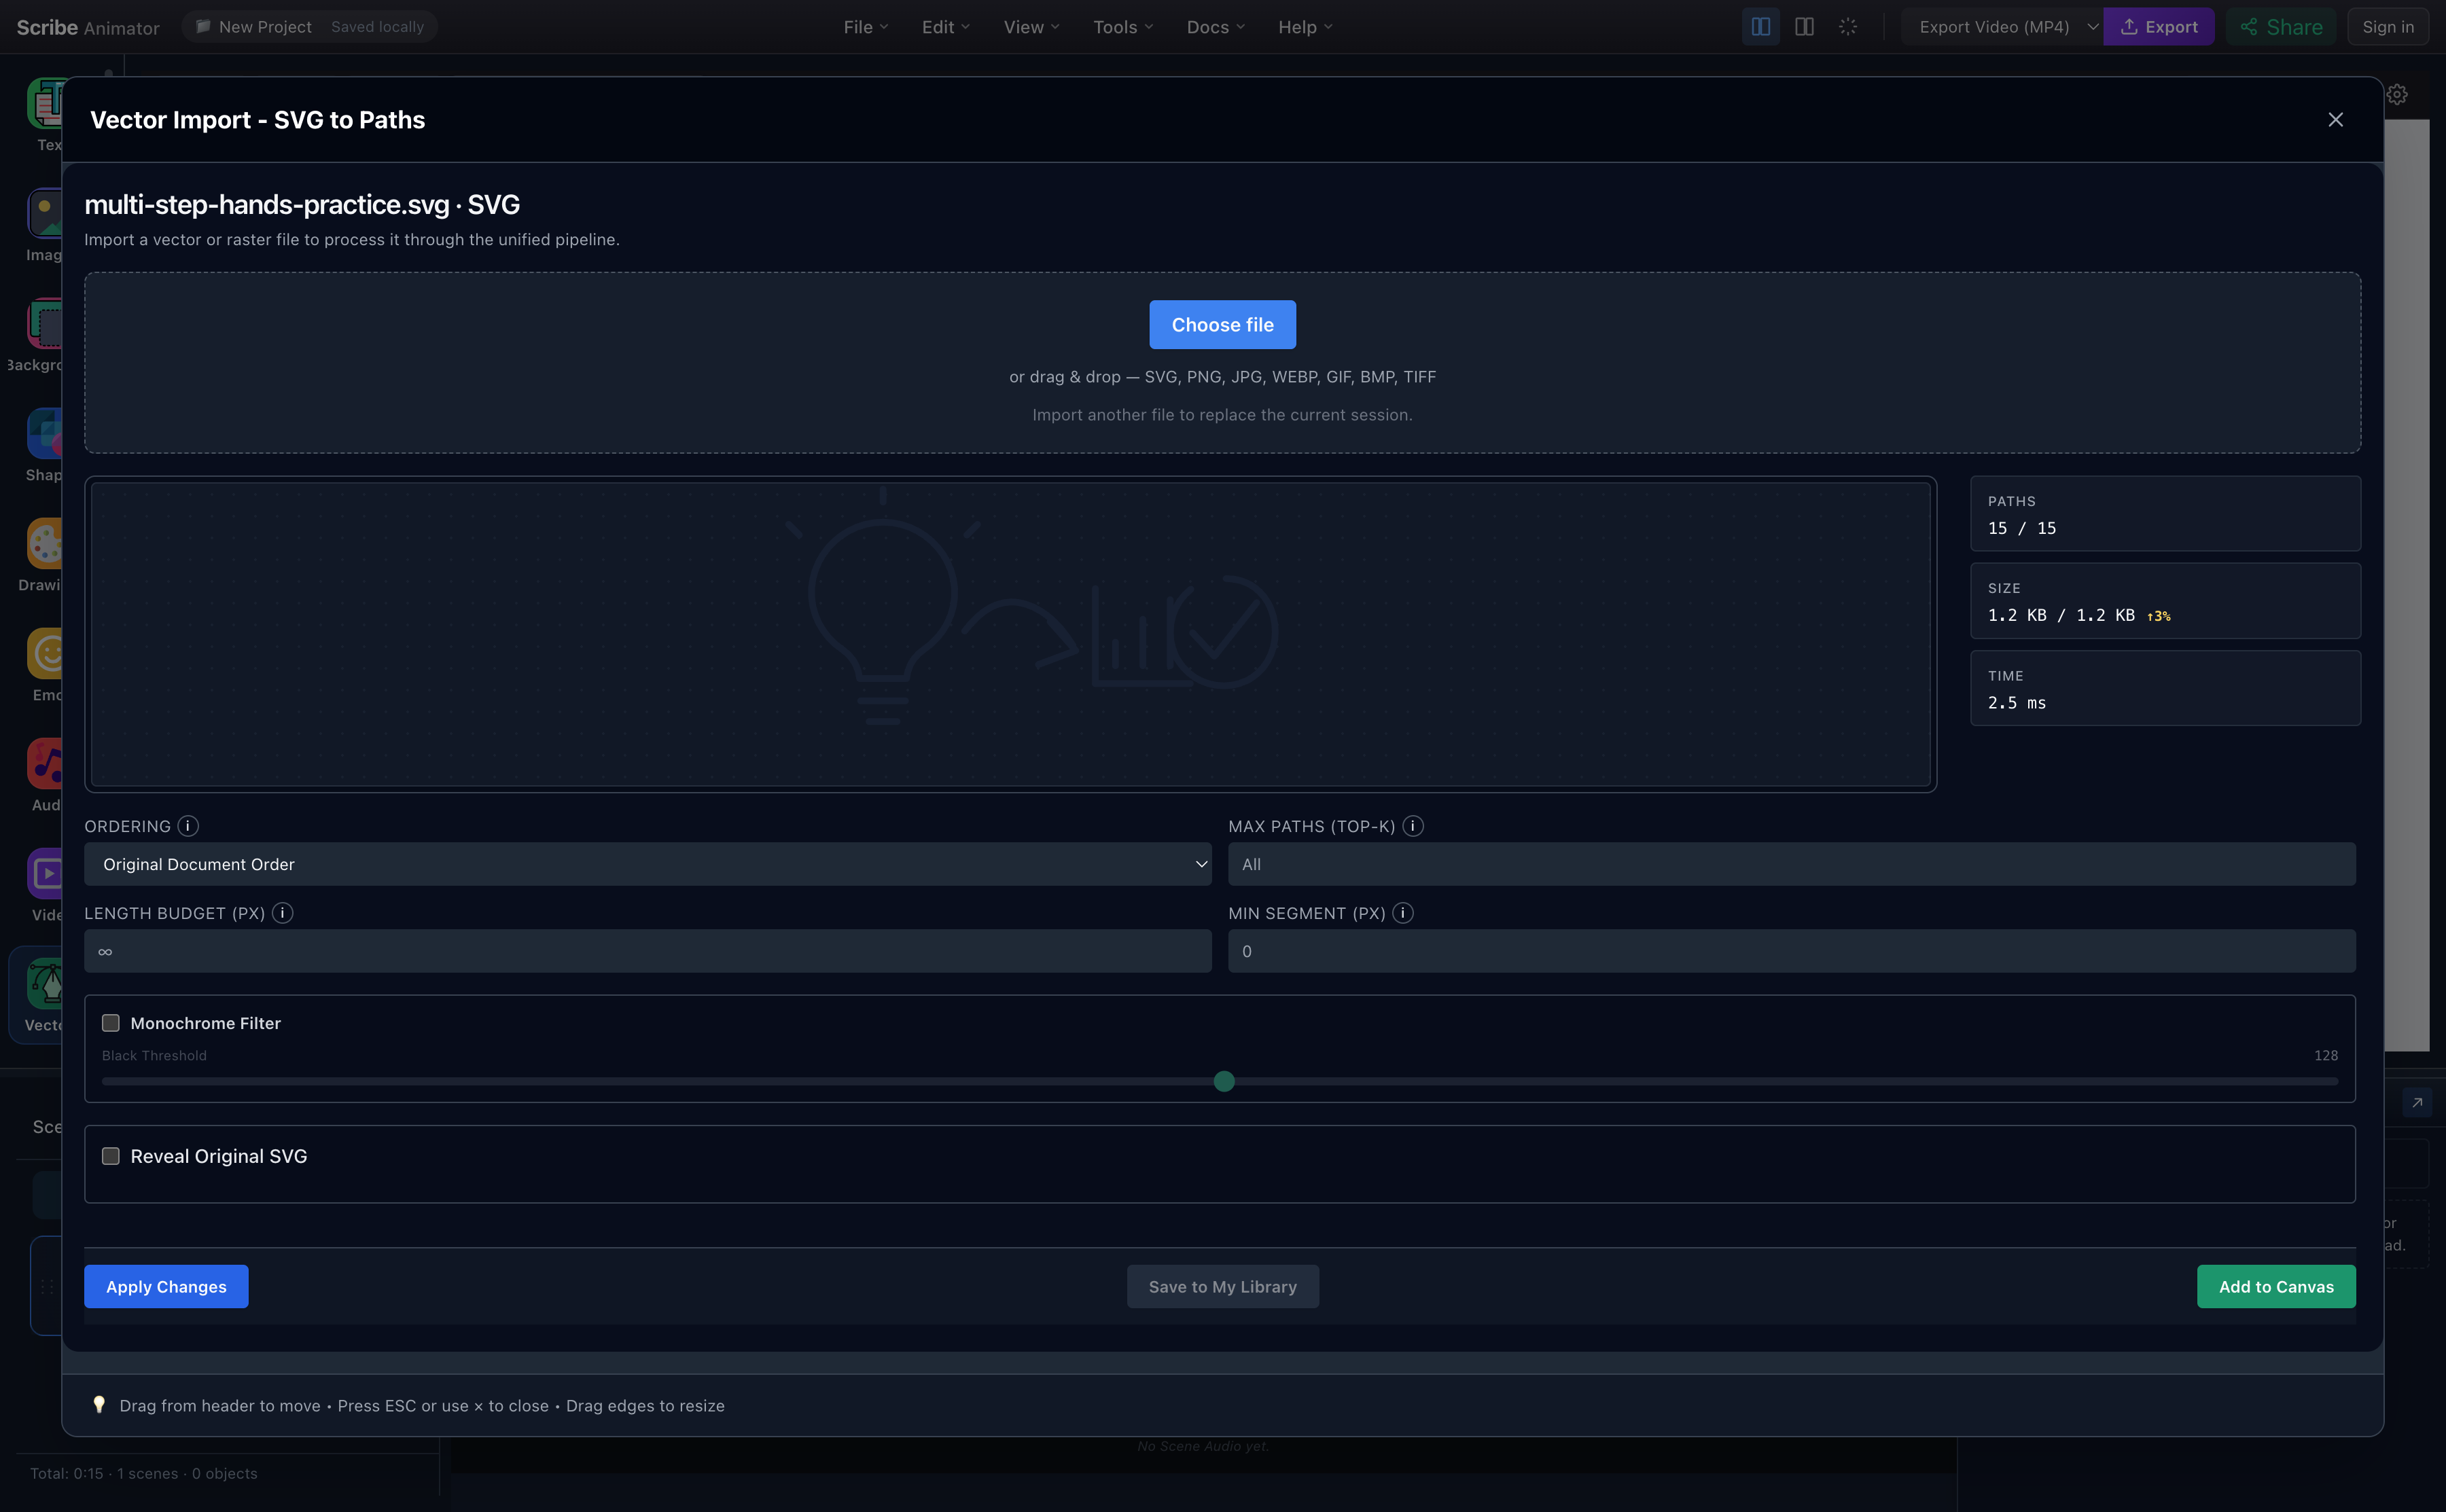
- Processed artworkConfirm that all four regions are present and unclipped after sanitization and normalization.
- 15 / 15 pathsAn unexpected missing-path count is a reason to stop and inspect the source before planning animation.
Choose Add to Canvas, close the importer, and name the vector Idea to result drawing in Properties → Basics → Name in timeline. The scene count and timeline should still show one object.
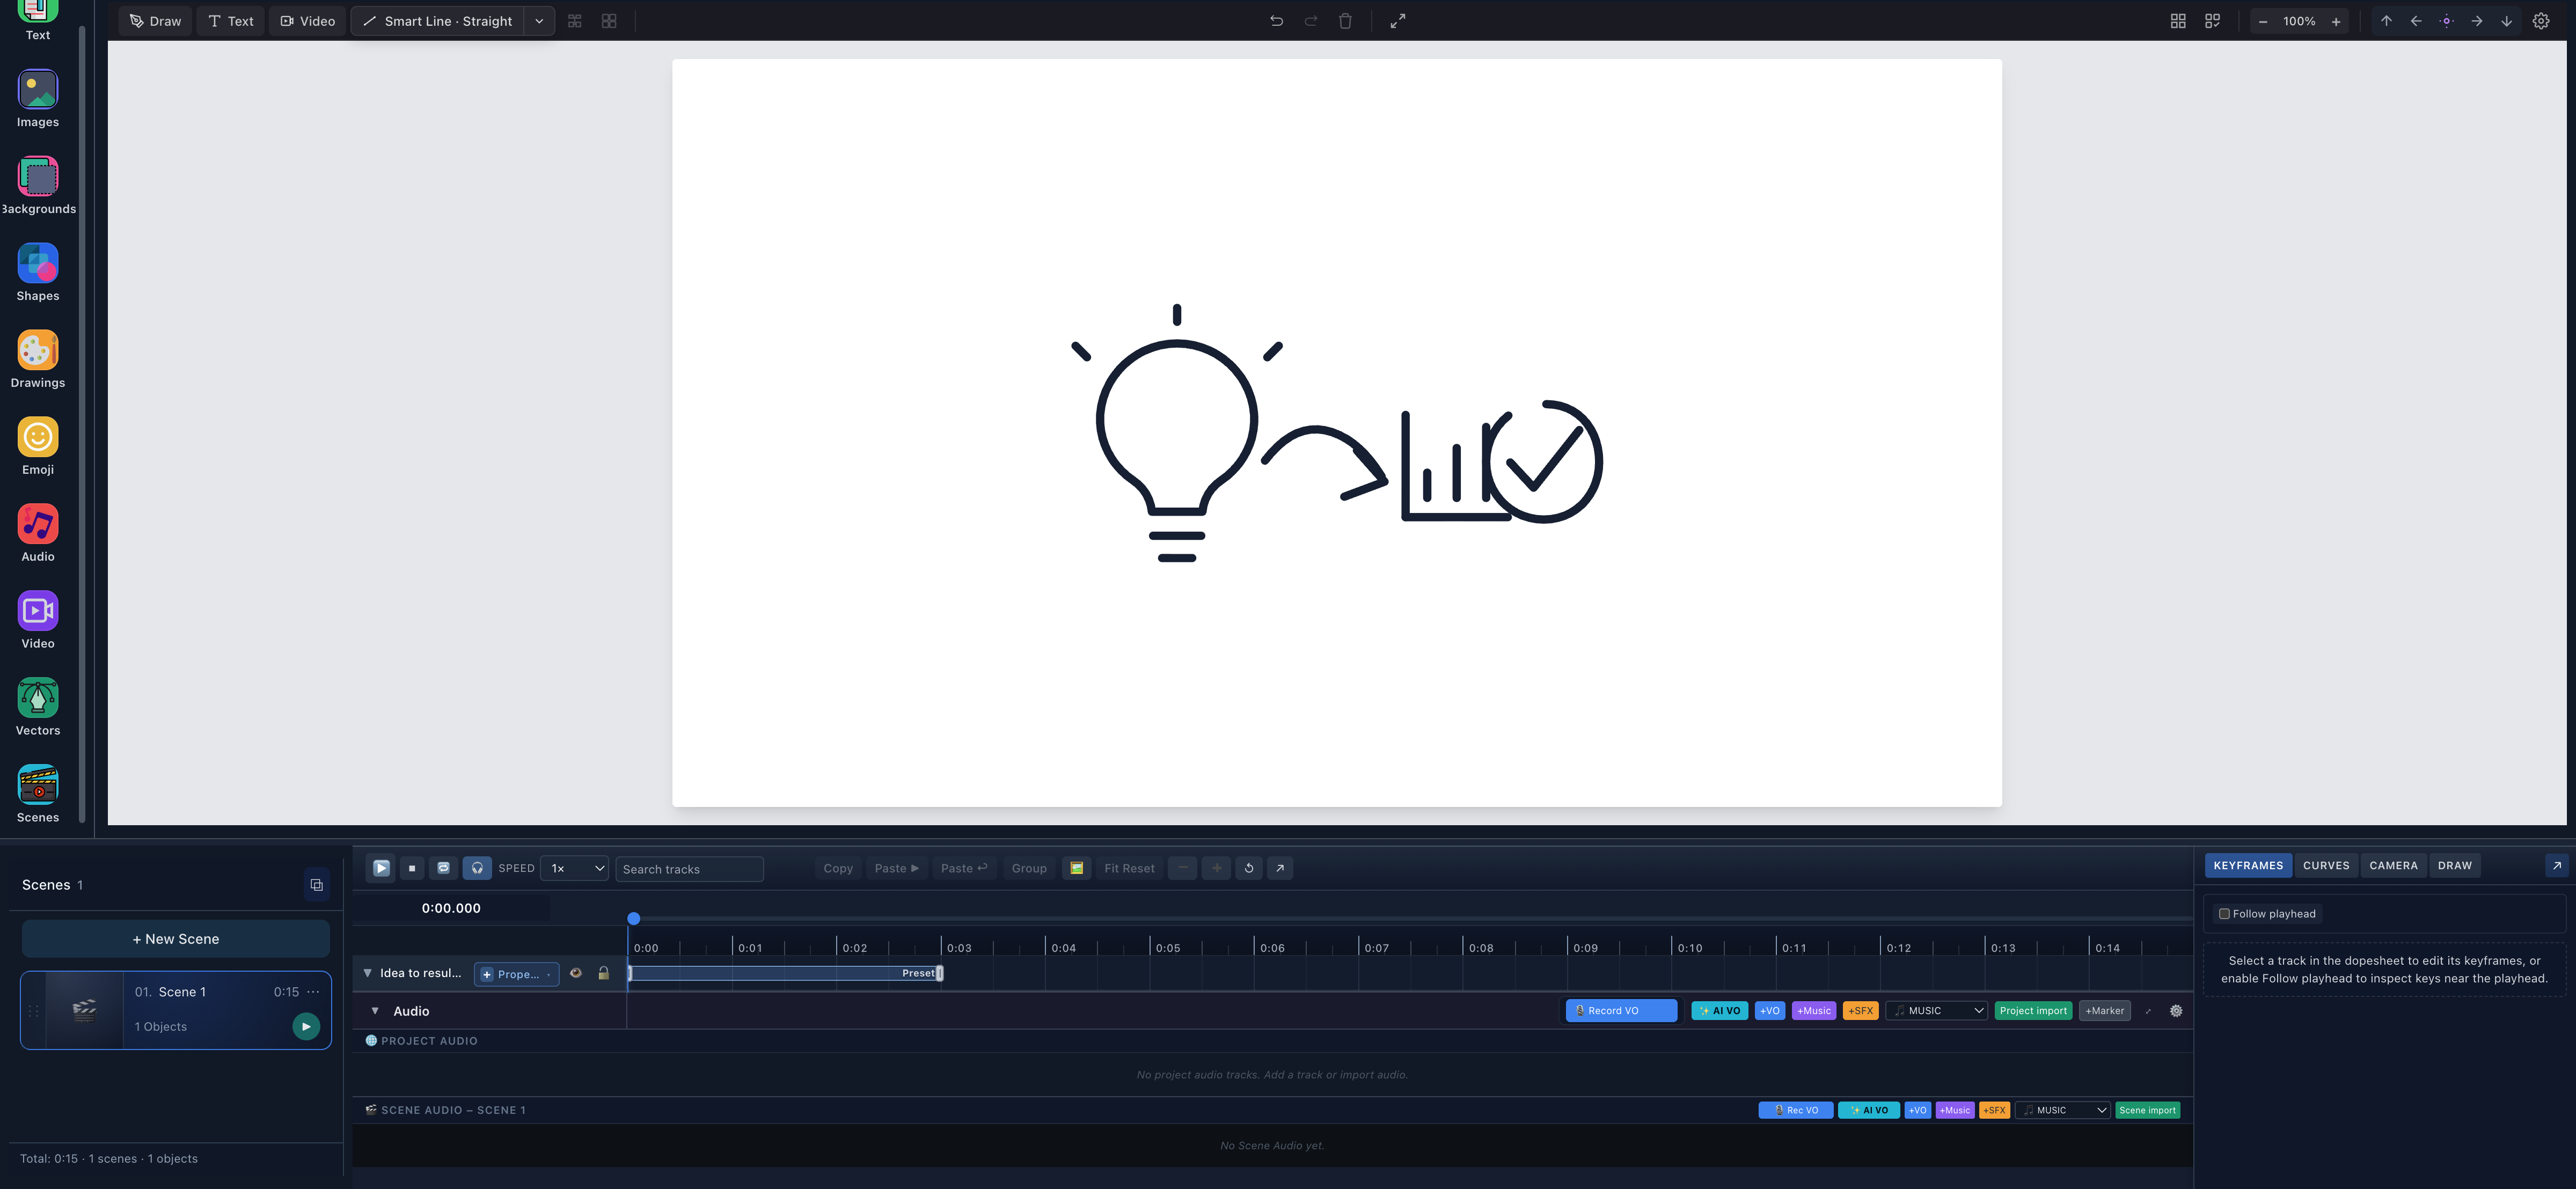
- One selected vectorThe lightbulb, arrow, chart, and result belong to a single imported object.
- One object rowThe timeline contains one relevant drawable object before Draw Steps are added.
For importer limits and sanitization behavior, read Import SVG and vector artwork.
2. Add the first Draw Step
Open the timeline's DRAW drawer. Move the playhead to zero and choose + Step @ ▶. A newly added manual step begins with a full 0 → 1 reveal, so edit it rather than leaving the default unchanged.
For Step 1, enter:
- Start time (sec):
0 - Duration (sec):
2 - Target:
Idea to result drawing - Stroke material:
Solid - From:
0 - To:
0.42
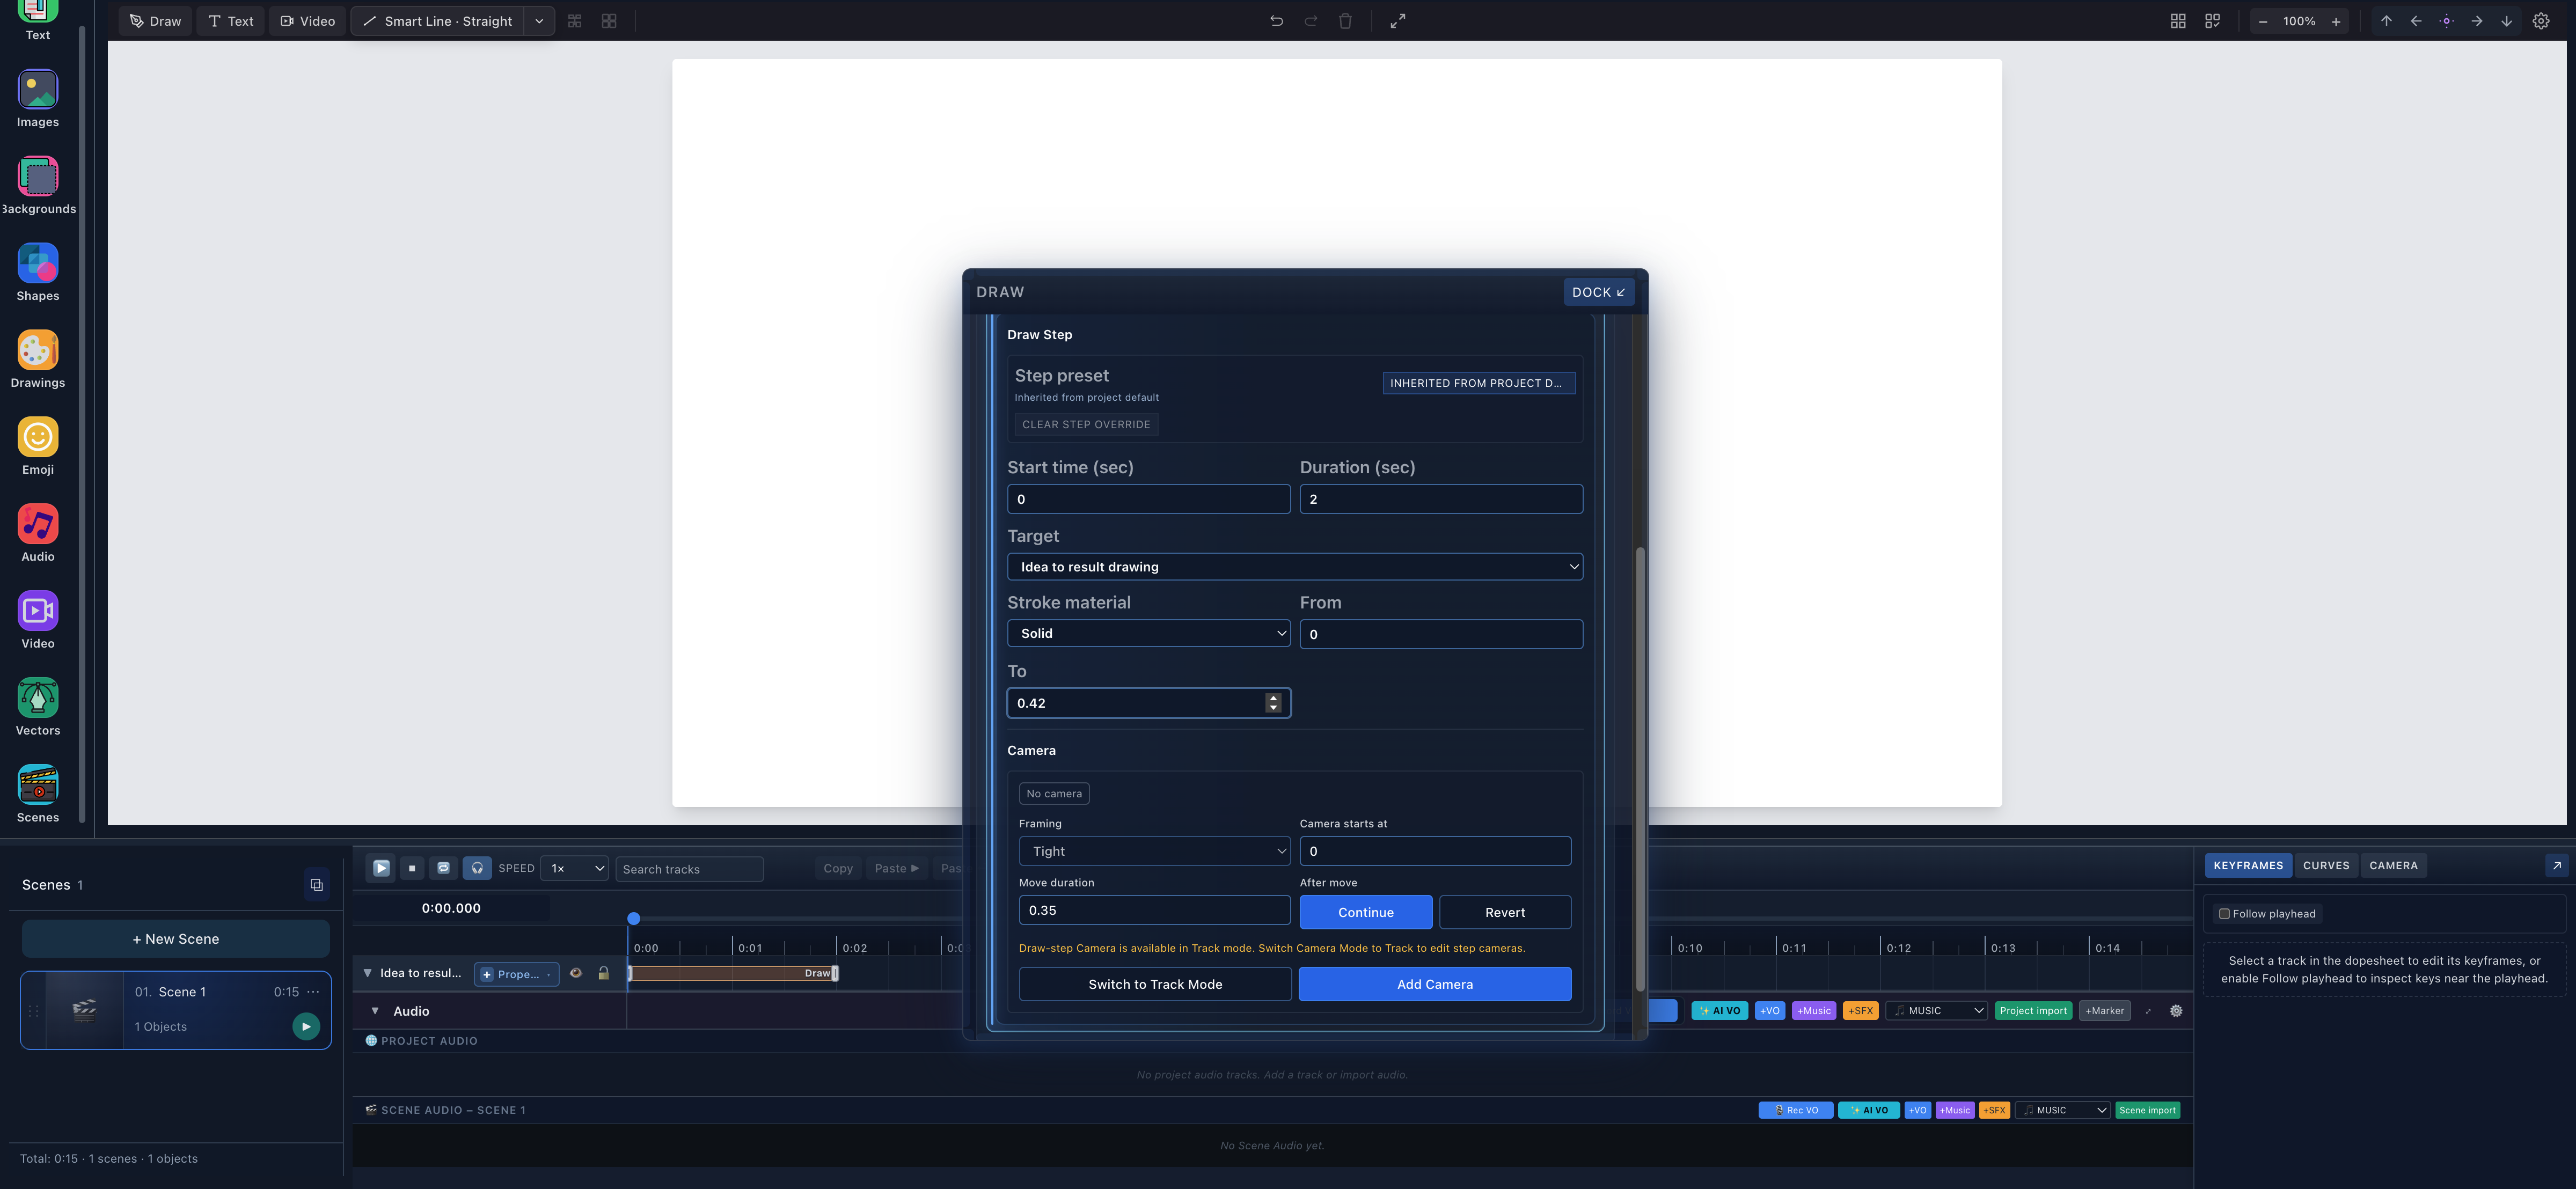
- Inherited presetStep 1 uses the project default because it has no step-specific hand/tool override.
- Two-second stepStart and duration independently place this partial reveal from zero to two seconds.
- First route sectionFrom 0 to 0.42 covers the inspected lightbulb region of this practice SVG.
3. Split one object into multiple reveal ranges
Create three more steps, then edit each start, duration, From, and To value. Keep the same target object.
Normalized reveal progress runs through the object's drawable route. It is not an index of semantic objects. Scribe does not know that 0.42 means “the lightbulb ends”; that relationship exists only because the source paths were authored in a useful order and the result was previewed.
How to split reveal ranges safely
Contiguous quarters are a good first diagnostic:
0.00 → 0.25
0.25 → 0.50
0.50 → 0.75
0.75 → 1.00
Unequal ranges are better when they match inspected route boundaries:
0.00 → 0.42
0.42 → 0.54
0.54 → 0.77
0.77 → 1.00
Avoid accidentally leaving four manual steps at their default:
0 → 1
0 → 1
0 → 1
0 → 1
That repeats the complete reveal rather than continuing through sections. Gaps can deliberately leave geometry hidden, and overlaps can deliberately redraw a range, but neither should happen by accident.
4. Give each Draw Step its own hand and tool
Expand a step and open Step preset. Choose a real installed hand, then choose a compatible tool and apply the selection. The Draw Step should report Custom for this step.
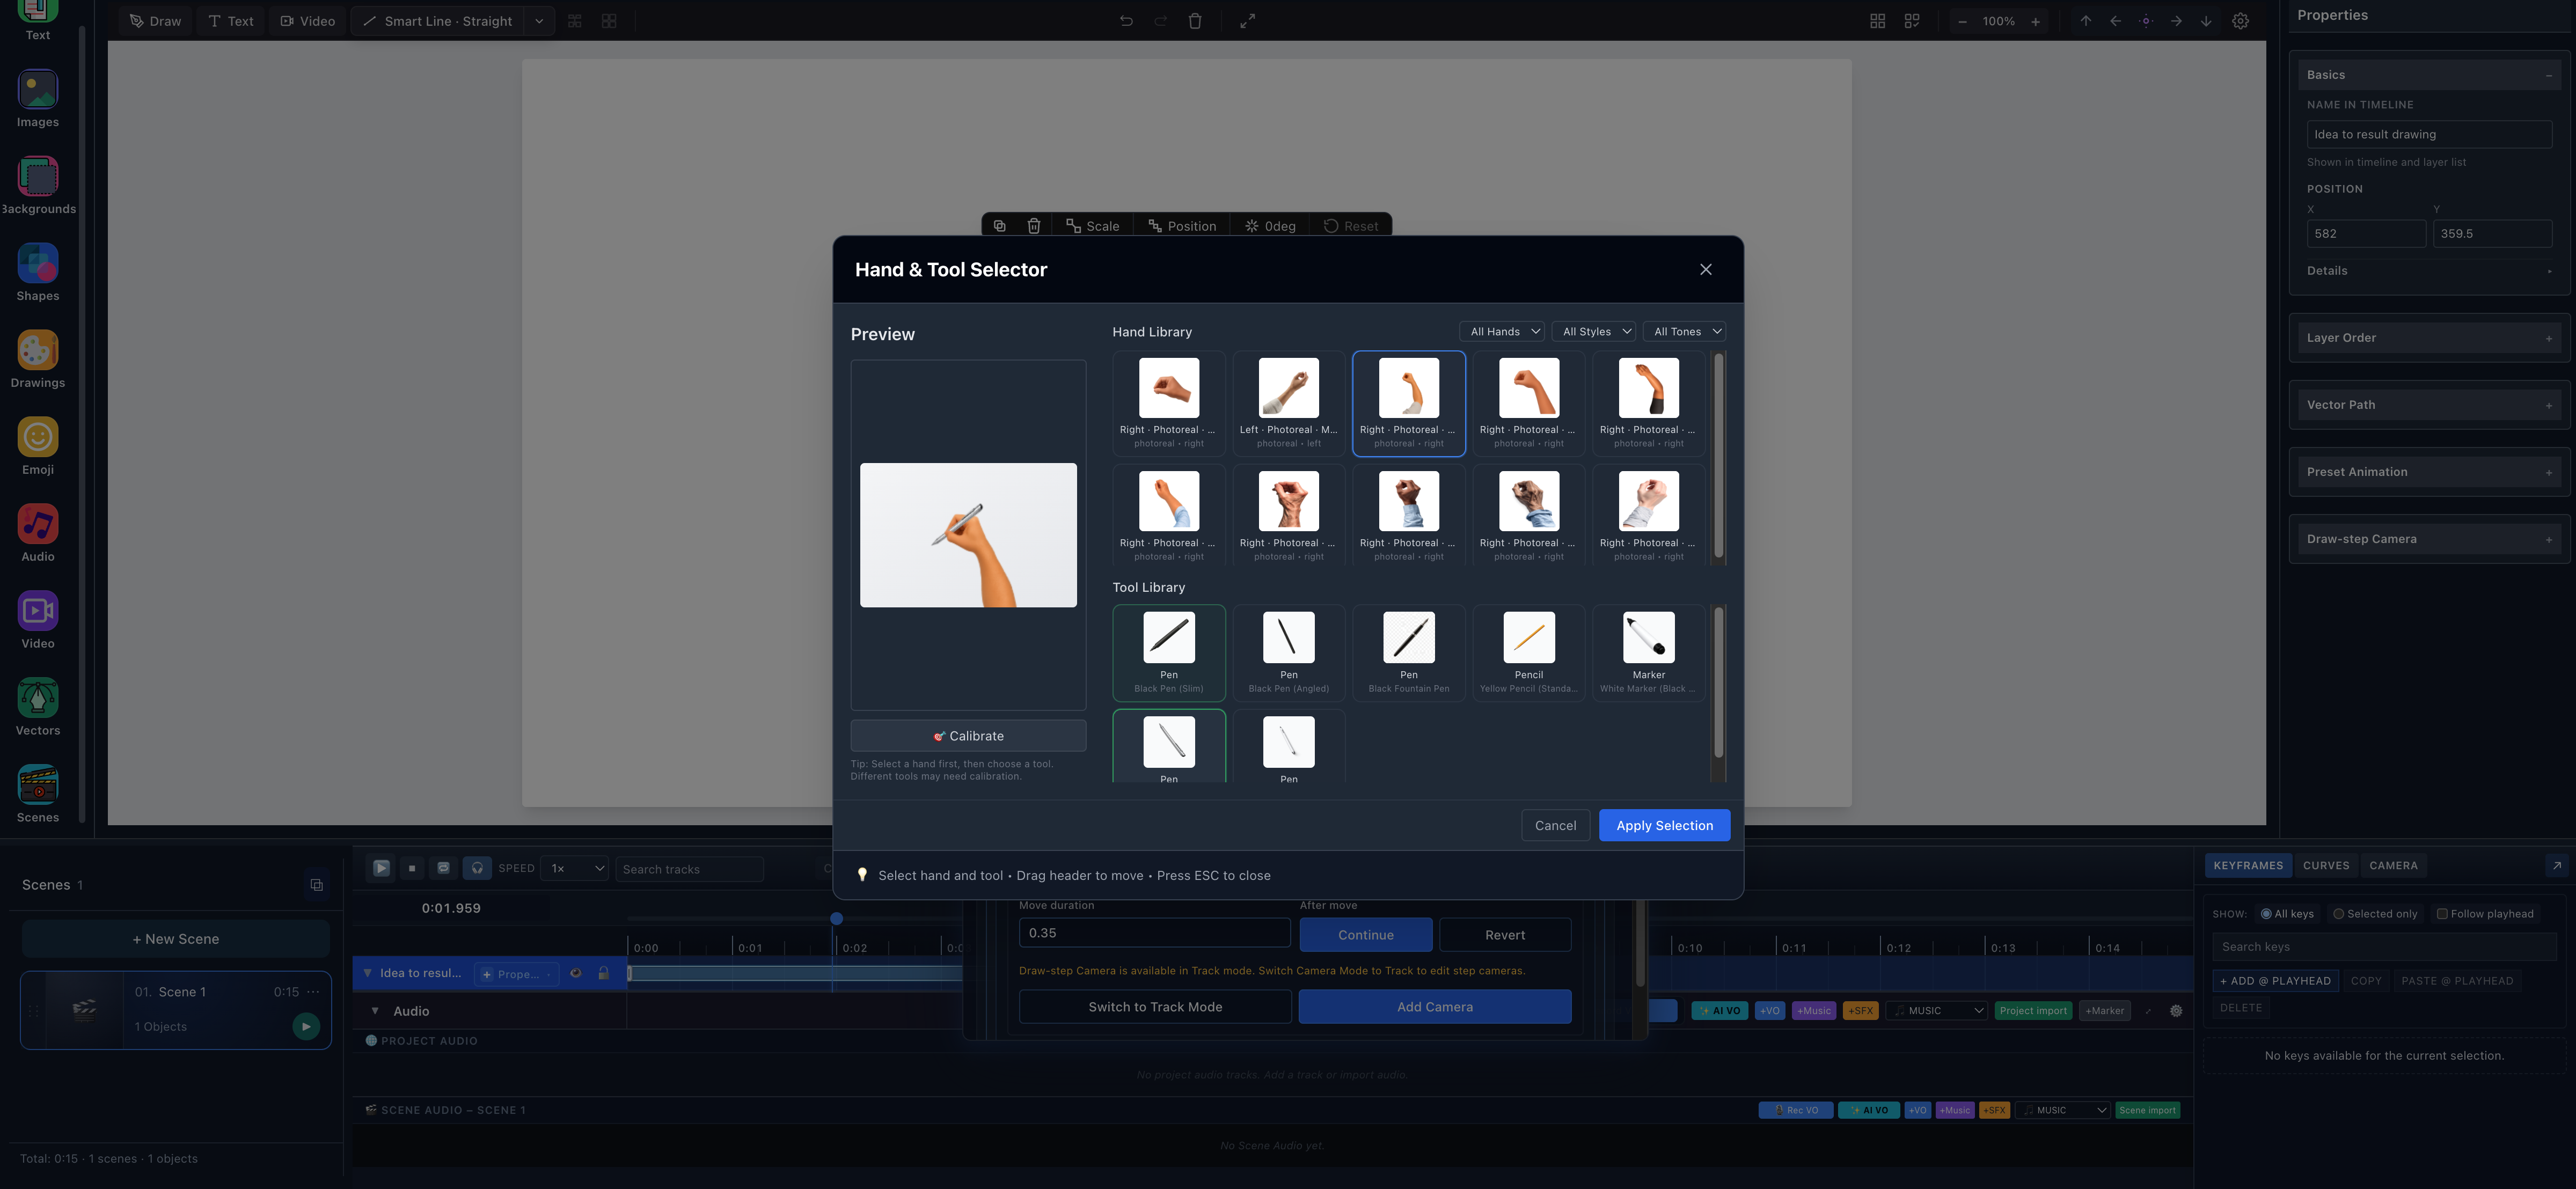
- Step handThis run selected the installed Right photoreal medium Full Hand preset for Step 4.
- Step toolSilver Ballpoint Pen was selected independently from the hand asset.
- Apply SelectionApplying writes the override to this Draw Step only.
Step 3 demonstrates another independent combination:
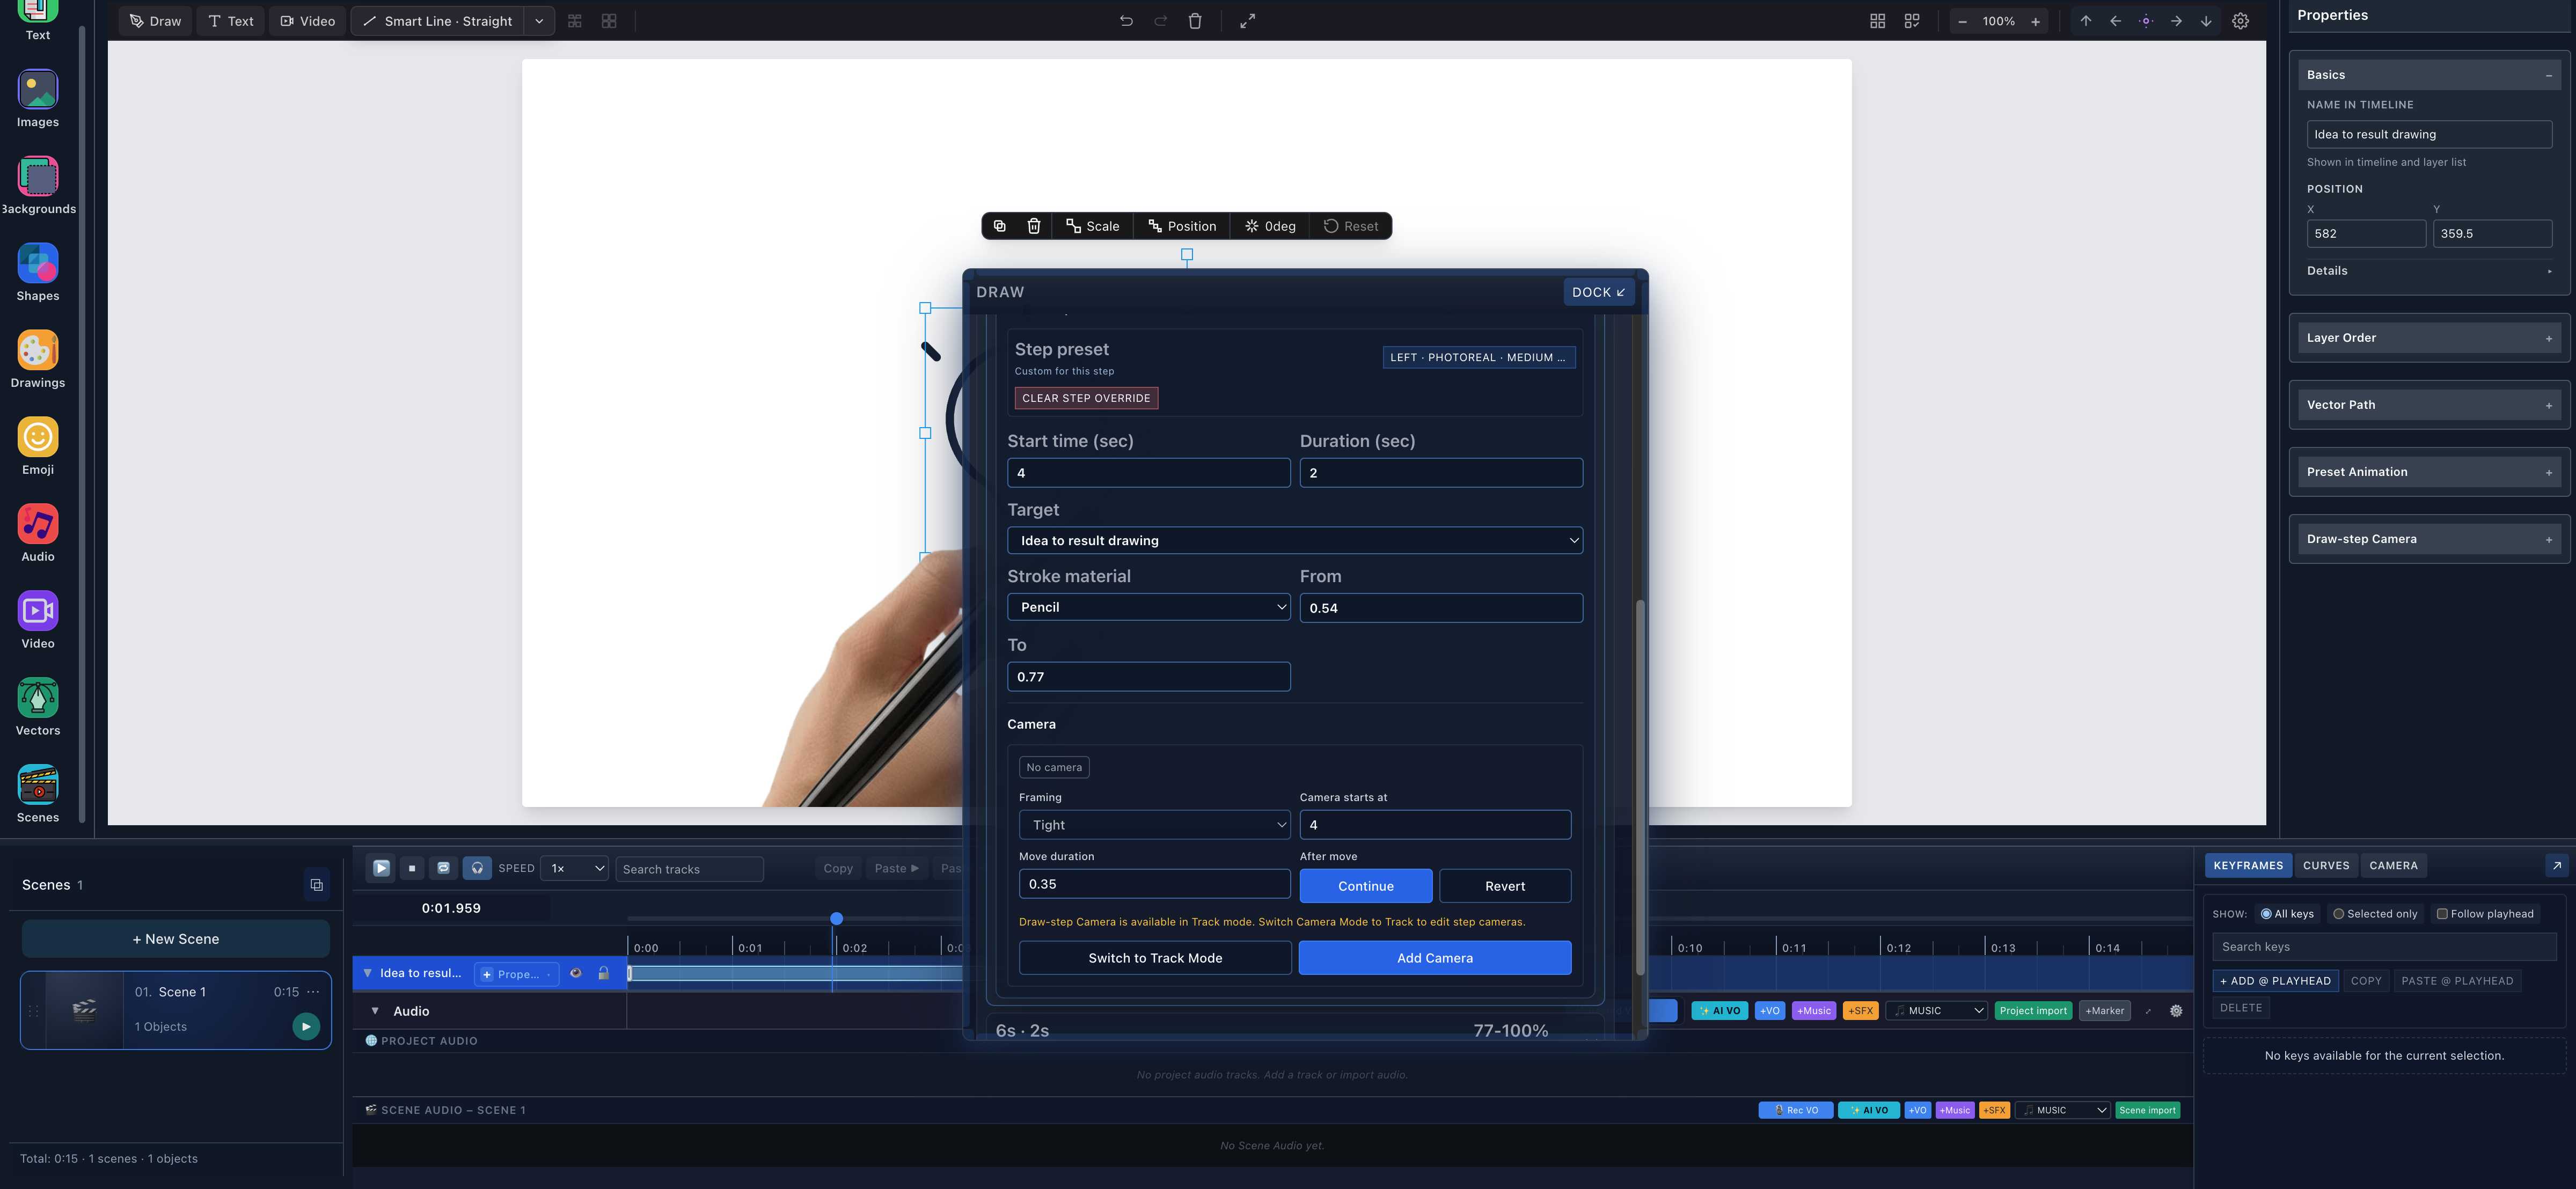
- Custom for this stepThe hand/tool source confirms that this step no longer inherits the project preset.
- Independent settingsThe step starts at four seconds, lasts two seconds, uses Pencil material, and reveals 0.54 to 0.77.
5. Change stroke material per step
The hand/tool asset and the stroke material are separate settings.
- The hand/tool preset controls the visible hand sprite, grip, tool image, scale, and mirror behavior.
- Stroke material controls how the vector mark itself is rendered during that step.
A marker sprite does not automatically make the path use Marker material. Set both when they should agree. Current step material choices are Inherit, Solid, Marker, Chalk, Pencil, Crayon, Dry Marker, Ink Brush, and Highlighter.
This exercise used Solid, Marker, Pencil, and Ink Brush to make the scope visible. A restrained production animation may use only two materials. Changing every short step can become visually noisy.
Read board surfaces and stroke materials for surface-aware recommendations.
6. Understand inheritance
The effective hand and tool resolve from the most specific available scope:
Step → Object → Scene → Project
The verified project default was Left · Photoreal · Medium · Pen + Black Fountain Pen. Step 1 inherited it. Step 2 was changed to a custom marker preset, then Clear step override was used; the UI returned to Inherited from project default. Reapplying the marker selection returned the source to Custom for this step.
This is useful when most of a project should stay consistent: set one project or scene default, then override only the exceptional steps. Clearing an override does not delete the Draw Step or change its reveal range.
7. Preview the hand changes and reveal continuity
Play from the scene start instead of judging each row in isolation. At every boundary, verify both the hand and the already completed geometry.
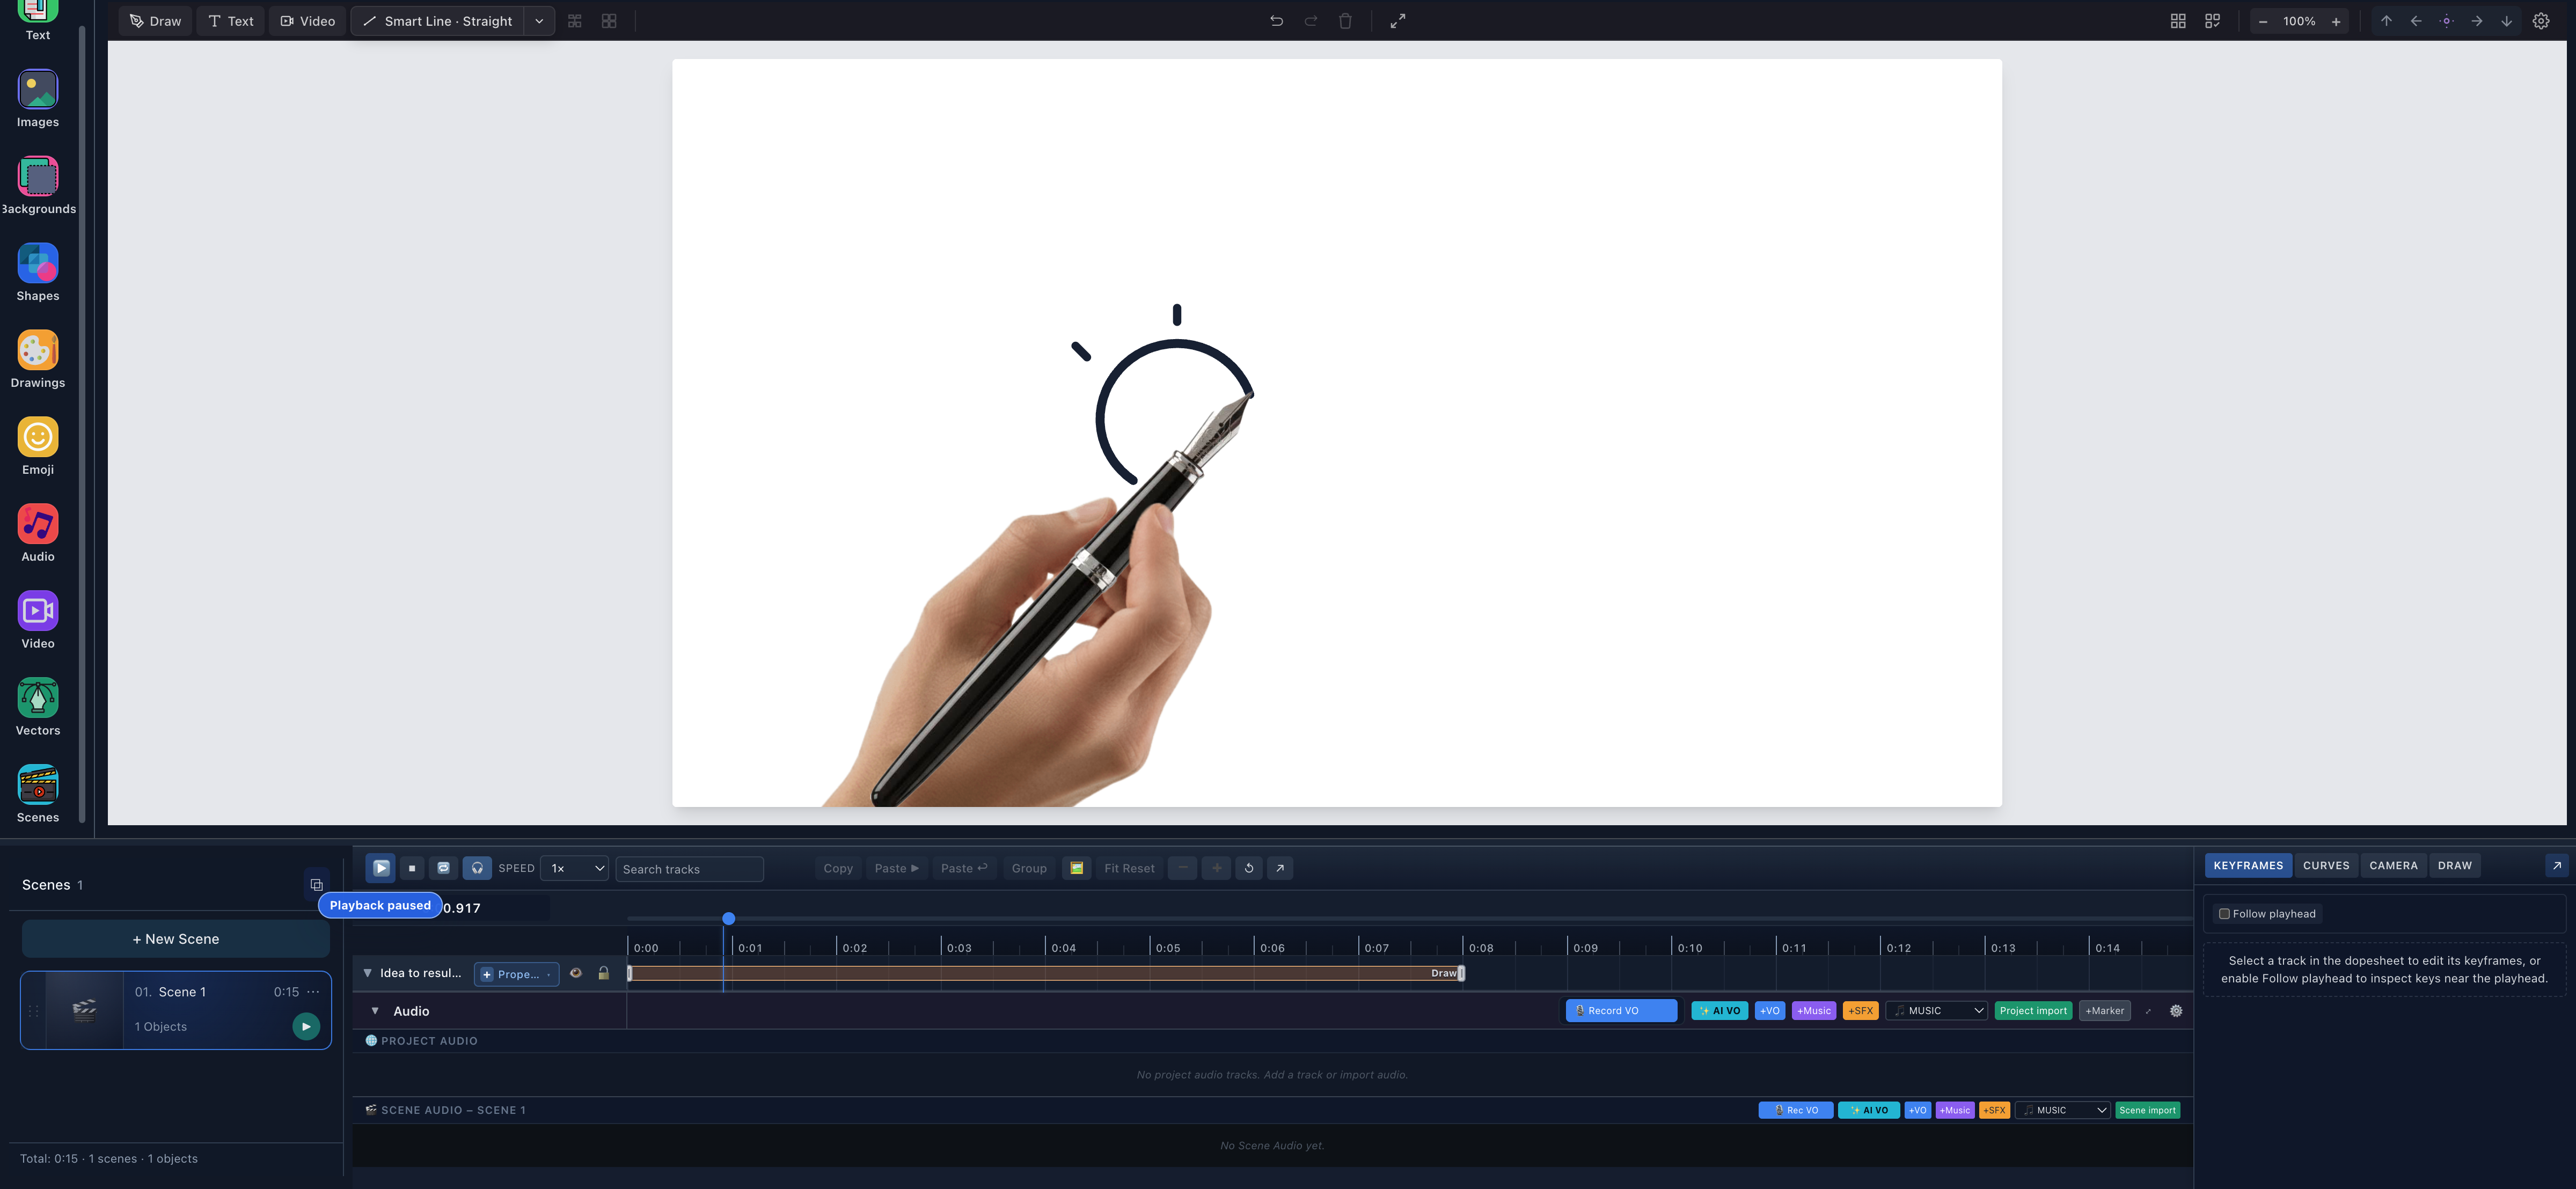
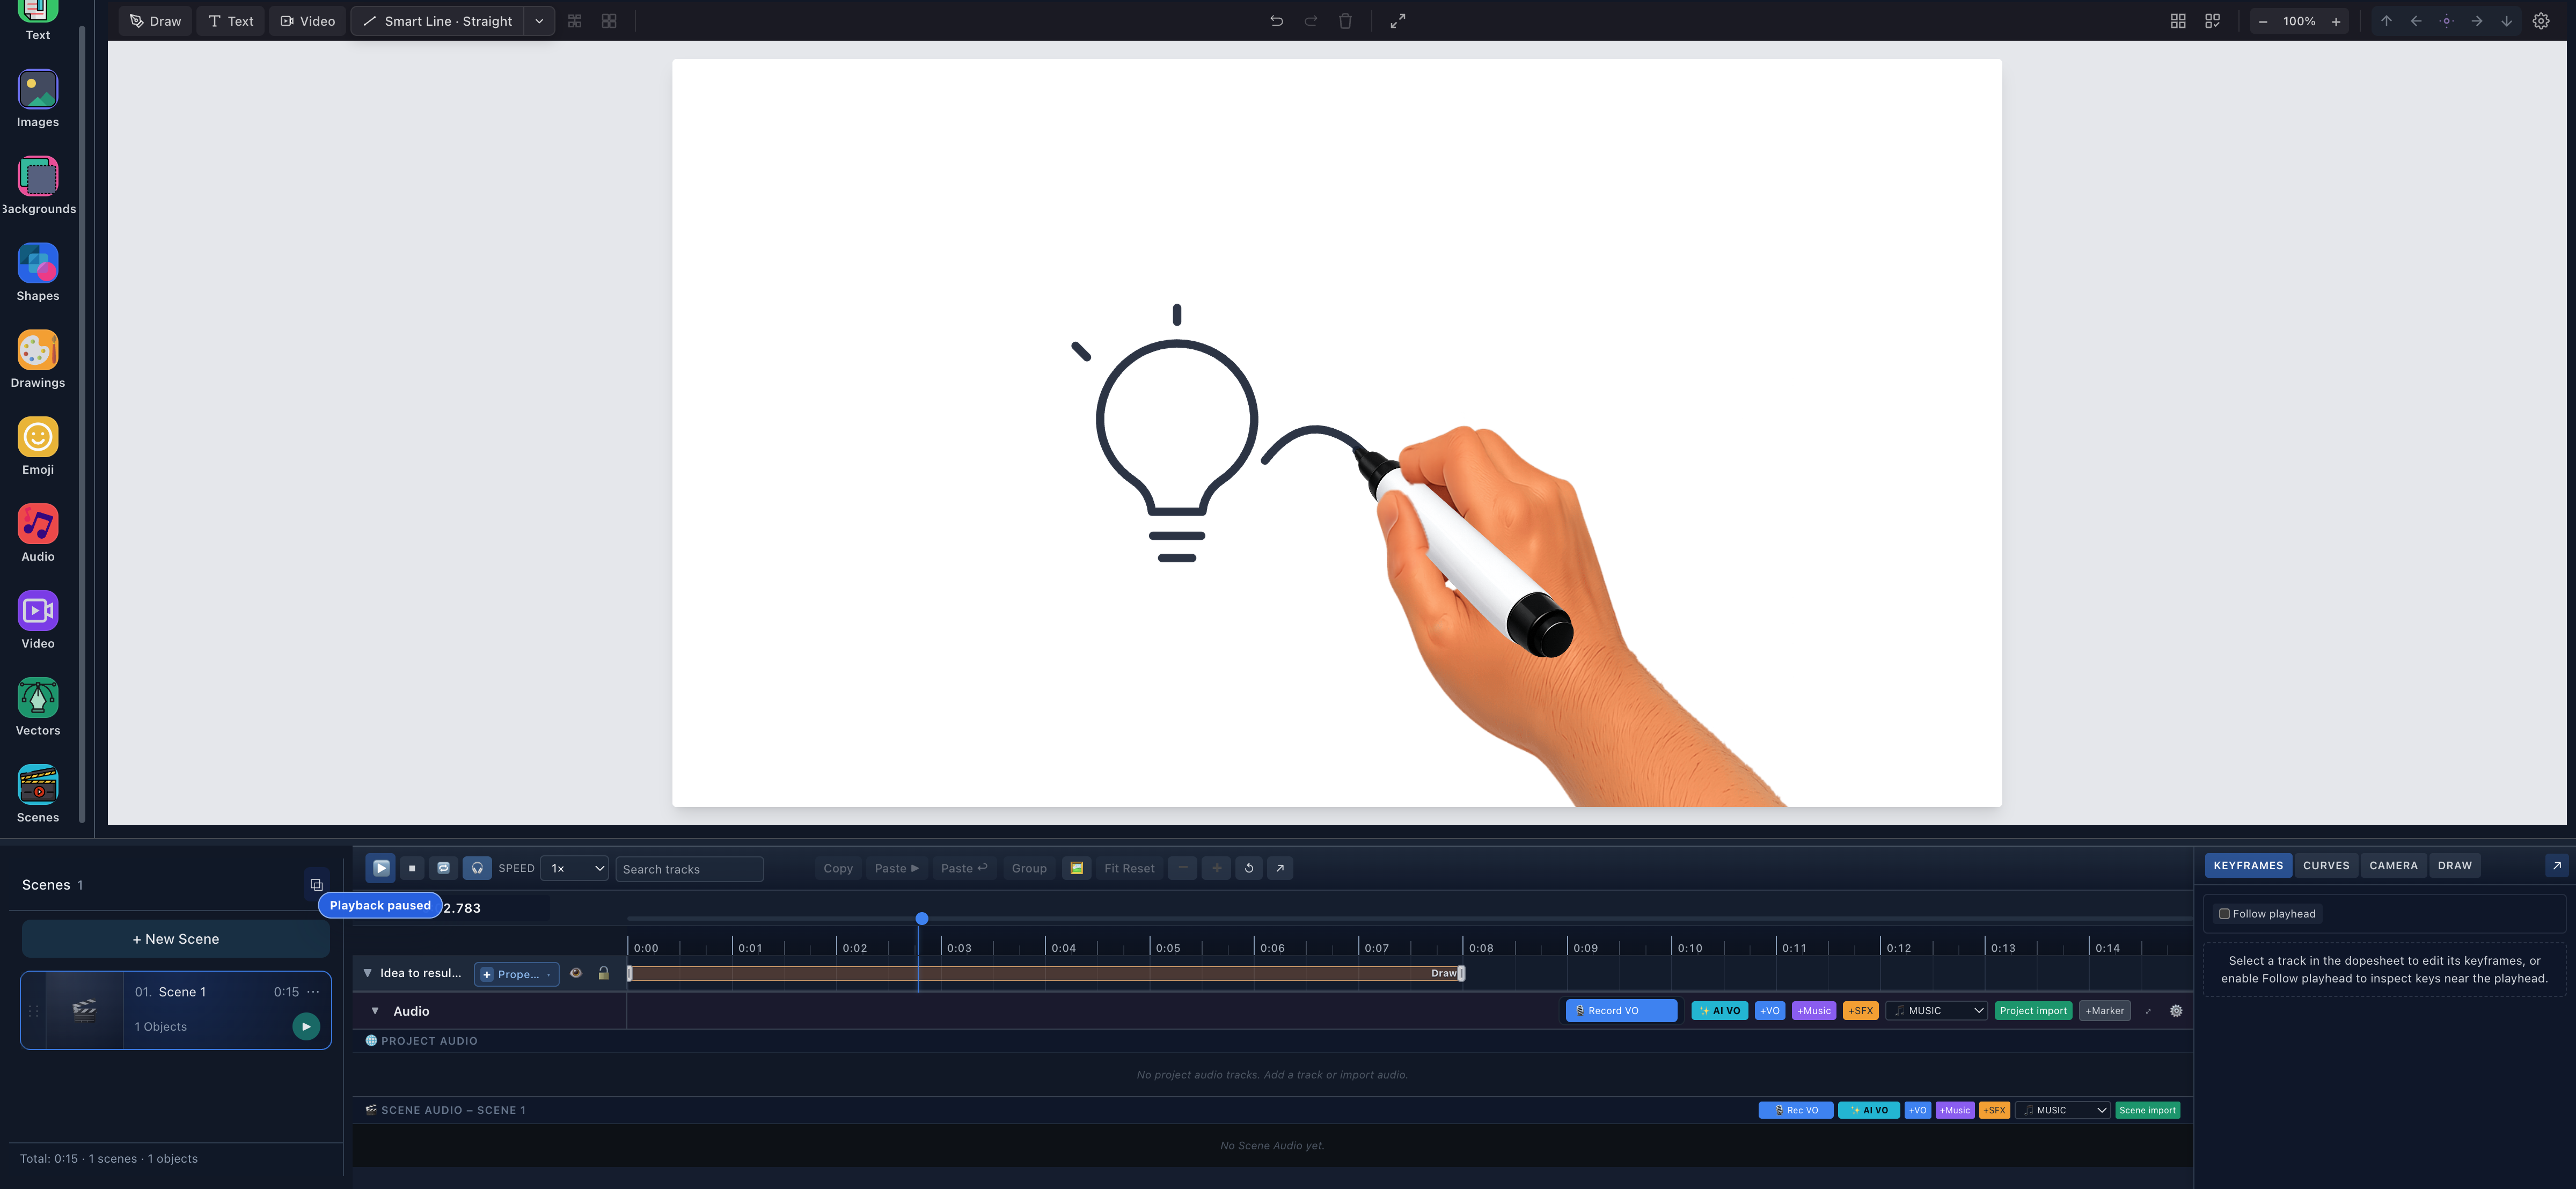
- Step 1 remains visibleThe lightbulb does not reset when Step 2 begins.
- Step 2 hand and toolThe right marker hand is the active step asset; the previous fountain-pen hand is no longer shown.
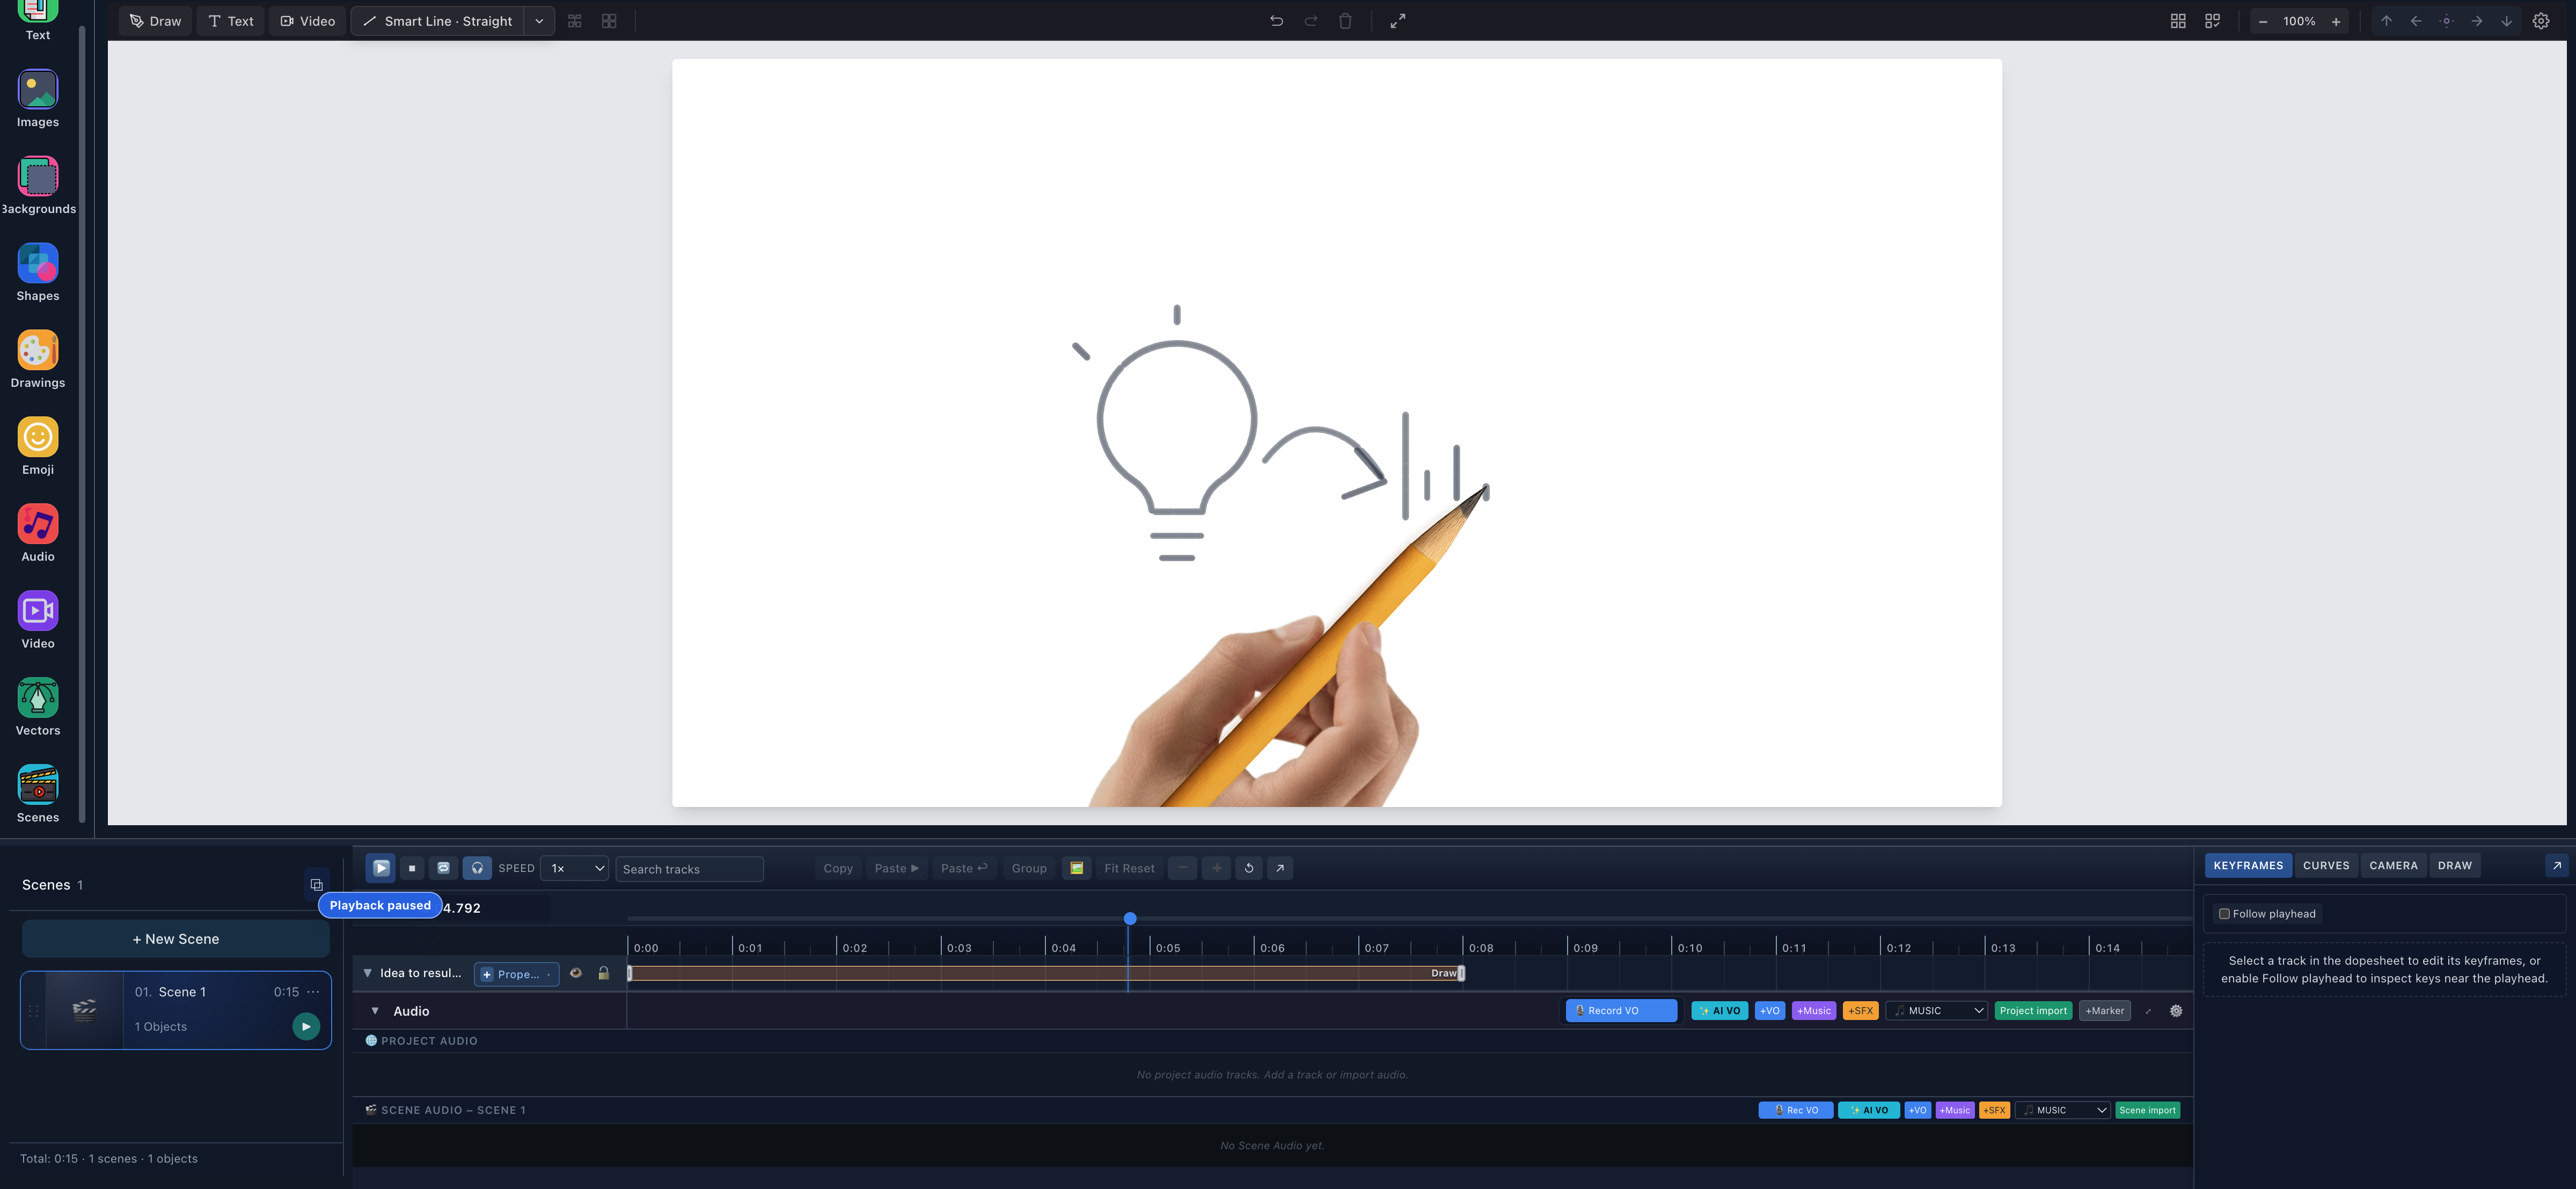
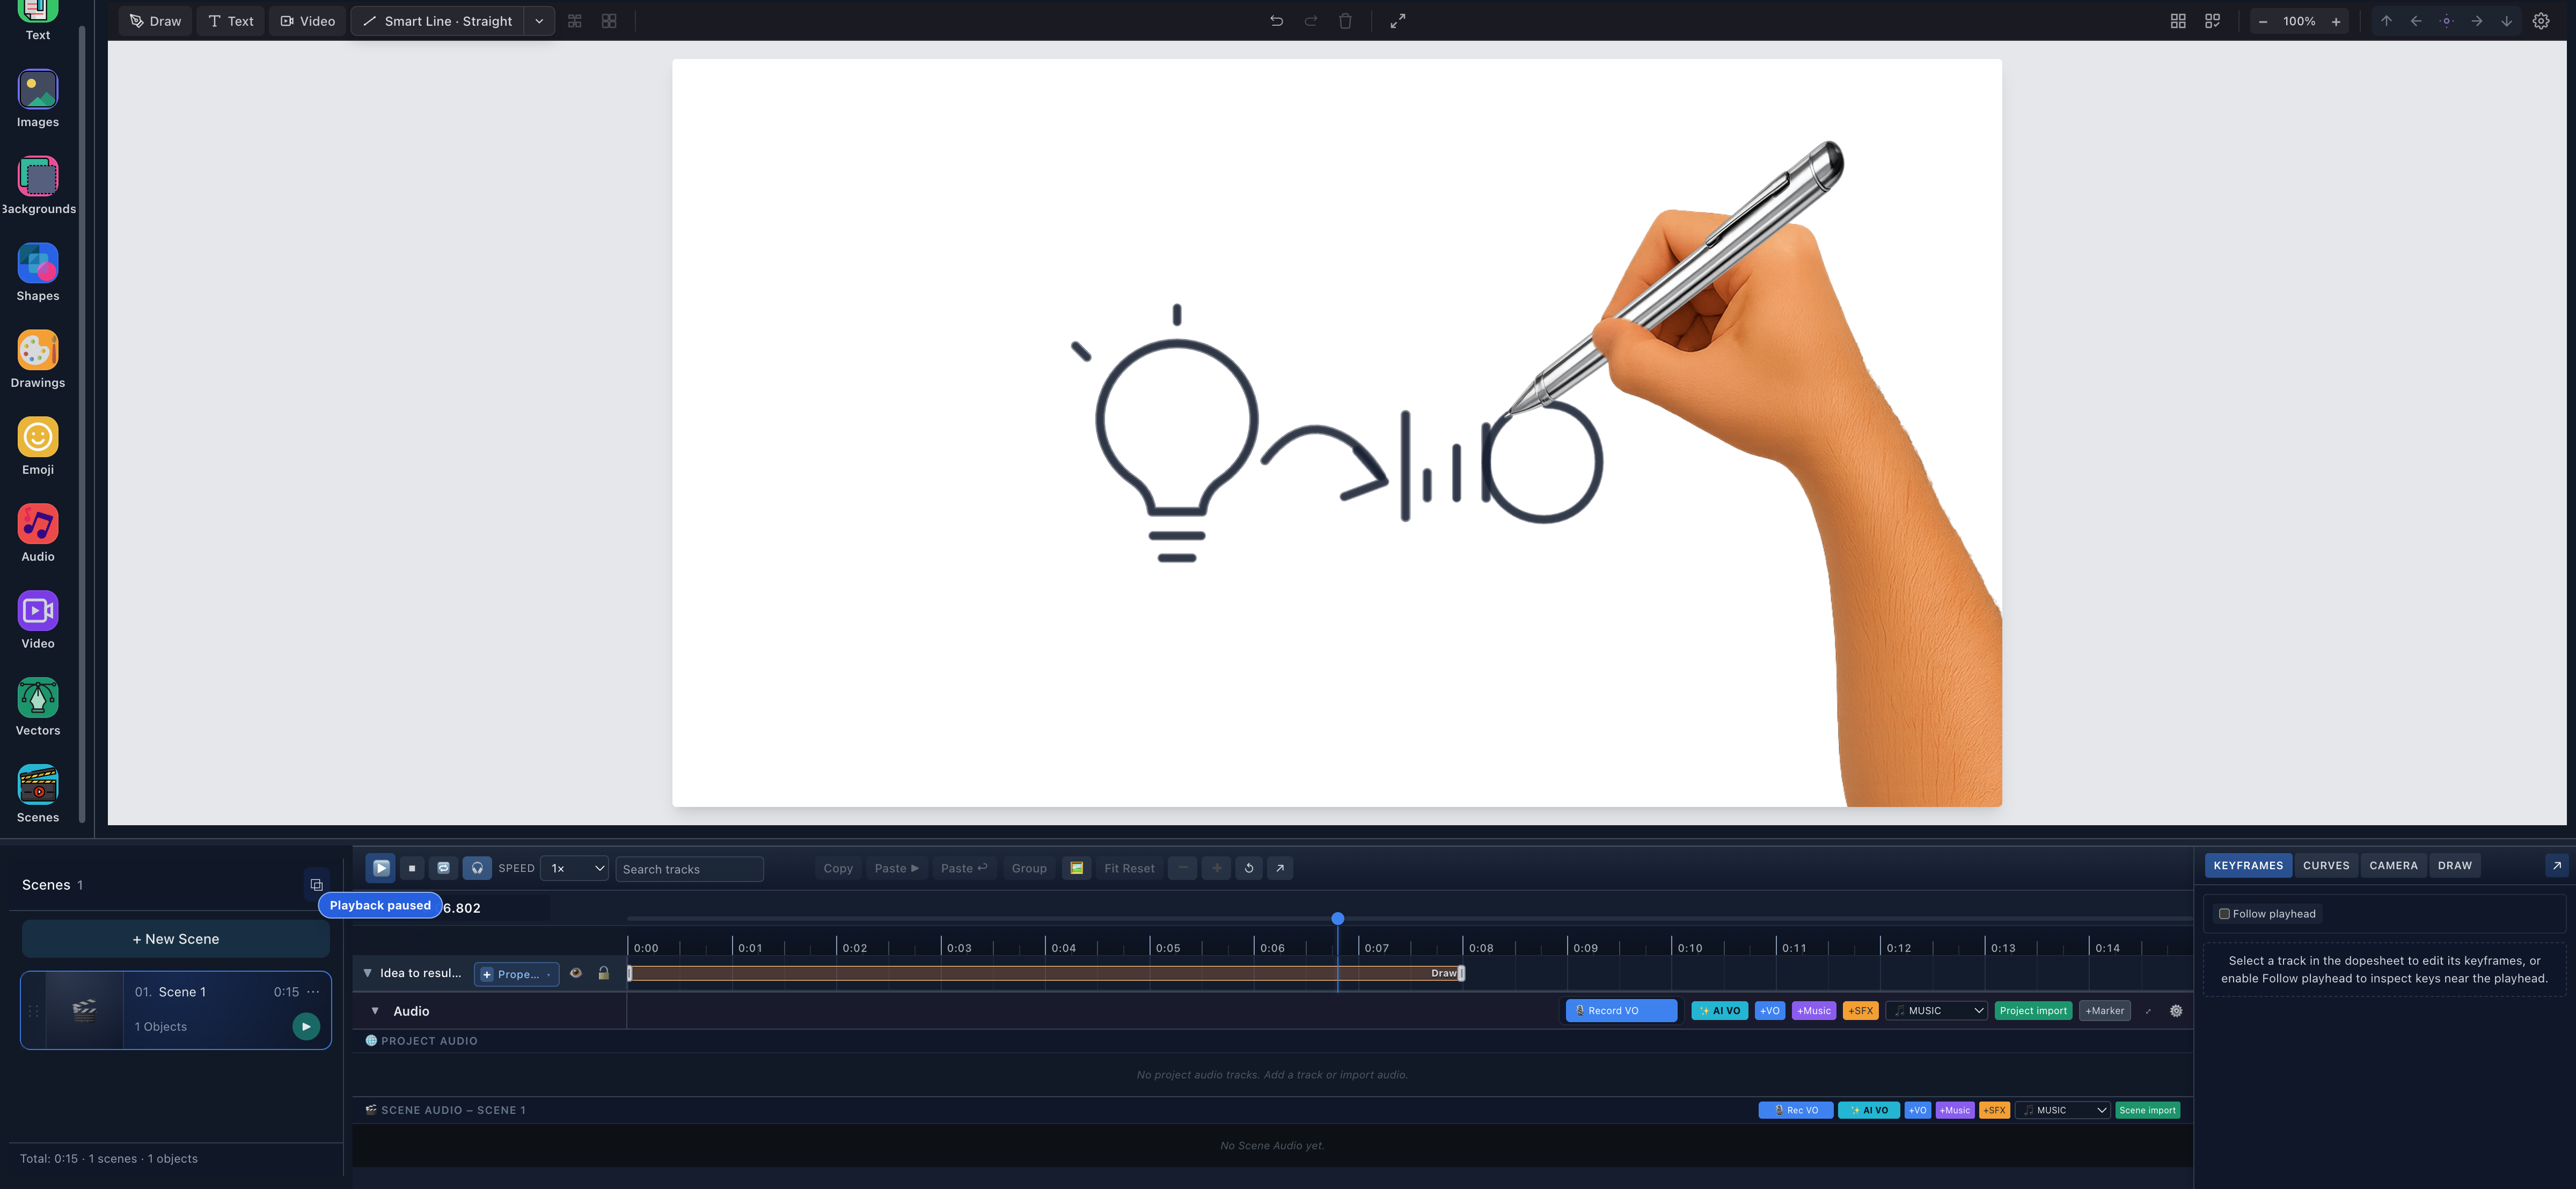
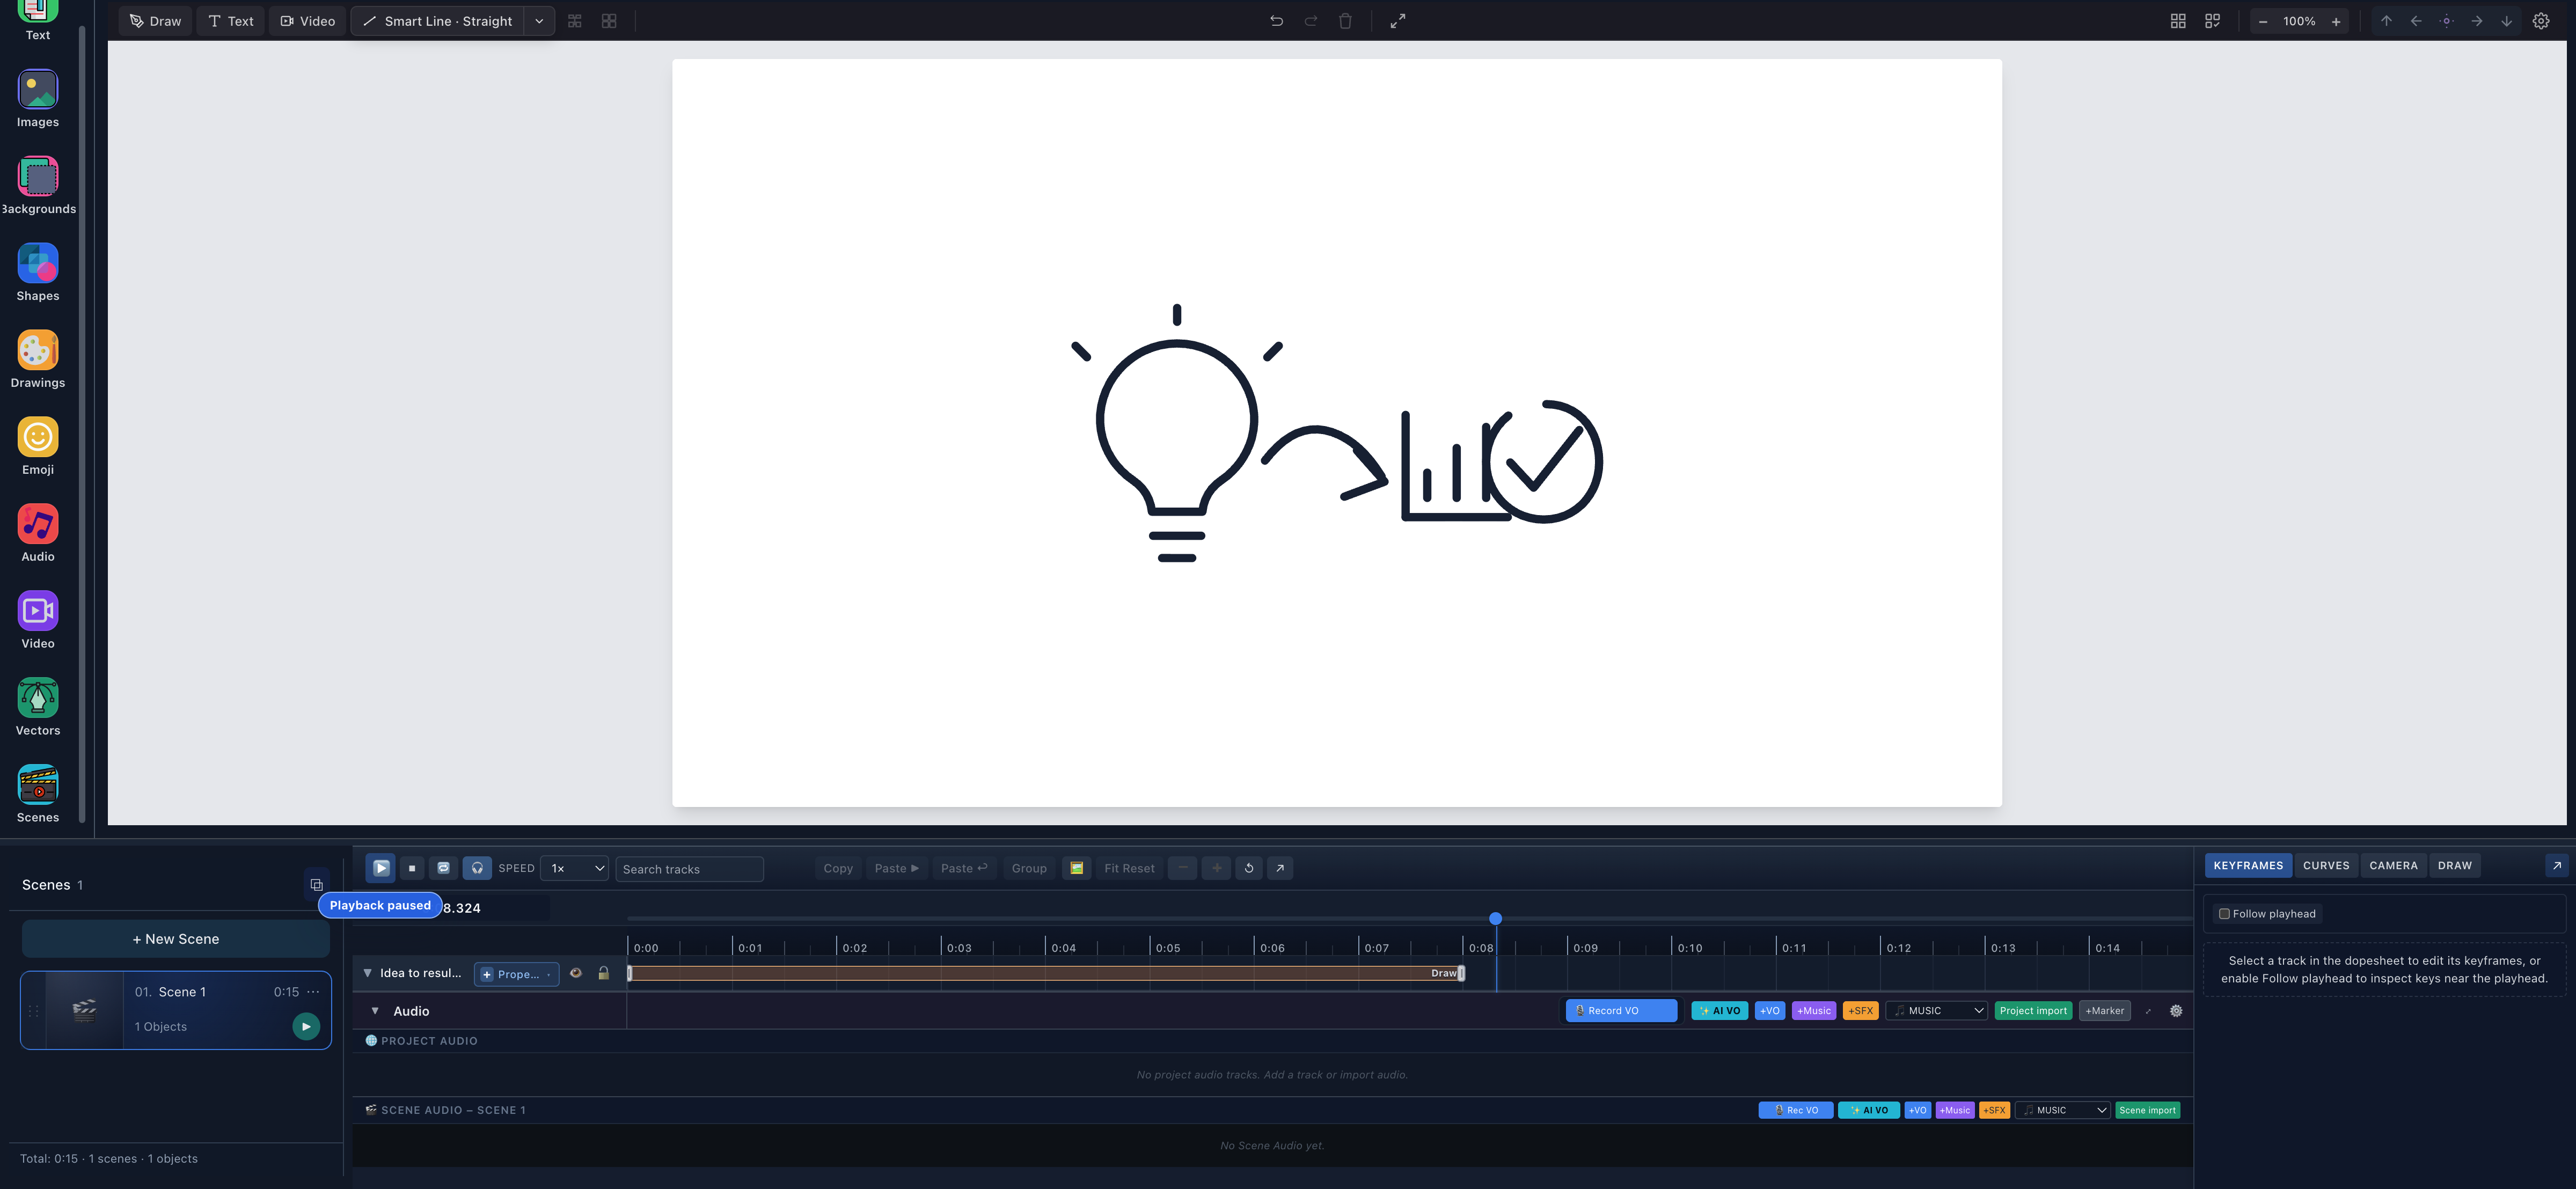
The tested runtime sequence was:
0–2s: inherited fountain-pen hand
2–4s: right marker hand
4–6s: left pen hand with yellow pencil
6–8s: right full hand with silver ballpoint
after 8s: complete object, no active hand
8. Manual Draw Steps vs Round-robin
Draw Steps are the right tool when a hand/tool, material, per-step camera, or authored reveal section matters. If you only need exact reveal percentages on a property track, the complete keyframe tutorial demonstrates draw.progress keys and explains why targeted Draw Steps take final authority over the same reveal.
Manual segmentation is the better choice when each range must correspond to a meaningful story region. You inspect the route, choose boundaries, and deliberately assign timing and step presets.
Round-robin — interleaved is useful when you need an automatic fractional split. In a separate real run, the same single object was auto-planned with 4 segments and Start @ ▶ enabled at 8.324 seconds. Scribe generated:
| Generated step | Start | Duration | Range |
|---|---|---|---|
| 1 | 8.324s | 0.75s | 0.00 → 0.25 |
| 2 | 9.074s | 0.75s | 0.25 → 0.50 |
| 3 | 9.824s | 0.75s | 0.50 → 0.75 |
| 4 | 10.574s | 0.75s | 0.75 → 1.00 |
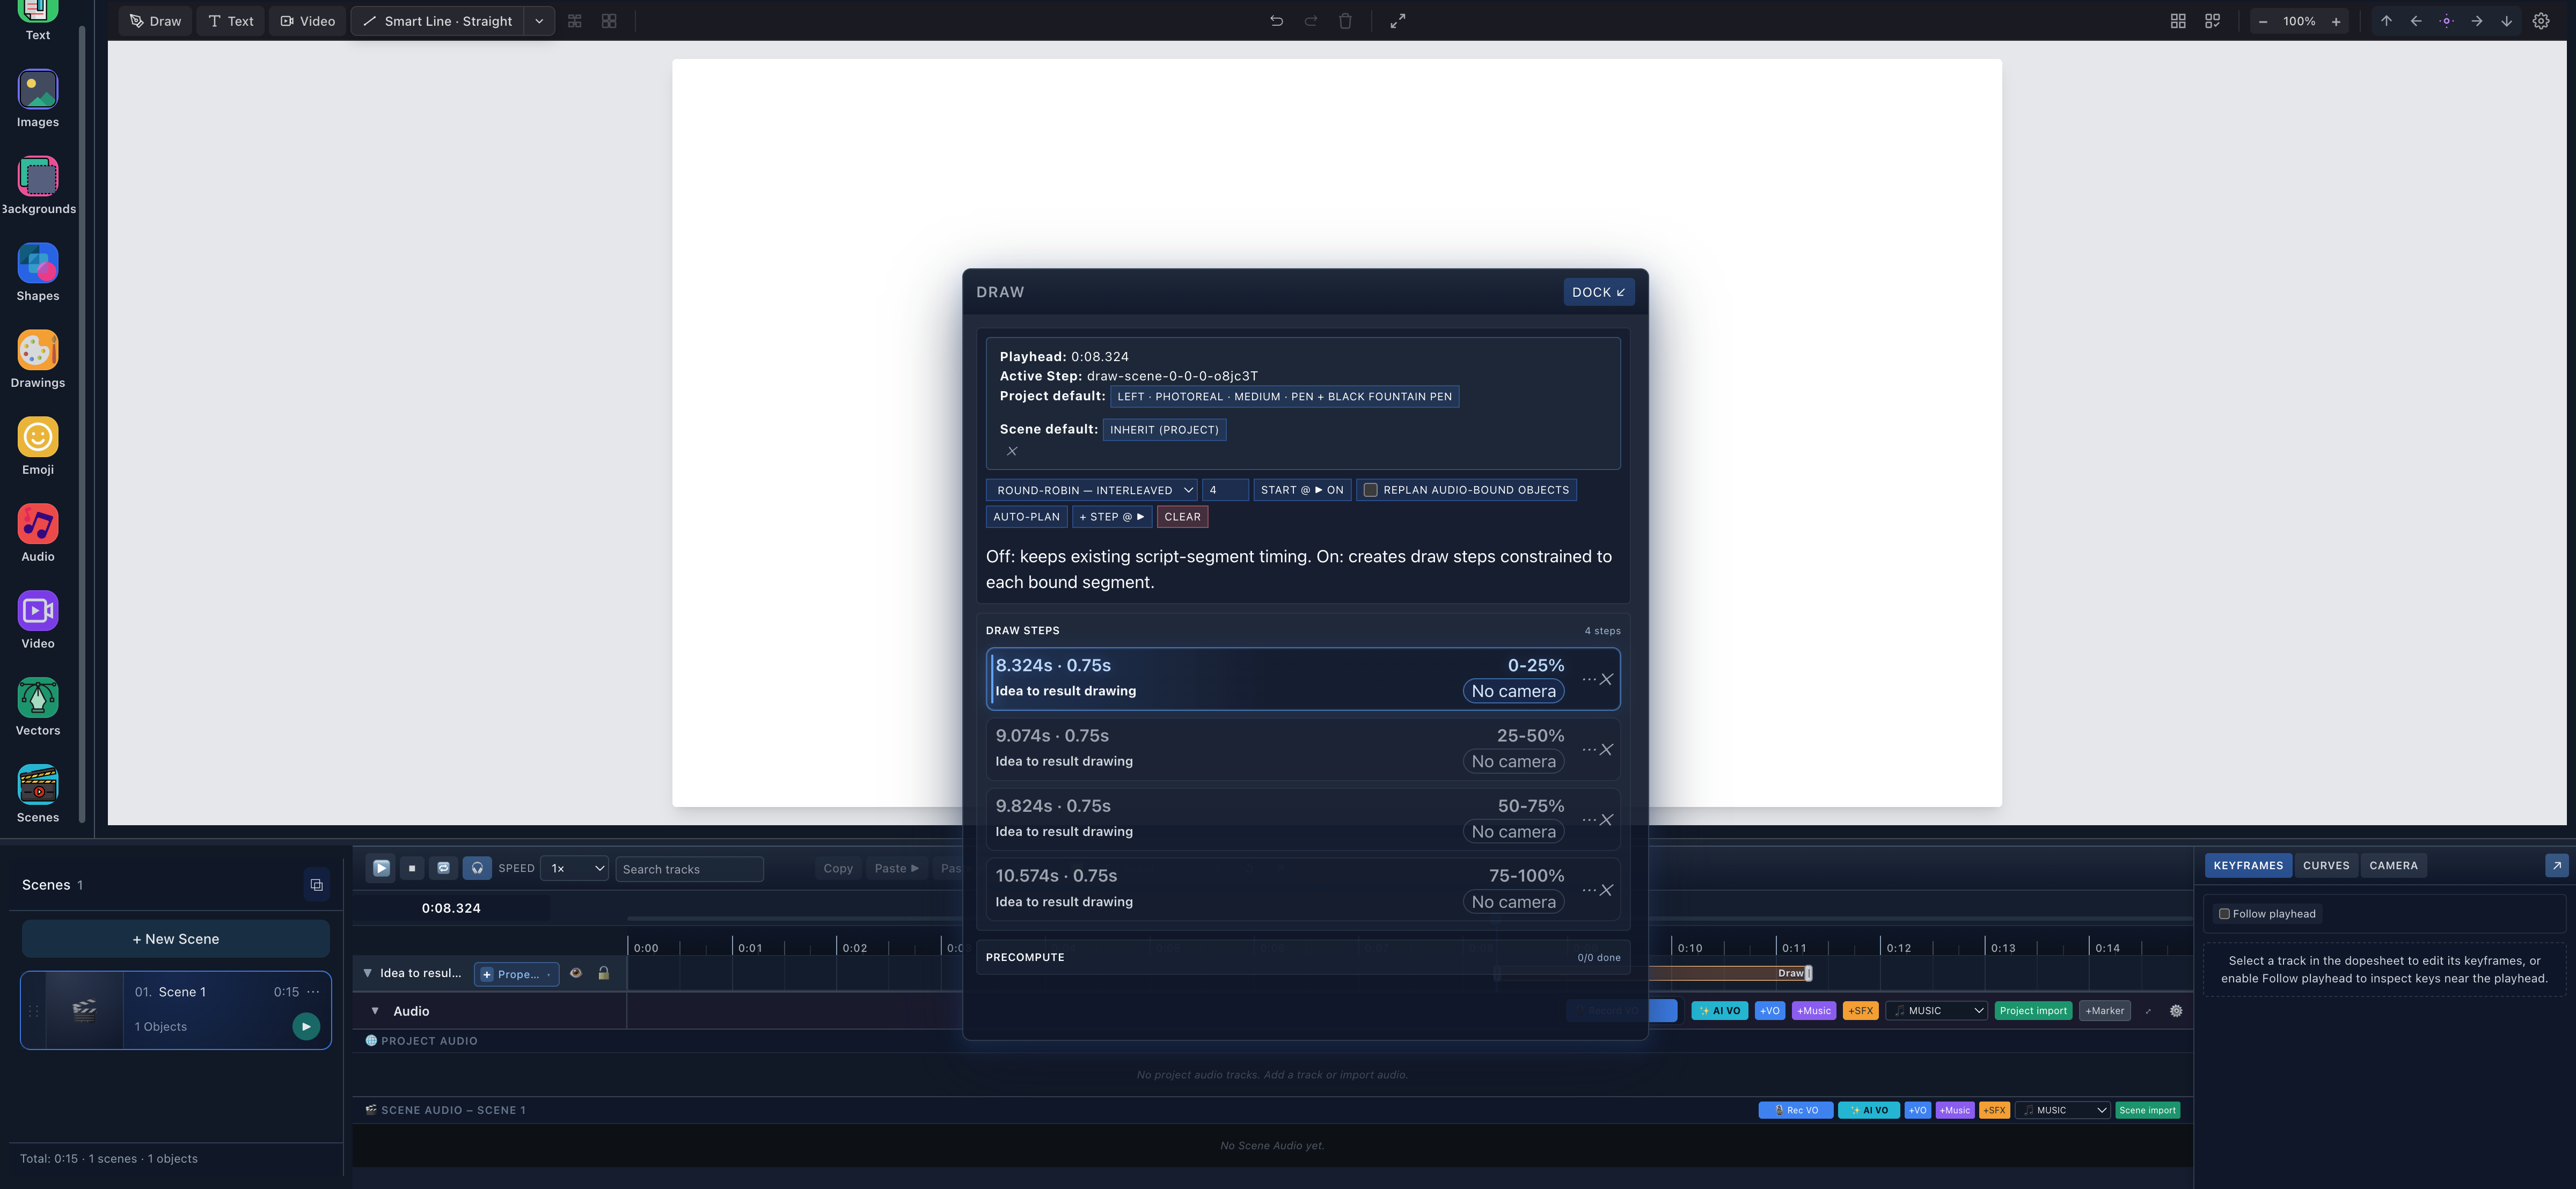
- Round-robin, four segmentsThe strategy and segment-count controls used for this separate verification remain visible.
- Generated quartersThe same target appears in four sequential 25-percent ranges with 0.75-second durations.
Use Round-robin as a starting plan when equal segments are acceptable. Use manual ranges when a lightbulb, arrow, equation term, or other visual region needs a purposeful boundary.
9. Leave Draw-step Camera off unless it helps
Expanded steps expose Draw-step Camera controls, but this verified run deliberately kept No camera. The complete composition fits one frame, and moving the camera during four short hand changes would add distraction.
If a larger drawing genuinely needs per-step framing, switch the camera to Track mode and use the camera choreography tutorial. The camera and path documentation remains the complete control and conflict reference. Do not add camera motion merely because the control is available.
10. Export and verify
Open Export Video (MP4) and choose the delivery settings. This run used 1280 × 720, 30 fps, High quality, and MP4/H.264. Keep the editor tab open until export completes.
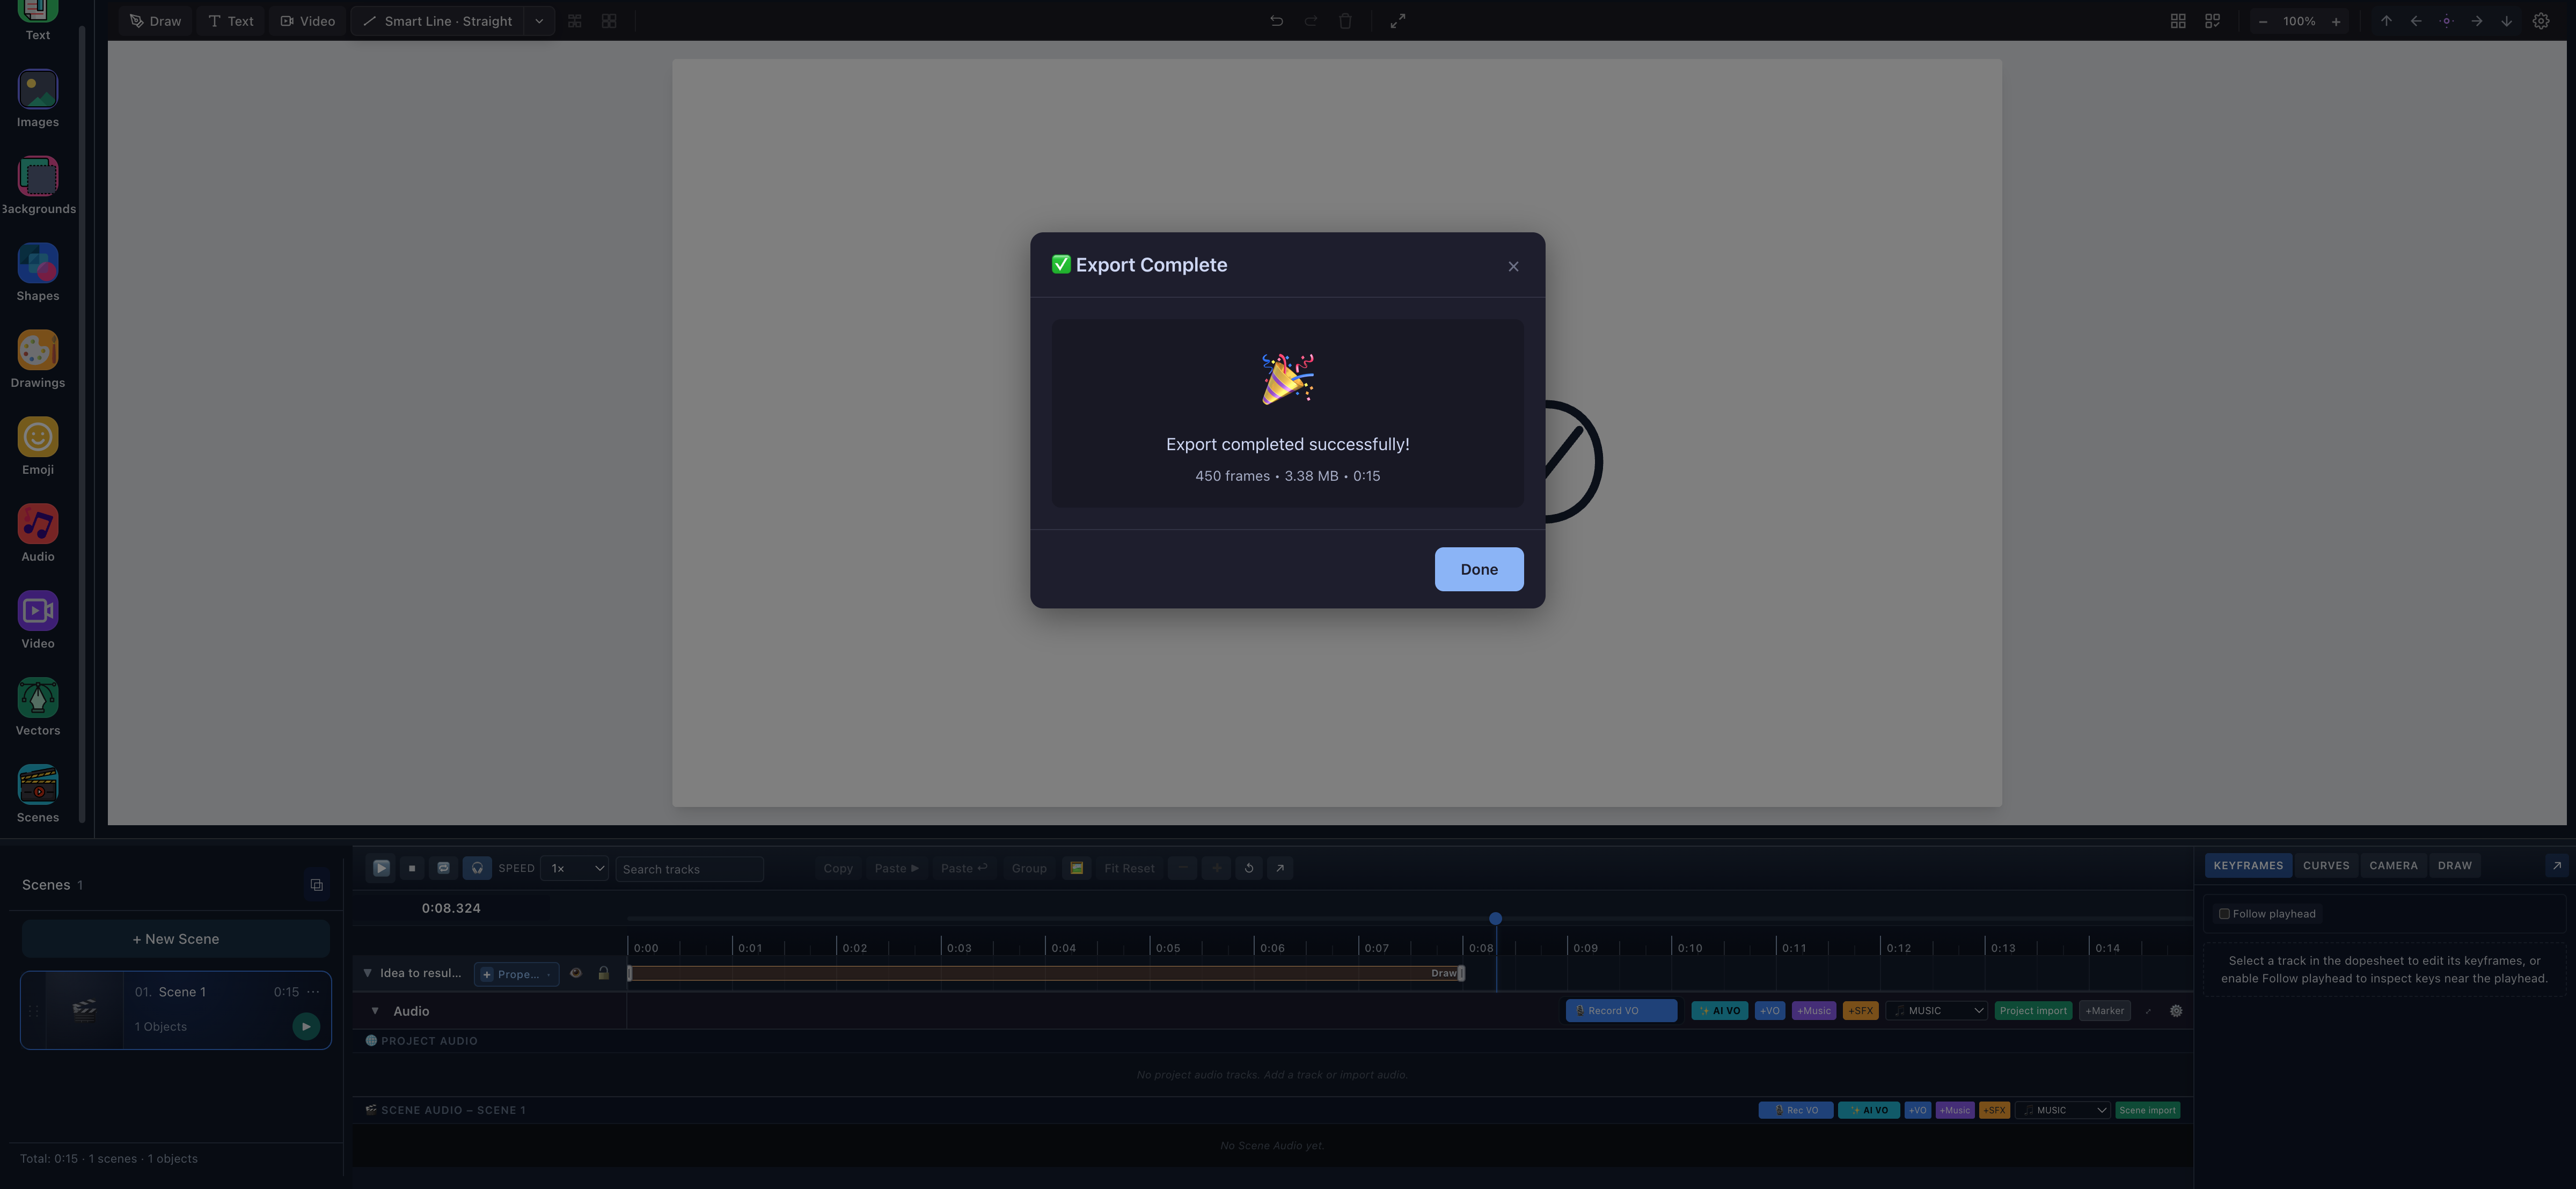
- Export CompleteThe on-device export reached the completed state without closing or reloading the editor tab.
- 450 frames · 3.38 MB · 0:15The product summary corresponds to the exact one-object, four-step scene used above.
ffprobe independently reported:
codec:      h264
resolution: 1280 × 720
frame rate: 30/1
duration:   15.000000 seconds
bytes:      3,545,687
See Choose and verify an export for format and delivery guidance.
Current limitations
- From and To are normalized progress through drawable geometry, not semantic regions understood by Scribe.
- Path ordering strongly affects whether percentage boundaries match meaningful visual sections.
- + Step @ ▶ starts a manual step with a full
0 → 1reveal; edit the ranges for progressive drawing. - Keep sequential ranges contiguous unless a gap or overlap is intentional.
- Changing a hand, tool, or material does not repair poor SVG stroke ordering.
- The hand/tool asset and step material are independent settings.
- Very short steps can make hand switching feel distracting.
- High path counts increase planning, preview, precompute, and export work.
- Different hand assets can need calibration before the nib aligns cleanly.
- Audio binding can constrain the timing available to associated object steps.
- Locked objects protect their associated steps from editing and bulk clearing.
- Mobile Lite uses a more compact authoring workflow; this article verifies the Desktop UI only.
- A hand follows the drawable route. It does not infer the natural human pen order for an arbitrary filled or outlined shape.
Troubleshooting
| Problem | What to check |
|---|---|
| Every step redraws the whole SVG | Edit the default 0 → 1 ranges into deliberate partial ranges |
| A later step hides an earlier section | Check for an unintended gap, backward range, or overlapping step on the same target |
| The wrong hand appears | Expand the active step and confirm whether its source is Custom, Object, Scene, or Project |
| Tool changes but line appearance does not | Set Stroke material separately; the tool sprite does not choose material automatically |
| Percentage boundary cuts through a visual region | Reorder the source paths or choose a boundary after previewing the drawable route |
| Auto-plan replaces deliberate ranges | Keep a recovery copy and review the confirmation before applying another strategy |
| Hand blocks the drawing | Adjust scale/calibration or use fewer, longer steps |
Try this multi-step drawing workflow in Scribe
Download the practice SVG, open Scribe Animator, and build the four ranges on one object. Start with inheritance, then override only the steps whose hand, tool, or material genuinely helps the story.
For adjacent workflows, continue with animating an SVG by hand, drawing hands and Draw Steps, or the deeper Draw & SVG Path reference.