Choose board surfaces and stroke materials
Scribe Animator can combine a semantic board surface with a separate stroke material. The board establishes the environment; the material controls how drawable vector paths look. Keeping them separate lets you use Chalk on a blackboard, Pencil on paper, Highlighter on a whiteboard, or any deliberate custom combination.
Quick result
- Open Canvas Settings from the gear in the canvas toolbar.
- Choose Project to set the default for the whole project, or Scene to create an override only for the active scene.
- Choose a board surface.
- Under Drawing Style, choose the default material for drawings created from this point onward.
- Pick a readable stroke color, create a short test line, and preview it.
- Use an object's Properties or a Draw Step override when one path should differ from the scene default.
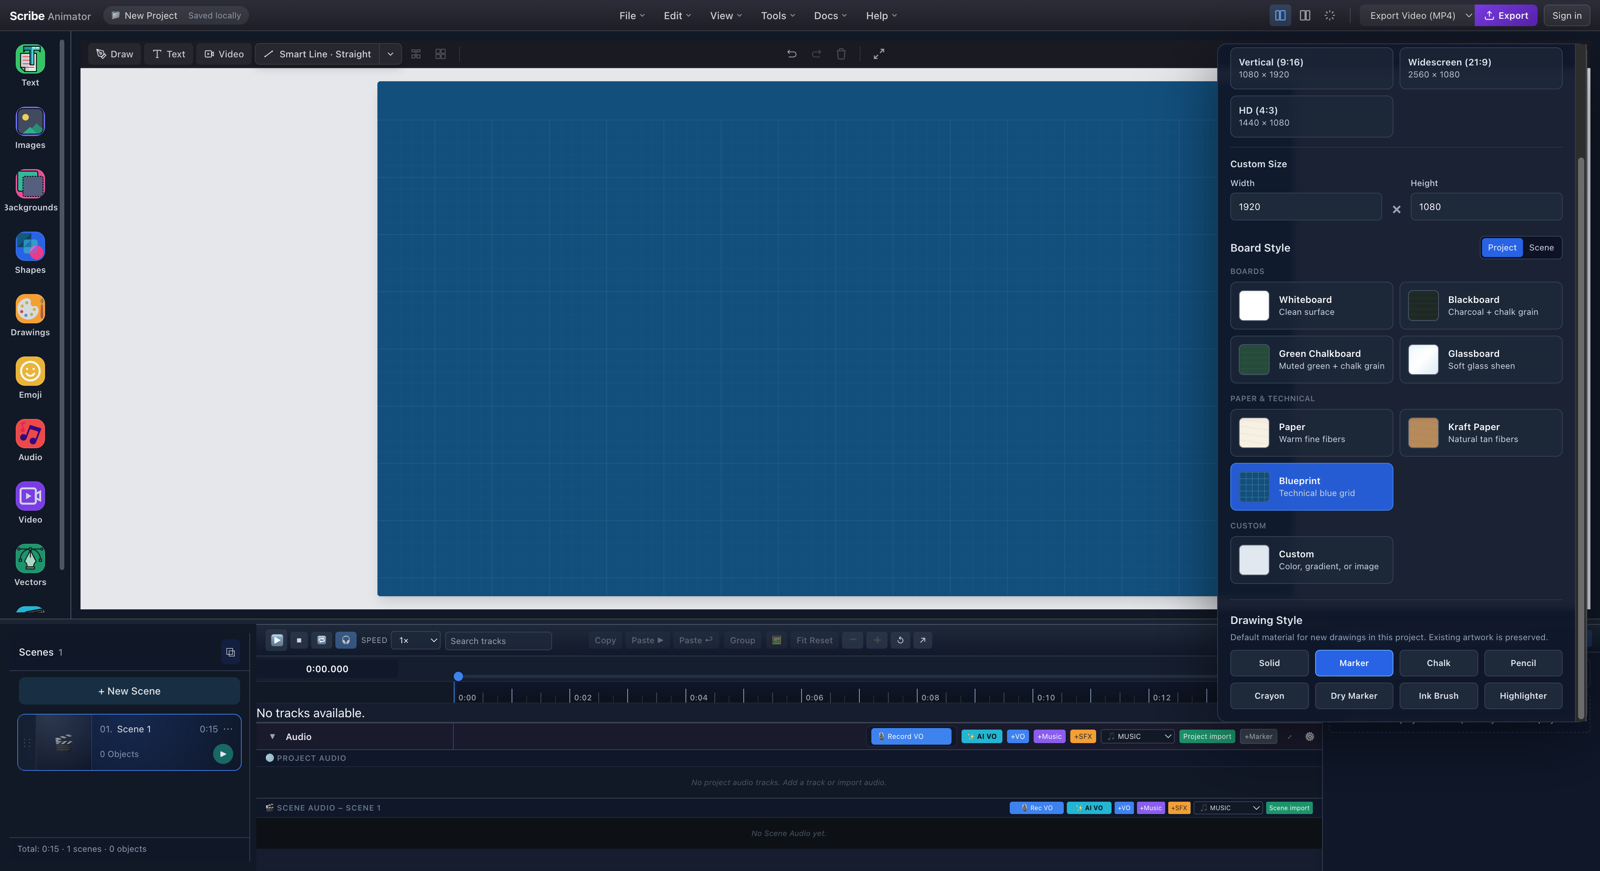
- Project or SceneProject sets the inherited default; Scene preserves a local override for the active scene.
- Board surfacesChoose a semantic board instead of approximating it with an anonymous solid color.
- Drawing StyleChoose the material inherited by newly created drawable paths in this scope.
Changing a board or Drawing Style sets sensible defaults for new content. Existing object colors, materials, photographs, videos, fills, and multicolor SVG artwork remain authored as they were.
Which board surface should you use?
Use the story and expected contrast—not novelty alone—to choose a surface.
| Surface | Best for | Recommended new stroke | Color guidance | Avoid when |
|---|---|---|---|---|
| Whiteboard | General explainers, product walkthroughs, training, diagrams | Marker or Solid | Black, charcoal, and saturated brand colors | The story specifically needs a tactile or classroom setting |
| Blackboard | Mathematics, science, teaching, historical or classroom scenes | Chalk | Warm white plus a few readable chalk colors | The scene depends on dark logos or dense dark artwork |
| Green Chalkboard | Traditional classroom, language lessons, school-style demonstrations | Chalk | Warm white, pale yellow, and restrained light colors | Bright green content must remain visually dominant |
| Glassboard | Modern presentations, polished product stories, light visual layouts | Marker or Solid | Strong dark colors with high contrast | Fine pale artwork would disappear against the light treatment |
| Paper | Sketch notes, storyboards, handwriting, concept development | Pencil | Graphite, dark ink, muted color accents | You need a clinical, screen-like technical presentation |
| Kraft Paper | Handmade brands, craft stories, history, packaging, tactile explainers | Ink Brush or Marker | Dark brown/black; warm white or vivid Crayon for accents | Low-contrast tan or muted-brown artwork dominates the scene |
| Blueprint | Architecture, engineering, systems, process diagrams, technical plans | Marker or Solid | White or light cyan; reserve warm colors for emphasis | Existing artwork is mostly dark and cannot be recolored safely |
| Custom | Brand colors, gradients, or a local background image | Depends on contrast | Test foreground contrast against the actual background | A named semantic surface already communicates the idea more clearly |
Blackboard surfaces use deterministic grain, faint streaks, and erased-chalk residue. Paper and Kraft use deterministic fibers. Blueprint adds a visual technical grid; it is not an editing or snapping grid.
A practical scene strategy
Use Project for a consistent visual identity. Use Scene when the surface itself communicates a story transition—for example:
| Scene | Surface and material | Story role |
|---|---|---|
| 1 | Whiteboard + Marker | Introduction |
| 2 | Blueprint + light Marker | System diagram |
| 3 | Paper + Pencil | Rough idea |
| 4 | Blackboard + Chalk | Explanation or proof |
A scene override wins over the project surface. If you choose a project board and the visible scene does not change, inspect the Scene scope and choose Use Project to remove the local override.
Which stroke material should you use?
| Material | Visual behavior | Best uses | Good surfaces |
|---|---|---|---|
| Solid | Clean original vector stroke; lowest rendering cost | Precise diagrams, icons, technical paths, compatibility-first work | Whiteboard, Glassboard, Blueprint, Custom |
| Marker | Smooth physical stroke with restrained softness | Default explainers, callouts, arrows, headings | Whiteboard, Glassboard, Blueprint |
| Chalk | Grainy deposition, irregular edges, and subtle gaps | Classroom writing, equations, hand-drawn emphasis | Blackboard, Green Chalkboard, Kraft accents |
| Pencil | Fine graphite texture and lower-opacity density | Sketches, notes, storyboards, detailed outlines | Paper, Whiteboard |
| Crayon | Waxy, colorful pigment with granular coverage | Playful explainers, children’s content, colorful emphasis | Paper, Whiteboard, Kraft Paper |
| Dry Marker | Directional depleted ink with repeatable small gaps | A worn whiteboard feel or occasional physical emphasis | Whiteboard, Glassboard |
| Ink Brush | Dense expressive core with a soft feathered edge | Bold illustrations, handmade headings, expressive contours | Kraft Paper, Paper, Whiteboard |
| Highlighter | One broad translucent pass that preserves content beneath it | Annotation ranges, review emphasis, highlighting a term or region | Whiteboard, Paper, light Custom backgrounds |
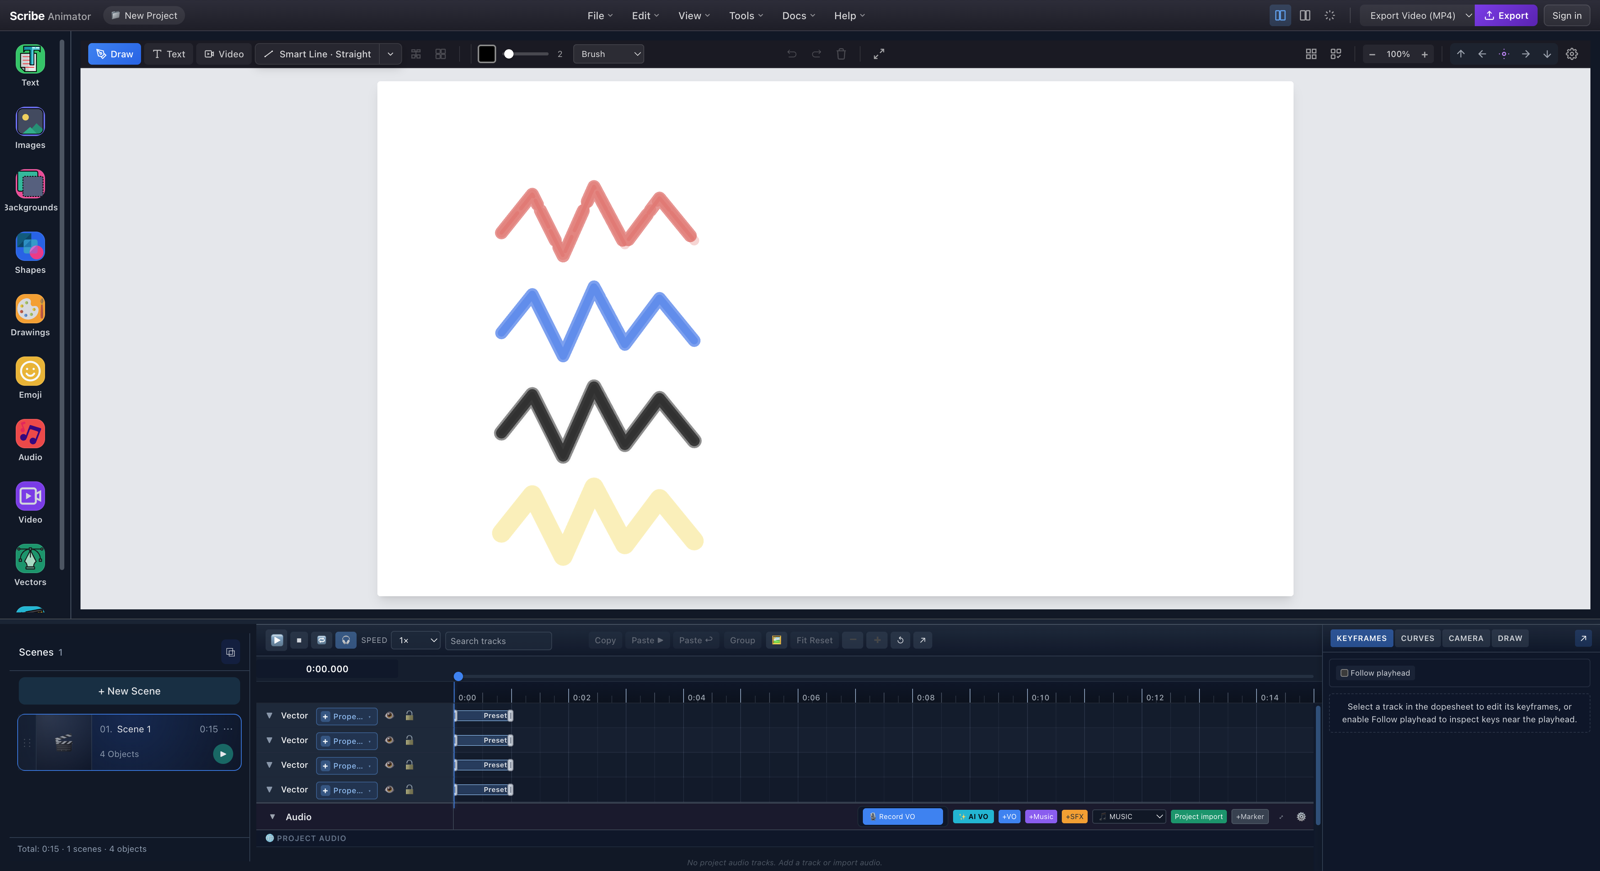
- CrayonWaxy red pigment with deterministic granular coverage.
- Dry MarkerBlue marker body with path-aligned depleted-ink streaking.
- Ink BrushA dark expressive core with controlled feathered passes.
- HighlighterOne broad translucent yellow pass for stable emphasis.
Highlighter works best behind or across something meaningful, not as the main outline for every object. Dry Marker and Crayon are similarly strongest when they support a visual idea rather than covering every path in a long project.
Apply a material at the correct level
There are three useful levels:
- Project or scene Drawing Style — the creation default for new drawings.
- Object Stroke Material — the authored material for one drawable object.
- Draw Step Stroke Material — a temporary override for one reveal step; choose Inherit to return to the object/default behavior.
The practical precedence, from highest to lowest, is:
- Draw Step override.
- Object material.
- Scene drawing default.
- Board suggestion.
- Solid compatibility fallback.
Material remains independent from the animated hand and the tool sprite shown inside that hand. A Chalk material may recommend a chalk tool, but choosing one does not silently rewrite the other.
Use materials with text converted to outlines
Normal editable text stays clean and readable; board texture is not applied to its glyphs. To draw text with Chalk, Pencil, Crayon, Dry Marker, Ink Brush, or Highlighter:
- Create and finish editing the text.
- Use Convert to outlines.
- Select the resulting vector object.
- Open Vector Path → Stroke Material in Properties.
- Choose the material and set a readable stroke color.
- Add or preview Draw In / Draw Steps.
Outlined text becomes vector geometry, so it follows the same deterministic material and partial-reveal pipeline as imported SVG paths and normal drawings. It is no longer editable as live text after conversion, so keep a duplicate if the wording may change.
Surface examples
Paper for graphite and sketch work
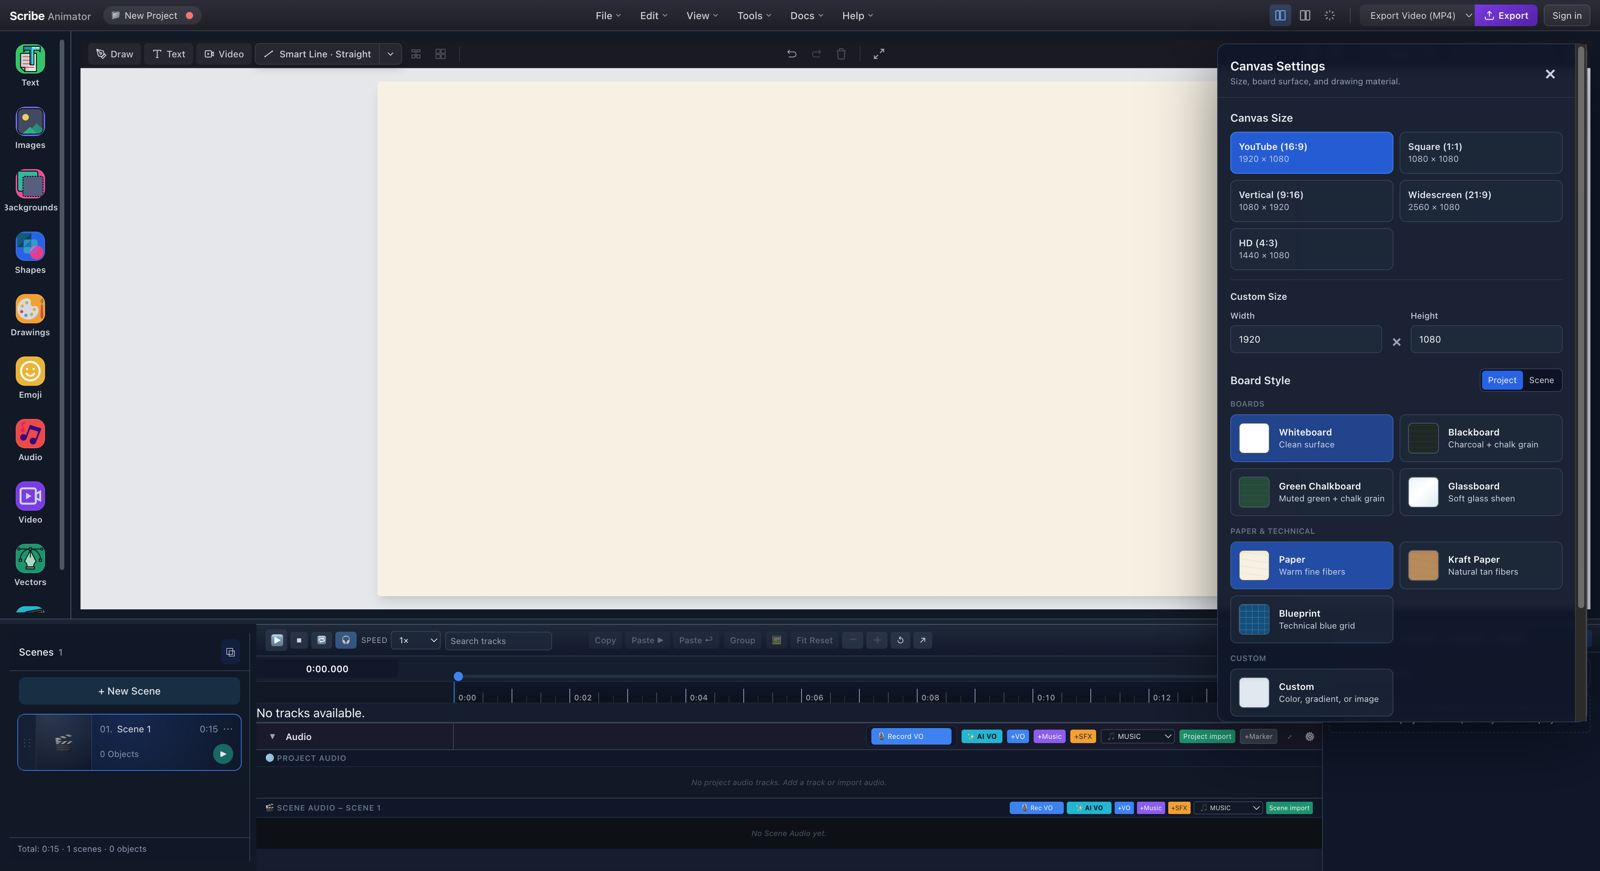
- Paper surfaceThe warm off-white board carries subtle deterministic fibers.
- Paper presetThe selected card preserves Paper as a semantic project or scene surface.
Kraft Paper for expressive ink
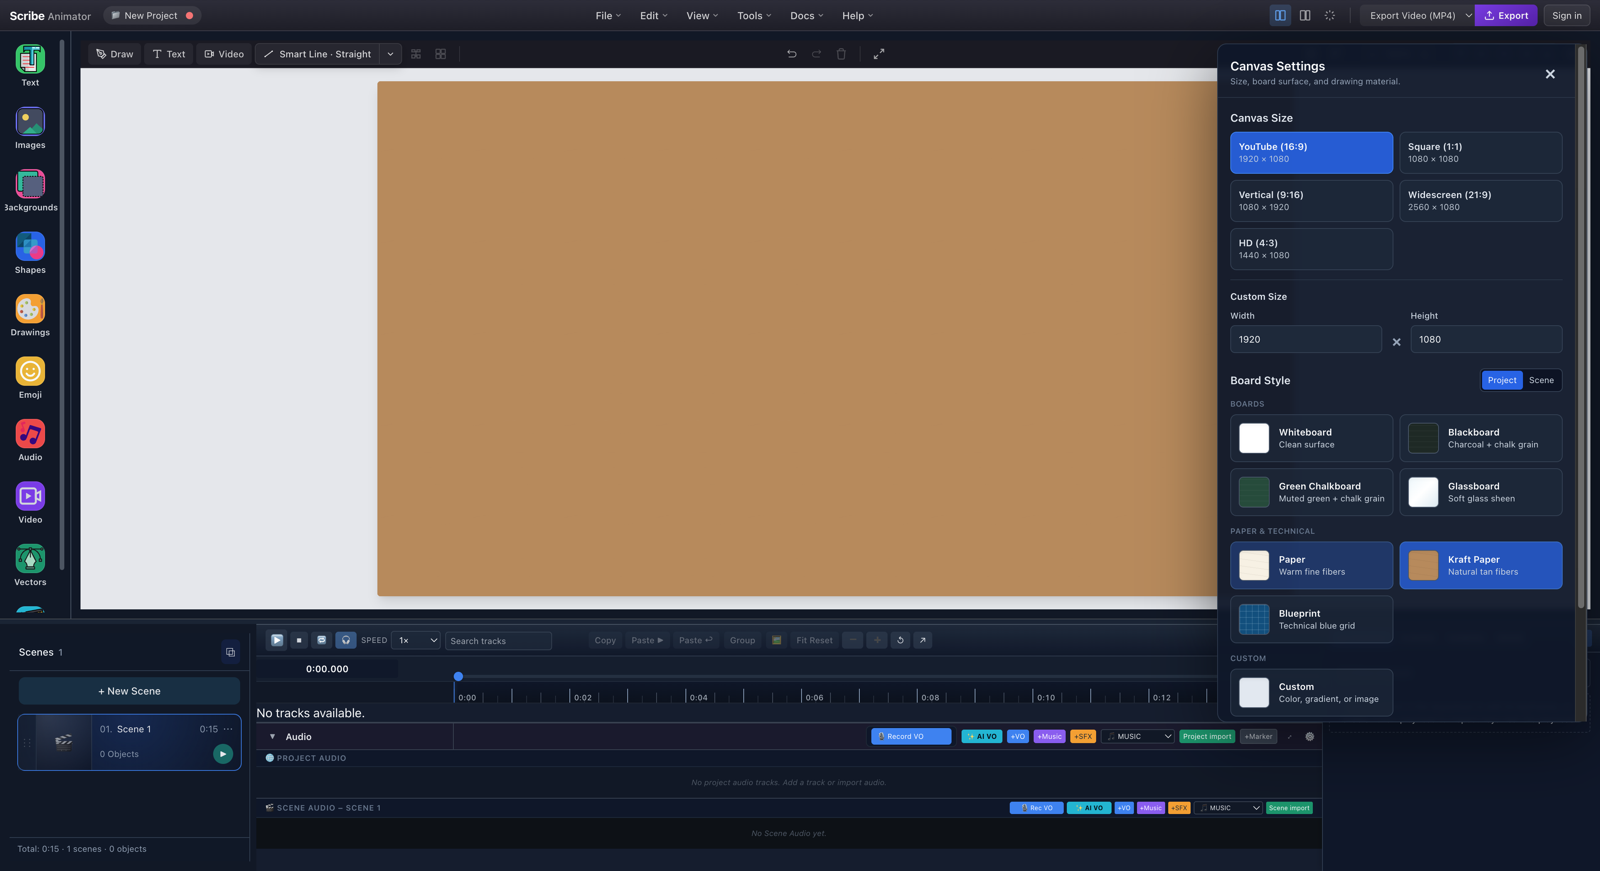
- Kraft Paper surfaceNatural tan and deterministic fibers establish the physical board treatment.
- Kraft Paper presetThe selected semantic preset can be applied at project or scene scope.
Blueprint for technical explanations
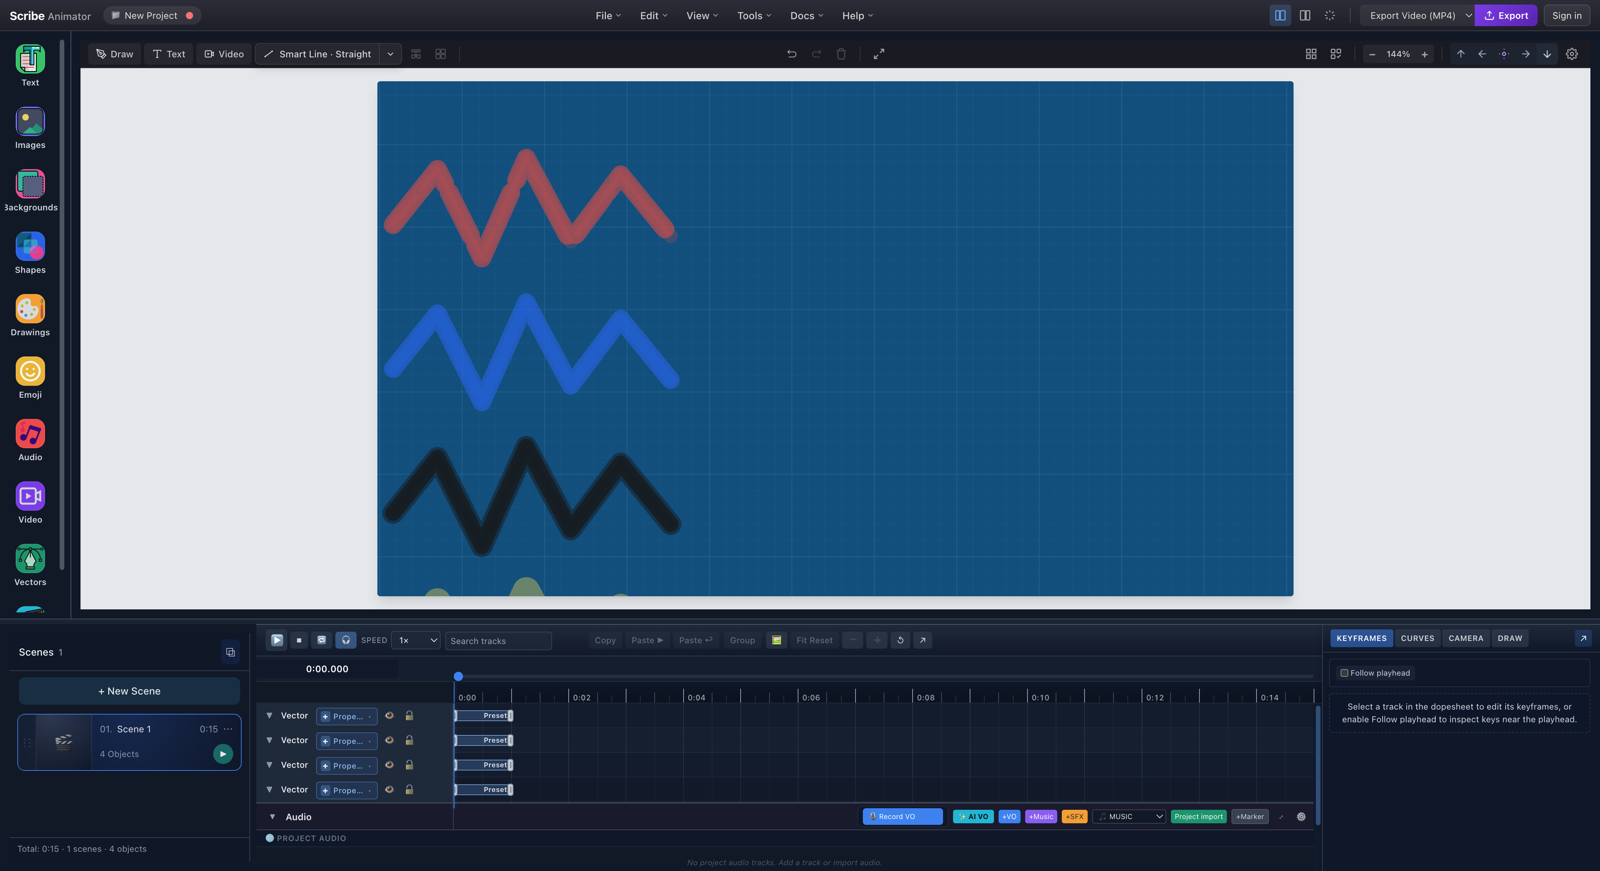
- Blueprint gridThe technical grid is a deterministic visual surface, not an interactive snapping grid.
- Camera zoomAt 144% zoom, the grid and stroke textures stay attached to world content.
- Material pathsDrawable paths keep their own authored colors and materials over the board.
Preview, export, and compatibility limits
- Desktop, Mobile Lite, and hidden-stage video export resolve the same semantic surface and material IDs.
- Procedural textures use stable seeds, so they do not flicker when scrubbing, moving the camera, replaying, saving, or exporting video.
- Partial Draw In and Draw Step reveals show only the currently revealed part of a textured stroke.
- Authored dash patterns remain intact.
- Board texture affects only the background. It does not add noise to videos, photographs, text, fills, or the completed frame as a global filter.
- Video export is the full-fidelity textured output.
- Static SVG keeps Solid and Marker as ordinary vector strokes and represents Highlighter with vector width/opacity. Physical Chalk, Pencil, Crayon, Dry Marker, and Ink Brush export as safe base-vector fallbacks rather than embedding oversized raster textures.
Mobile Lite
Mobile Lite stores and renders the same board and material values as Desktop. Open the project settings sheet for the board scope and the compact drawing controls for material selection. A project can safely move between Desktop and Mobile Lite without translating to separate mobile-only IDs.
Readability checklist
Before finishing a scene:
- preview from the beginning and at the final camera framing;
- verify every foreground color against the board;
- keep body text and thin diagrams cleaner than decorative strokes;
- reserve Highlighter for transparent emphasis;
- check colored SVG fills instead of assuming the board changed them;
- inspect every scene override separately; and
- compare a short video export with the editor preview.
Troubleshooting
| Problem | What to check |
|---|---|
| Project board is selected but the canvas still shows another surface | The active scene probably has an override. Switch to Scene and choose Use Project. |
| Changing Drawing Style did not change existing art | Drawing Style is a creation default. Select the object and change its Stroke Material in Properties. |
| Chalk or Pencil is invisible on a dark board | Change the object stroke to warm white or another high-contrast color. Existing authored colors are intentionally preserved. |
| Editable text is not textured | Convert a finished copy to outlines, then set the vector Stroke Material. |
| A material changes for only part of the animation | Inspect Draw Step overrides and choose Inherit where appropriate. |
| Highlighter hides the content beneath it | Use a lighter color and avoid stacking duplicate strokes over the same range. |
| Static SVG looks cleaner than video preview | This is the intentional safe vector fallback for physical textured materials. Use video export for full texture fidelity. |
| Texture appears different after every frame | That is not expected. Reload once, verify the selected material, and report a reproducible project because all procedural effects are deterministically seeded. |