How to animate an SVG like it is being drawn by hand
The most reliable way to make an SVG look hand-drawn is to start with artwork that already has a sensible path structure, then decide how those paths should reveal over time. Scribe Animator can sanitize a static SVG, turn its geometry into drawable editor data, plan a Draw Step, add a real drawing-hand overlay, preview the motion, and export the result as video.
This tutorial uses a first-party ten-path SVG and records the controls and result from a completed Scribe run. It does not assume that every arbitrary SVG has a perfect semantic drawing order.
This workflow was reproduced on 9 August 2026 in the desktop web editor on macOS with frontend@2.0.0. The tested scene completed a real 450-frame MP4 export: H.264, 1280 × 720, 30 fps, and 15 seconds. Mobile controls were not used for this article.
Download the practice SVG
Download idea-to-result-practice.svg
The file contains a lightbulb, an arrow, and a checked result. It has:
- a
viewBoxand explicit dimensions; - ten open or stroked paths;
- no text, embedded bitmap, script, external stylesheet, filter, or animation markup; and
- round line caps and joins that suit a pen reveal.
You can inspect it in a text editor before importing it. Use this deterministic file for a first run, then repeat the process with your own artwork.
Choose an SVG that will draw well
SVG is a container, not a promise about drawing quality. A browser may display an SVG perfectly even when its internal structure is awkward for a hand-drawn reveal.
Good candidates usually have:
- clear strokes or outline-like paths;
- a modest path count;
- a self-contained
viewBox; - explicit fills, strokes, and transforms;
- text already converted to outlines when the lettering itself must draw; and
- path order that roughly follows the way a person would construct the picture.
Poor candidates include dense maps, auto-traced photographs, artwork made from hundreds of tiny filled fragments, paths that jump repeatedly across the canvas, or files whose appearance depends on external CSS. Scribe rejects SMIL and CSS animation markup; export a static representative frame and recreate its motion in the timeline instead.
If the source is still editable text rather than an SVG, use the verified multilingual handwritten text workflow to choose a compatible font, preview every glyph, and convert it before planning the reveal.
1. Import and inspect the sanitized result
Save your current work, then open Vectors and choose the SVG in Vector Import - SVG to Paths. Scribe processes the file before it becomes an editor object. That boundary is important: the source document is not executed as a miniature webpage.
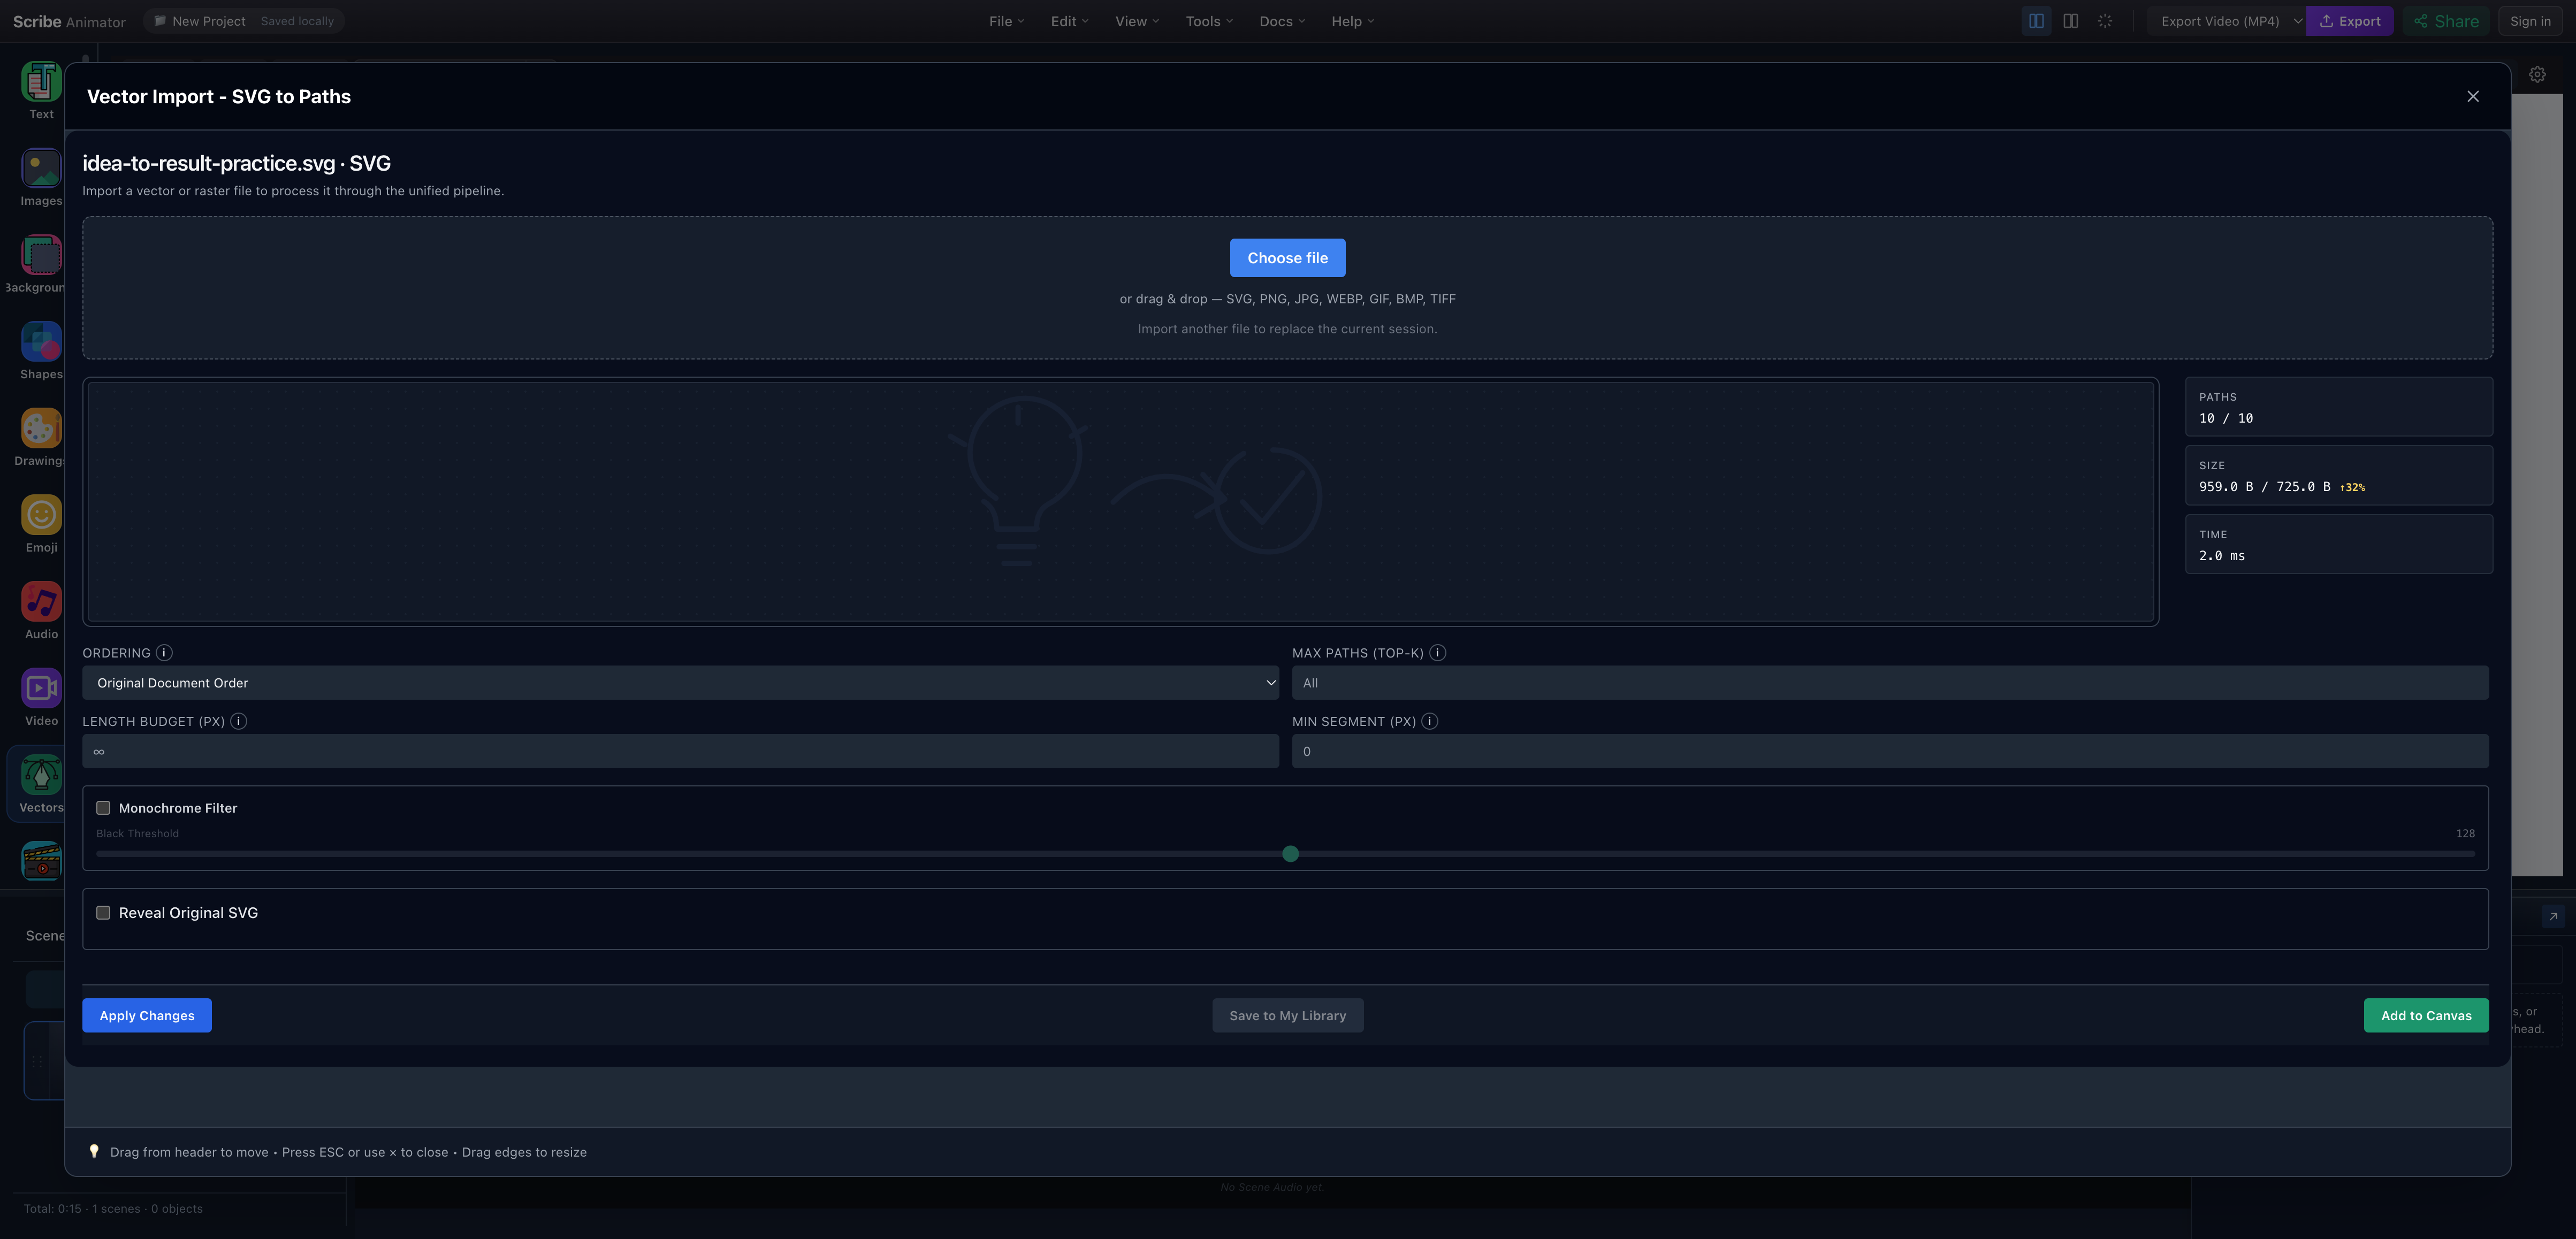
- Processed previewConfirm that the artwork is present, unclipped, and proportioned correctly after sanitization and normalization.
- Path evidenceThis practice file produced ten usable paths; a much larger or unexpected count is a reason to inspect the source.
- Document orderOriginal Document Order is a faithful starting point, not an automatic semantic interpretation of the illustration.
- Add to CanvasPlacement is separate from the optional cloud-library action and works on the current local project.
For this run, the panel reported PATHS 10 / 10, used Original Document Order, and showed no processing warning. Processing time and byte reduction are diagnostic values, not performance promises; they vary with the file and device.
Before selecting Add to Canvas, check:
- The entire composition appears in the preview.
- The path count is believable for the source.
- Important strokes have not disappeared.
- The aspect ratio matches the original.
- There is no warning you do not understand.
Read the deeper SVG and vector import guide for accepted formats, sanitization boundaries, raster tracing, and cloud-library limits.
2. Plan the draw reveal
Add the vector to the canvas and select it. Open the timeline's DRAW drawer, then use AUTO-PLAN with the vector selected. Scribe first shows an eligibility summary; only confirm when the selected and eligible counts match what you intended.
In the tested project, Auto-plan reported one selected and one eligible vector, then created one Draw Step from 0s to 3s covering 0–100% of the vector reveal. At the exact start of the scene the object was hidden, and at three seconds it was complete.
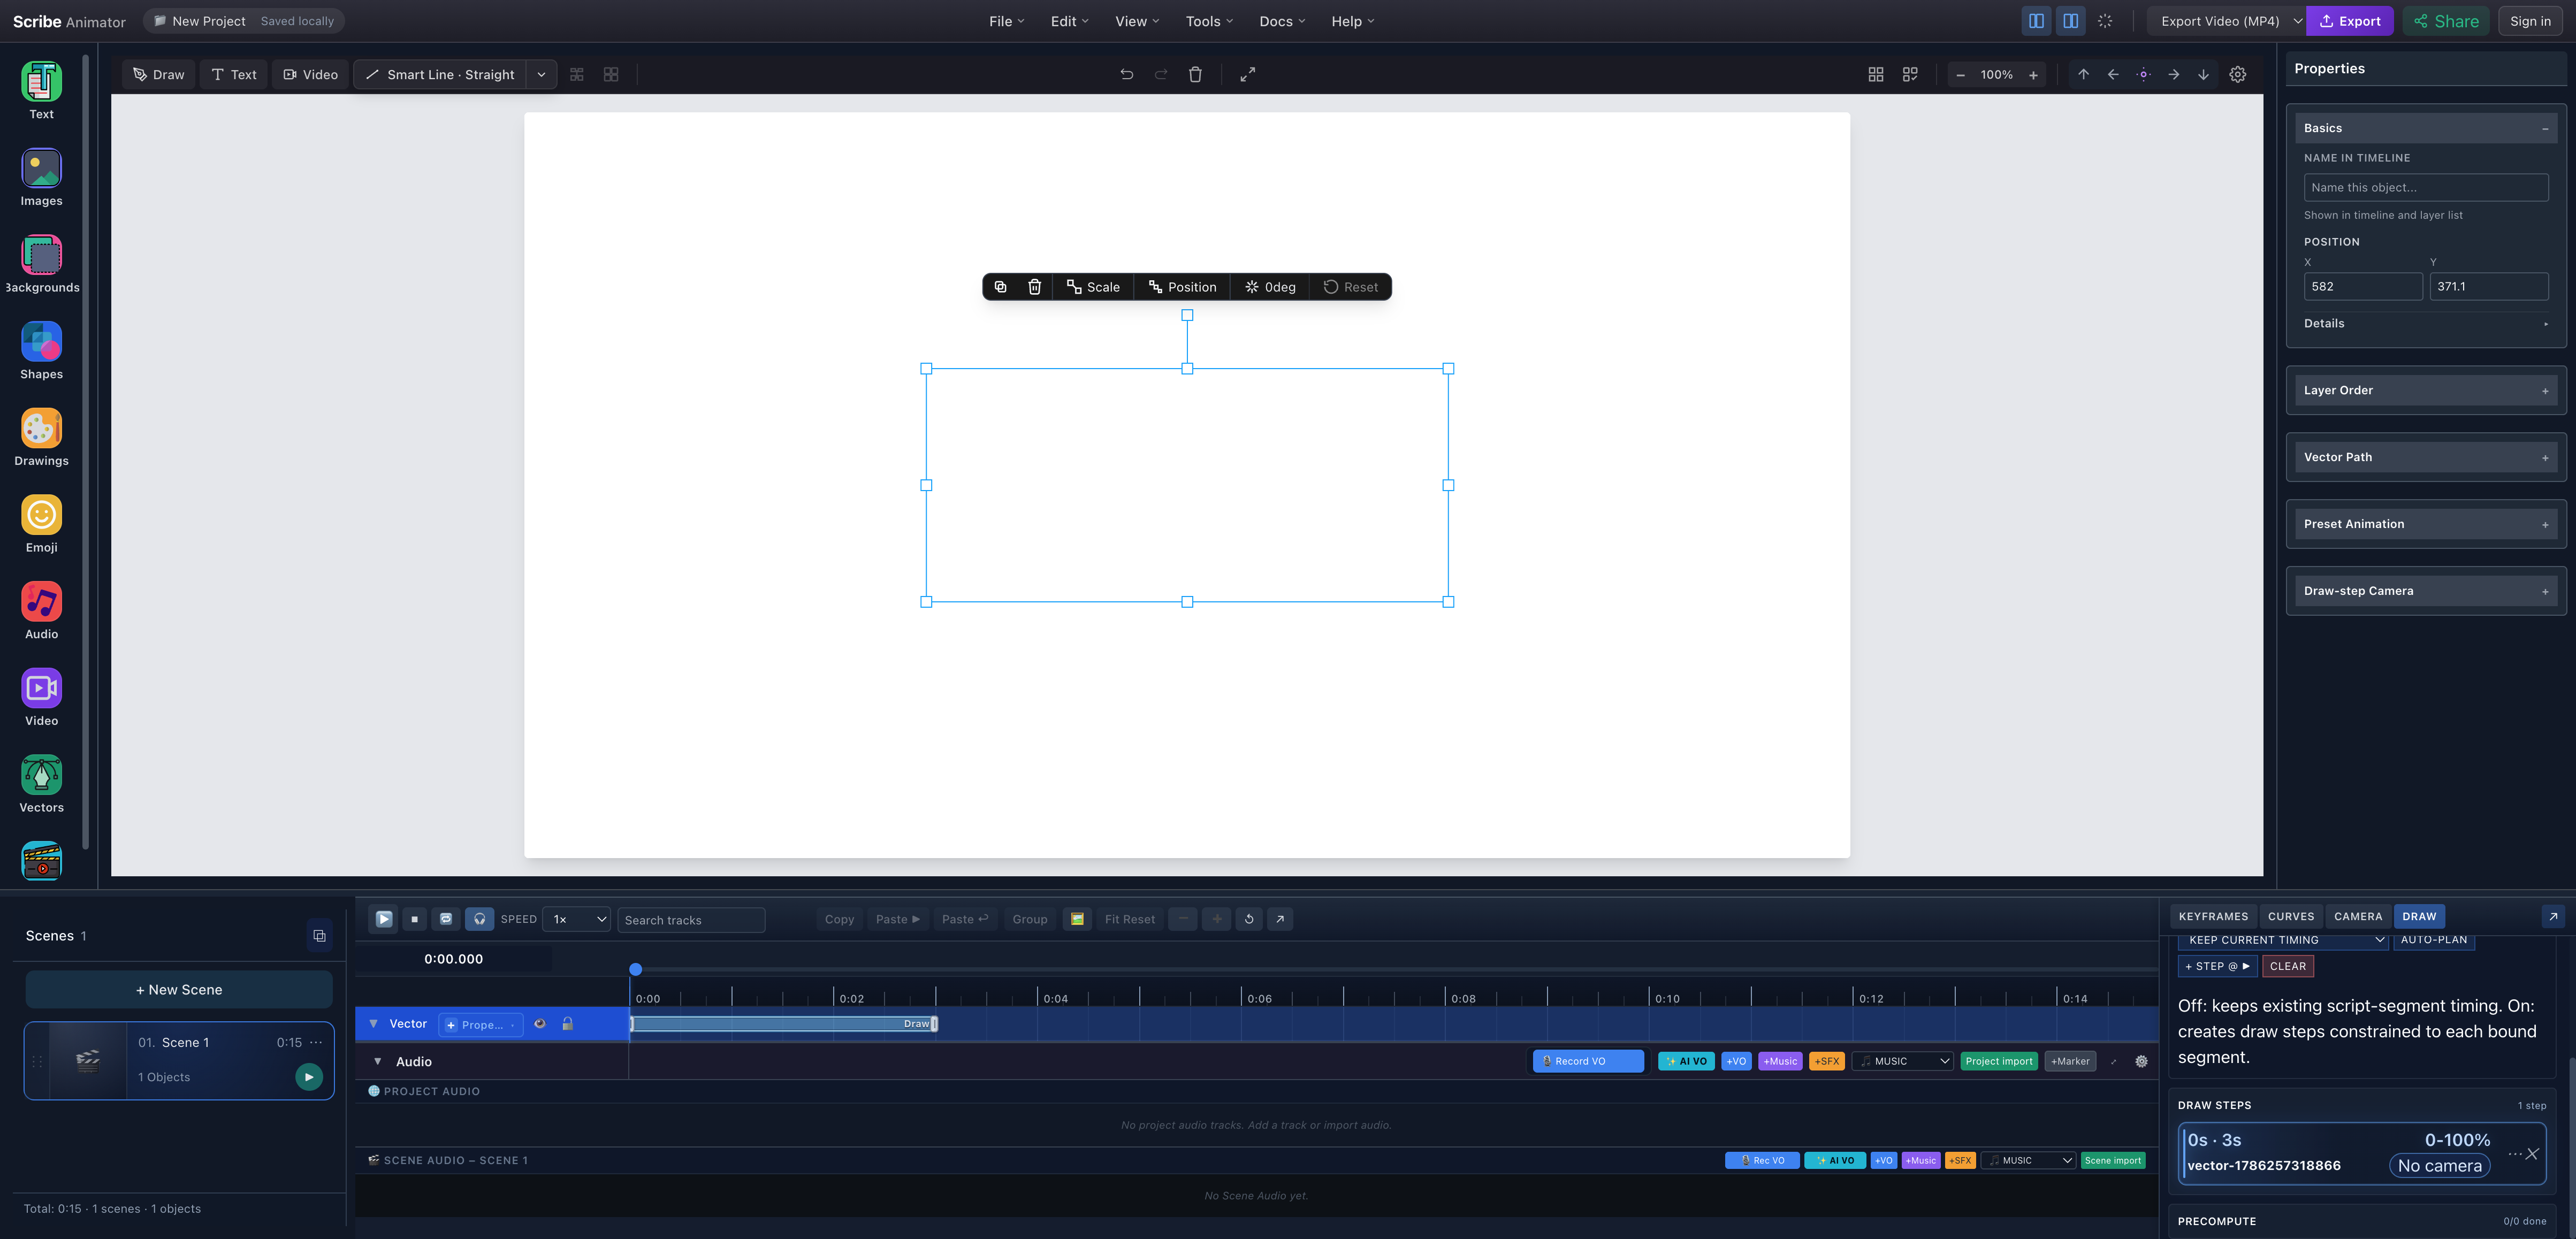
- Unrevealed first frameThe canvas is blank inside the selected vector bounds because the reveal is at zero percent.
- Playhead at zeroThe timeline readout confirms that this is the start state rather than a missing-object error.
- Planned Draw StepThe drawer records one step from 0s to 3s and from 0 to 100 percent reveal.
Auto-plan is a starting point. Preview the route rather than assuming document order tells a story. If the hand draws the result before the cause, jumps between distant details, or spends too long on an unimportant contour, return to the source SVG and improve its path order or split the artwork into more purposeful objects and steps. The Draw Steps and stroke-planning guide explains timing authority and manual refinement.
Need different parts of the same SVG to draw at different times or with different hands? Continue with the verified one-object, multiple Draw Steps tutorial. It keeps one target vector, splits its route into four partial ranges, switches hand/tool presets at runtime, and compares manual boundaries with Round-robin planning.
If you need exact reveal percentages without a hand-led Draw plan, use Draw Progress property keyframes. The keyframe tutorial explains why explicit progress keys and Draw Steps are separate timing authorities.
3. Choose a hand and tool that fit the line
Open the project hand-and-tool control in the DRAW drawer. For this example, the tested selection was Right · Photoreal · Medium · Pen with Black Pen (Slim).
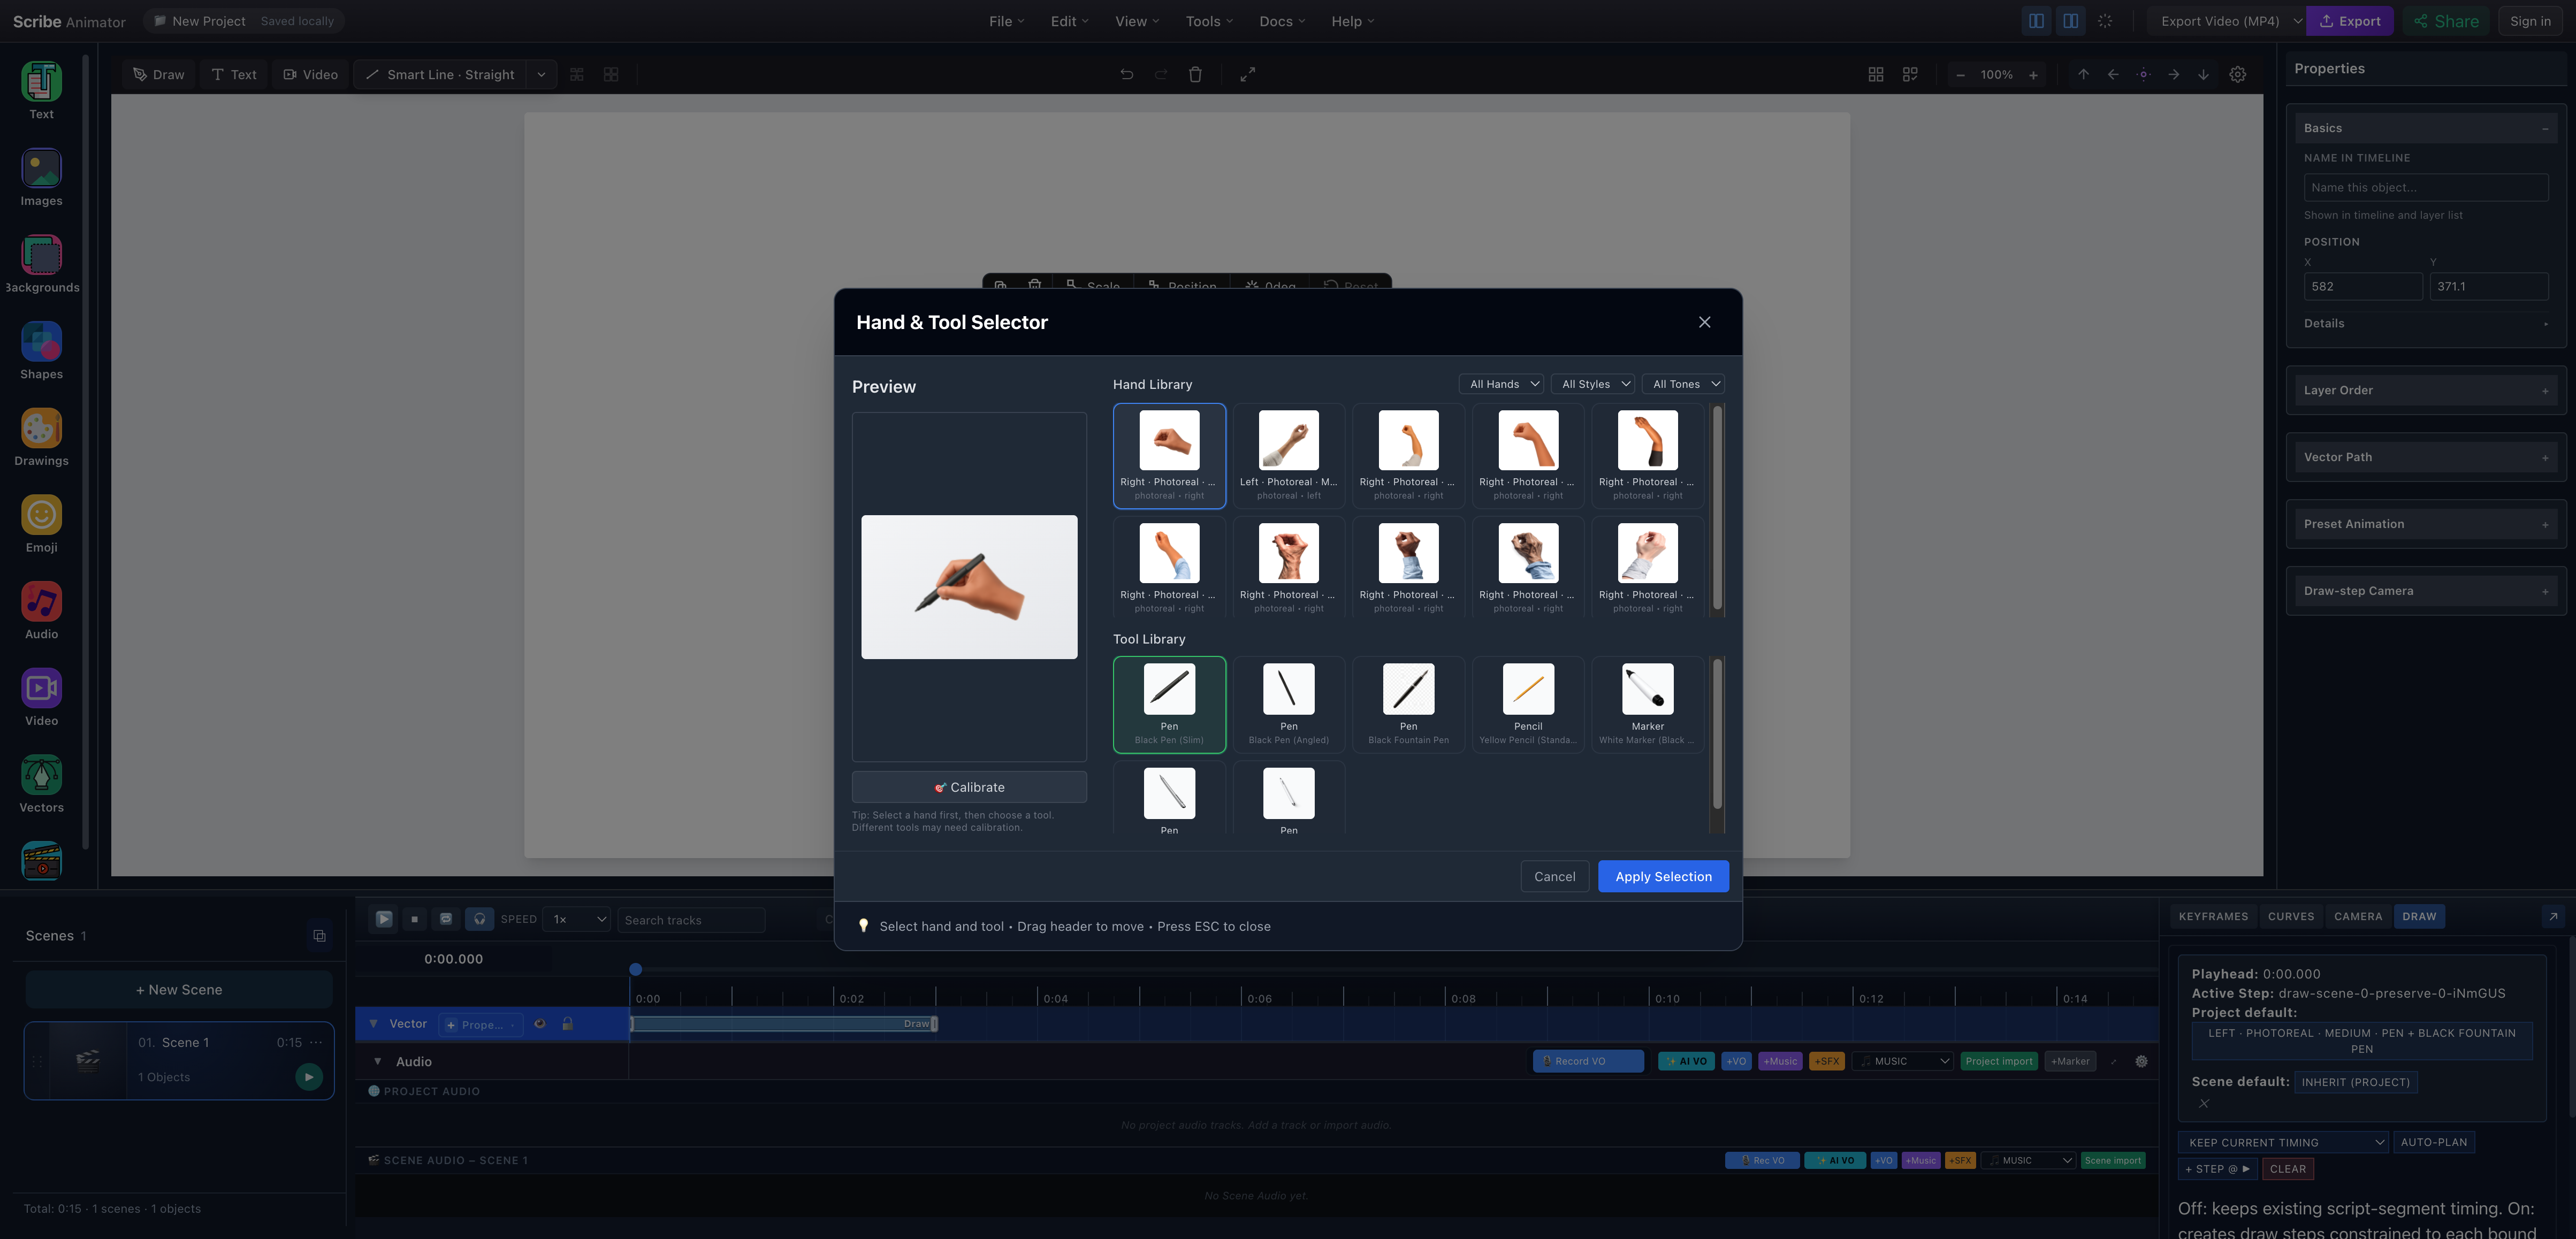
- Selected handThe blue outline identifies the right photoreal medium pen hand used in this run.
- Selected toolThe green outline identifies Black Pen (Slim). Tool appearance and calibration can differ by hand asset.
- Combined previewInspect the hand, grip, and visible tool before committing the project default.
- Apply SelectionThis updates the project draw default used by the planned step unless a more specific override applies.
A realistic hand can dominate a small drawing. Preview at the actual delivery frame, not only inside the selector. A simpler tool or no hand may be clearer for dense diagrams, very short strokes, or small mobile embeds.
4. Preview the complete motion
Seek to the start and press Play. Watch the route, the hand position, and the final hold—not just whether some lines appear.
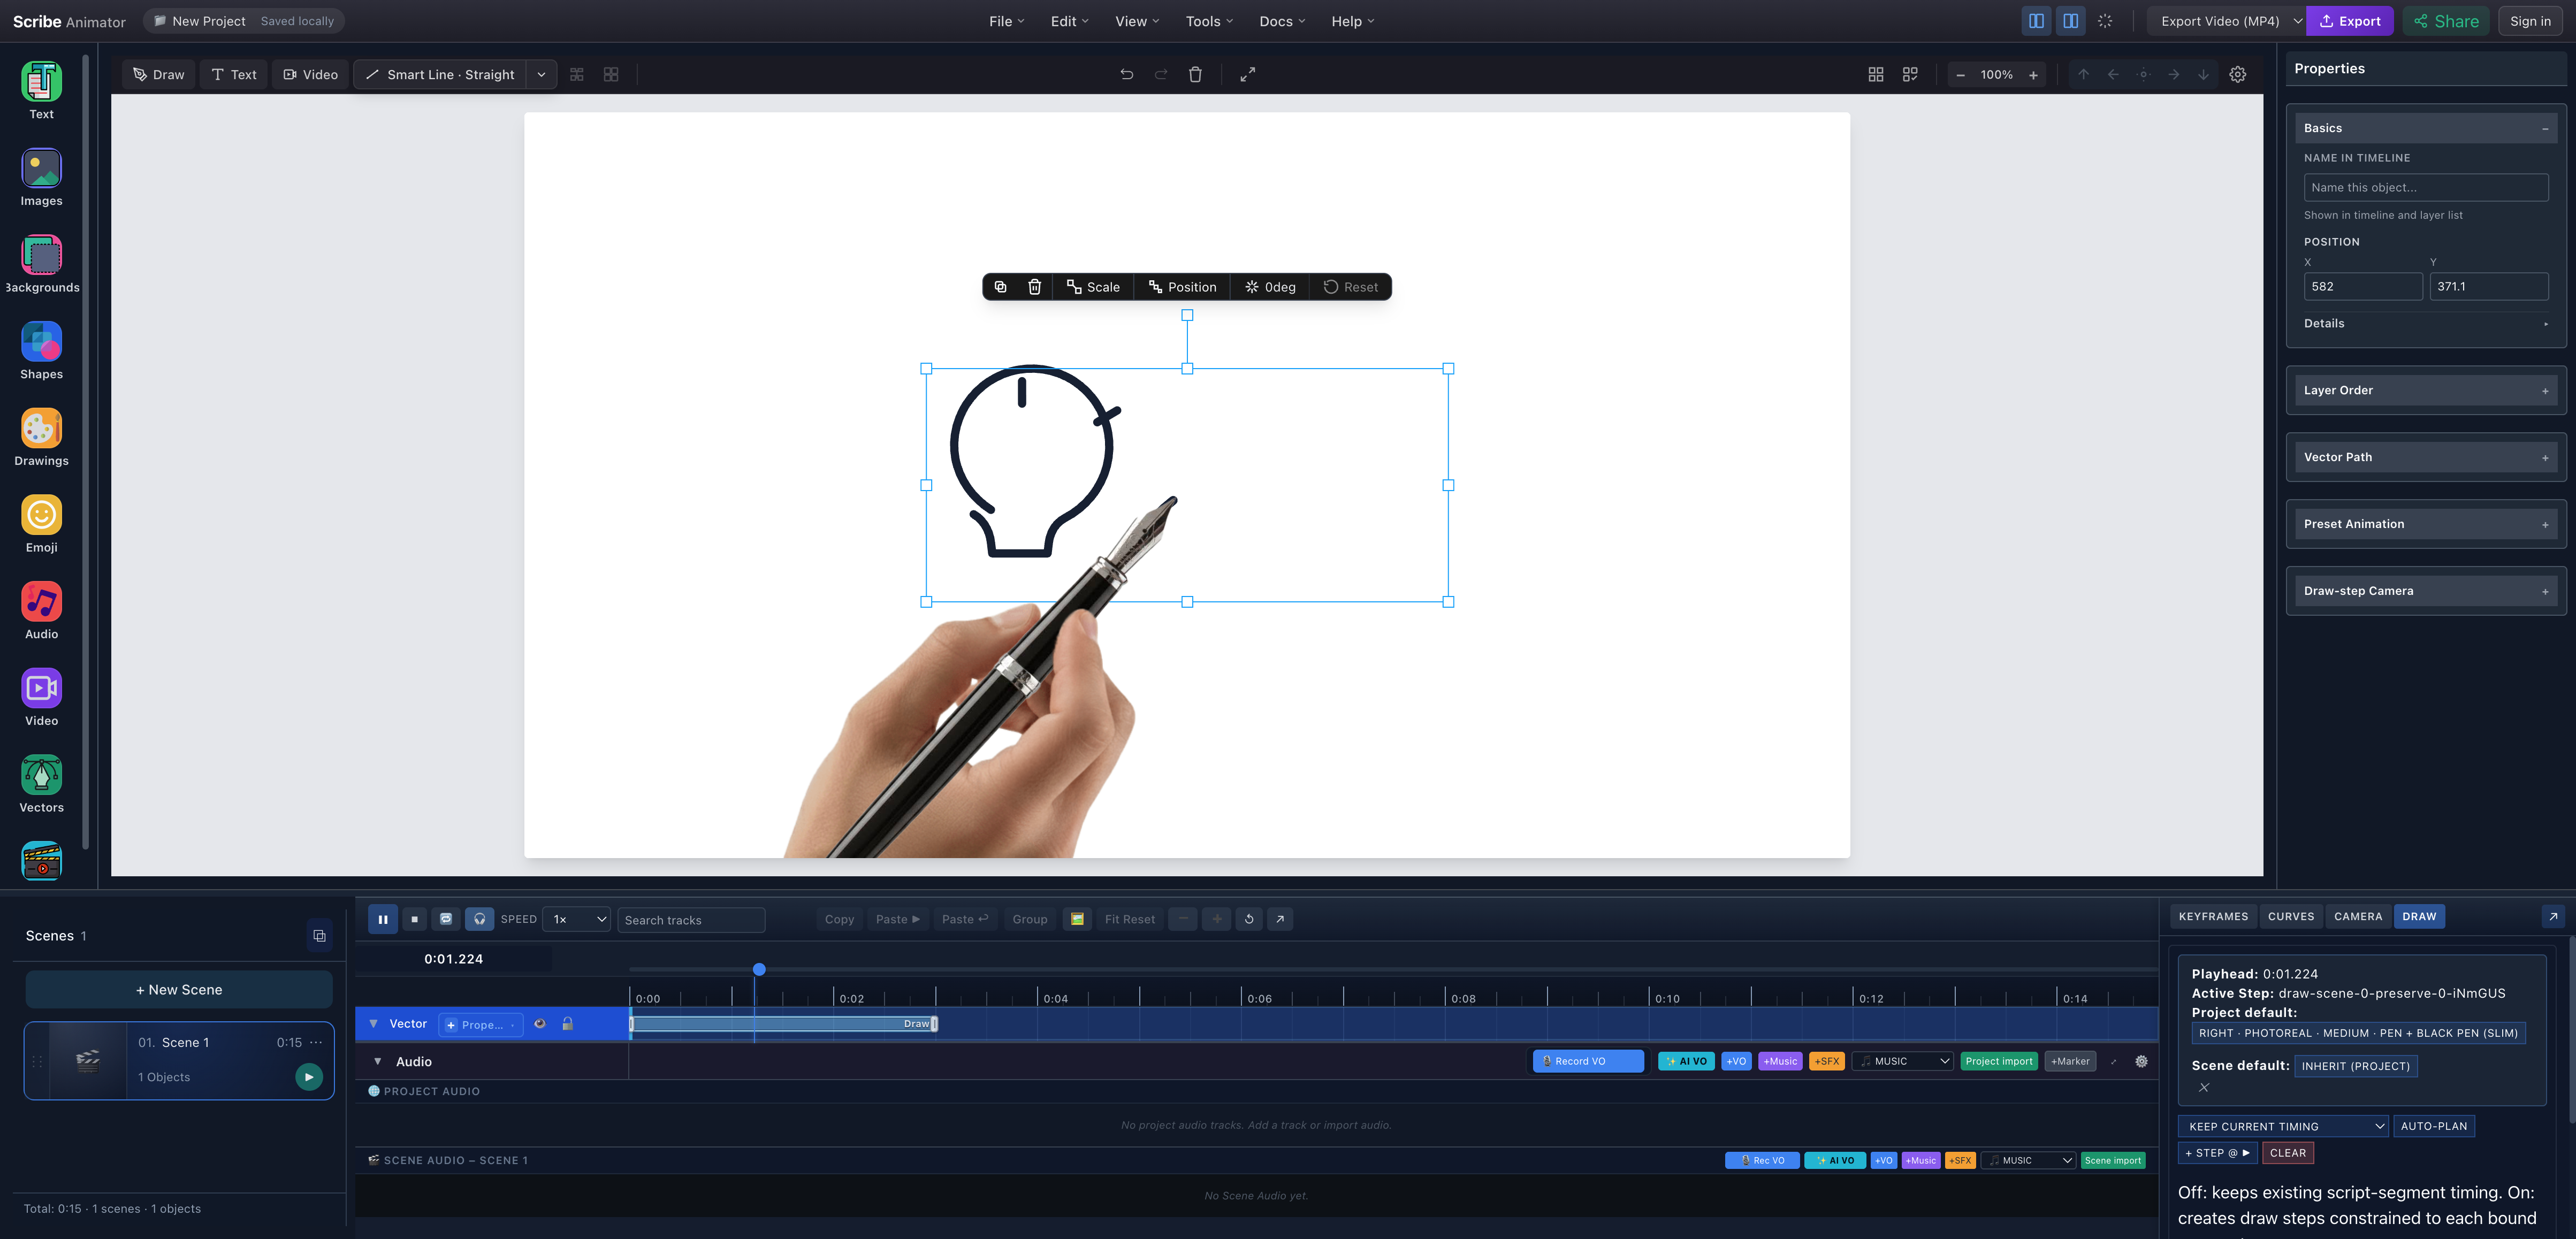
- Partial SVG revealOnly the portion reached by the Draw Step is visible at this time.
- Hand follows the drawingThe hand overlay is visible during preview and travels with the active reveal position.
- Verified playheadThe captured state is a live preview at 1.224 seconds, not a manually assembled mockup.
- Draw-step contextThe active DRAW drawer keeps the project hand and timing context visible while you review.
The tested route completed the lightbulb, then the arrow, then the checked result. That order worked because the practice SVG was authored in that sequence. Scribe did not infer the meaning of “idea becomes result.”
If the hand is clipped or blocks the mark, adjust the artwork's scale and placement or the hand calibration. If the reveal starts before the camera reaches the object, delay the Draw Step or give the camera a hold. See camera and path workflows before adding motion to a larger canvas.
5. Export and verify the file
Open Export Video (MP4), review resolution, frame rate, quality, and format, then keep the editor tab open until the progress dialog completes. The export runs on the device; closing or reloading the tab cancels it.
For the verified run, the free-plan policy produced a 1280 × 720 H.264 MP4 at 30 fps. The app reported 450 frames, 797.9 KB, and 0:15. A second media inspection confirmed a 15.000-second H.264 stream. Your size and processing time will depend on the scene and device.
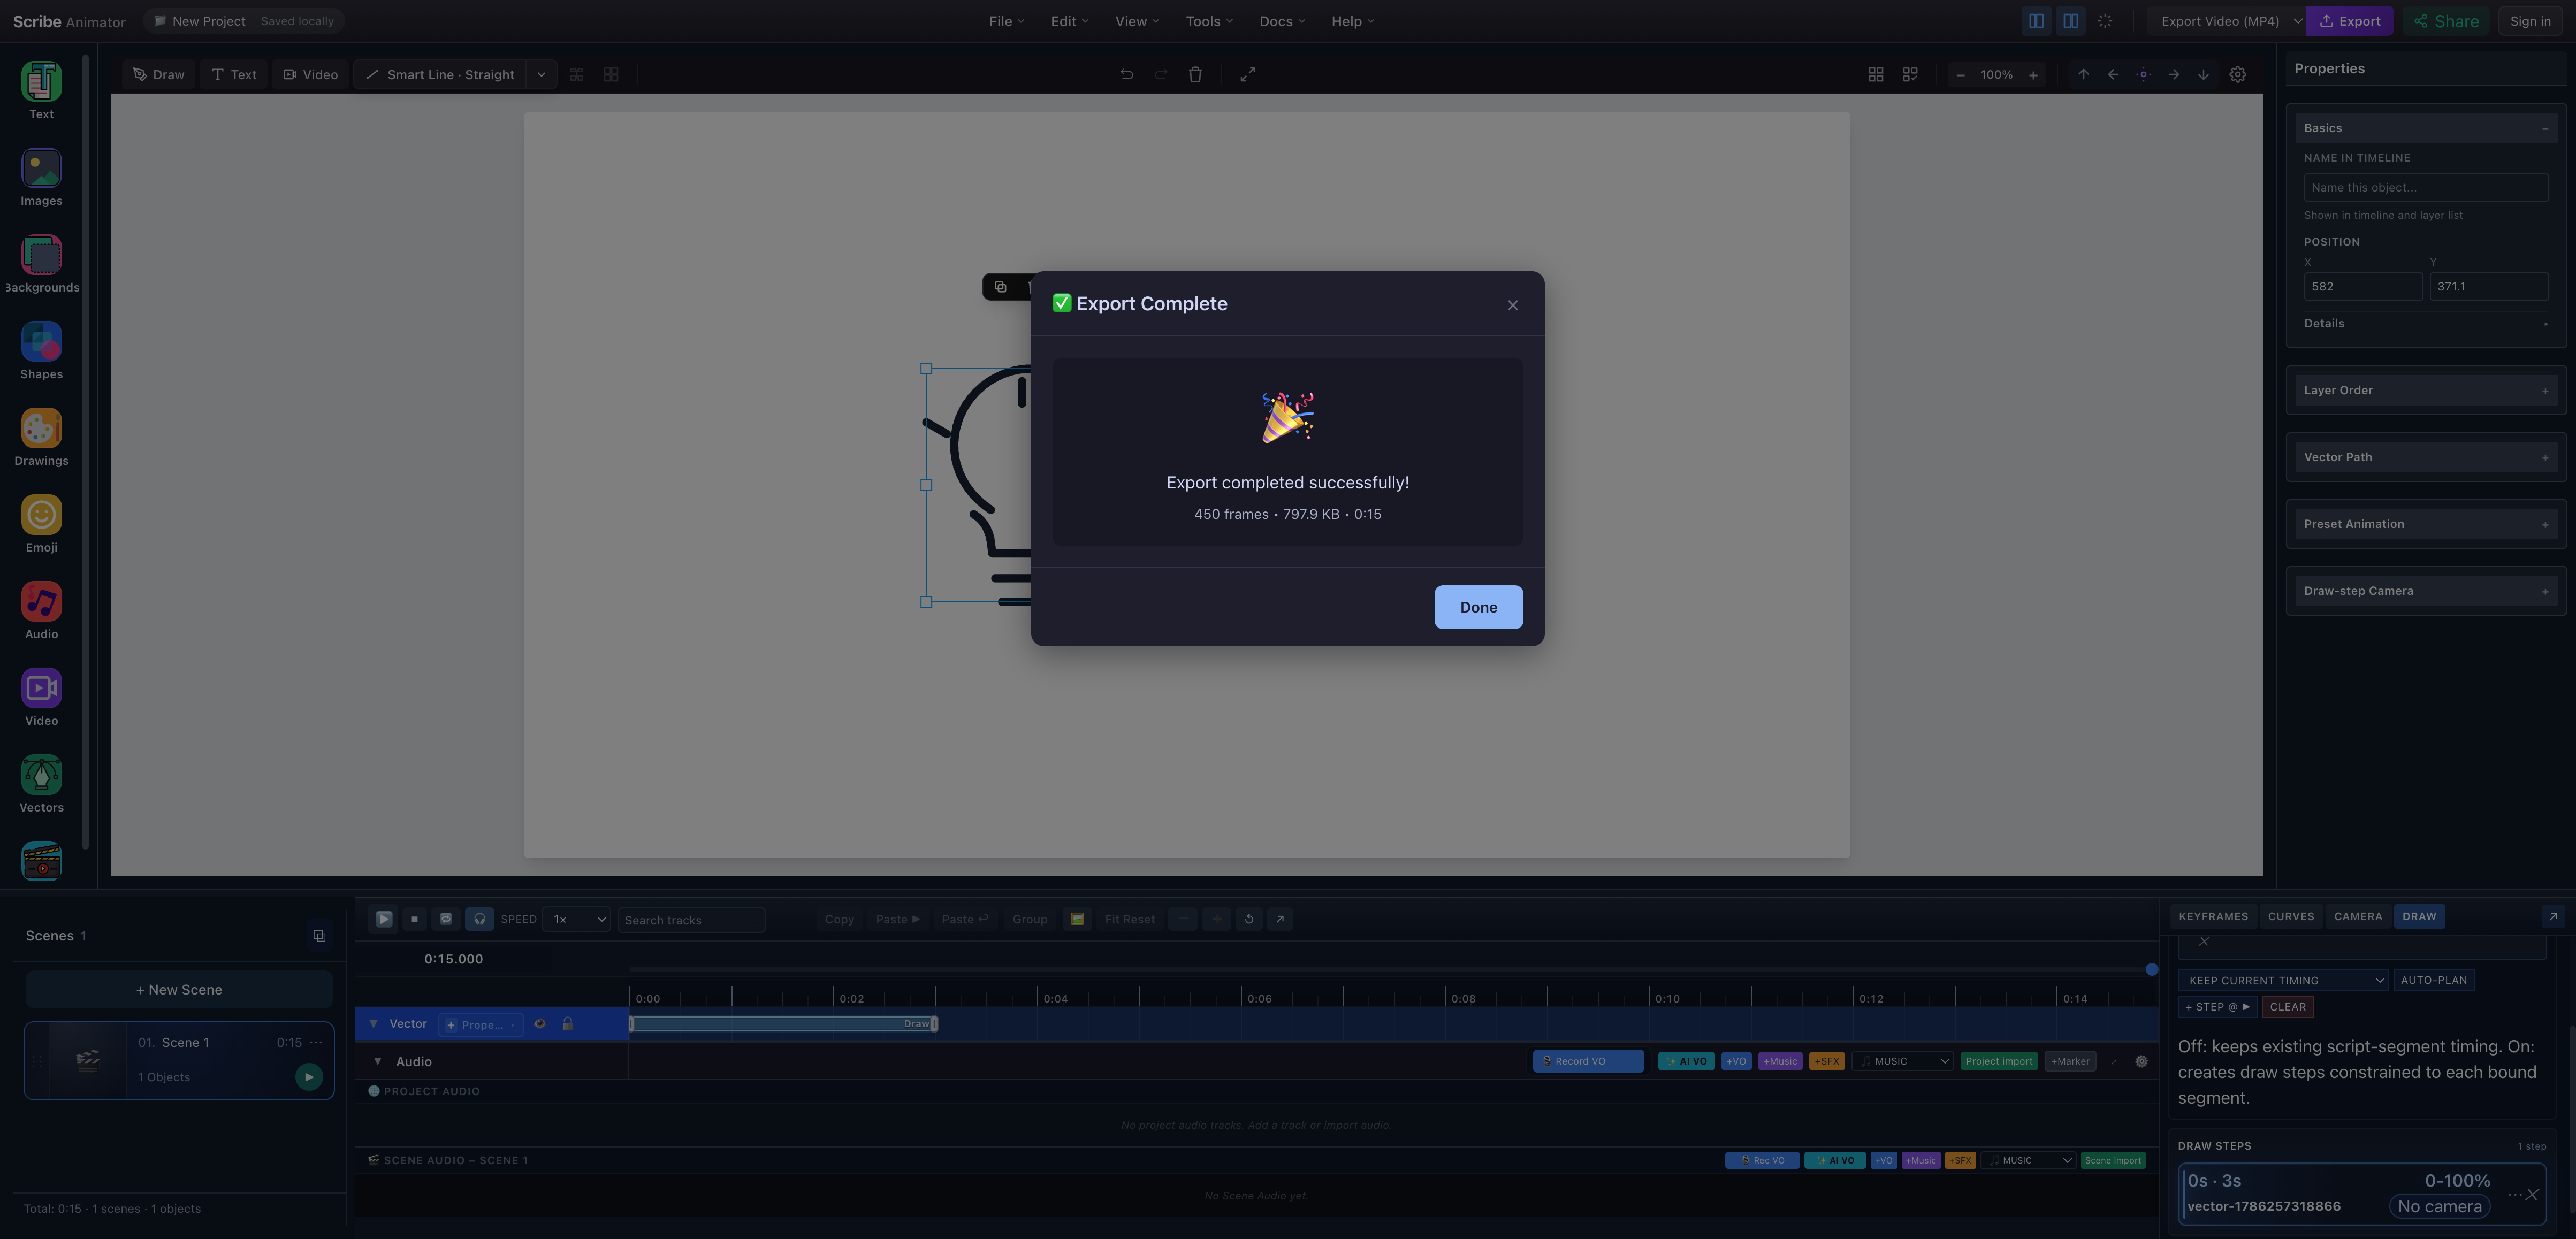
- Successful completionThe exporter reached its completion state without closing or reloading the editor tab.
- Measured outputThe app reports the generated frame count, file size, and duration for this exact run.
Current limitations
- Scribe accepts static SVG artwork for this workflow; it does not execute SVG animation markup.
- Sanitization can remove unsupported or unsafe document features.
- Automatic planning cannot understand the semantic importance of arbitrary paths.
- Filled illustrations may reveal like masks or shapes rather than like one continuous pen stroke.
- Detailed files increase import, editing, planning, preview, and export work.
- Hand assets can cover small artwork and may need calibration.
- Export resolution and watermark behavior depend on the current plan shown in the app.
Troubleshooting
| Problem | What to check |
|---|---|
| Preview is blank | Add a valid viewBox, flatten unsupported effects, convert required text to paths, and use explicit styles. |
| Path count is unexpectedly high | Simplify the source and remove invisible, duplicate, clipped, or auto-traced fragments. |
| Drawing jumps around | Reorder paths in the source, split the SVG into purposeful objects, or author separate Draw Steps. |
| Object is invisible at the start | That is expected when a Draw Step begins at zero; seek into the step or press Play. |
| Hand is visible but the route feels wrong | Fix path order and timing; changing the hand does not repair the stroke plan. |
| Export stops | Keep the tab open, reduce output settings if appropriate, and retry after confirming the preview works. |
Try this SVG workflow in Scribe
Download the practice file, then open Scribe Animator and repeat the same ten-path run. Keep your own SVG simple until its order reads clearly, then add camera movement or narration only when those elements improve the explanation.
For the broader visual-production context, read whiteboard animation design best practices and common workflow mistakes to avoid.