Smart Lines and Arrows
Smart Line and Smart Arrow are native editable objects for clean whiteboard diagrams. They are not generic SVG hacks.
Under the hood, Scribe Animator stores them as:
smartLinesmartArrow
Use them for process diagrams, concept maps, before/after flows, product walkthroughs, callouts, and educational explainers.
Visual orientation
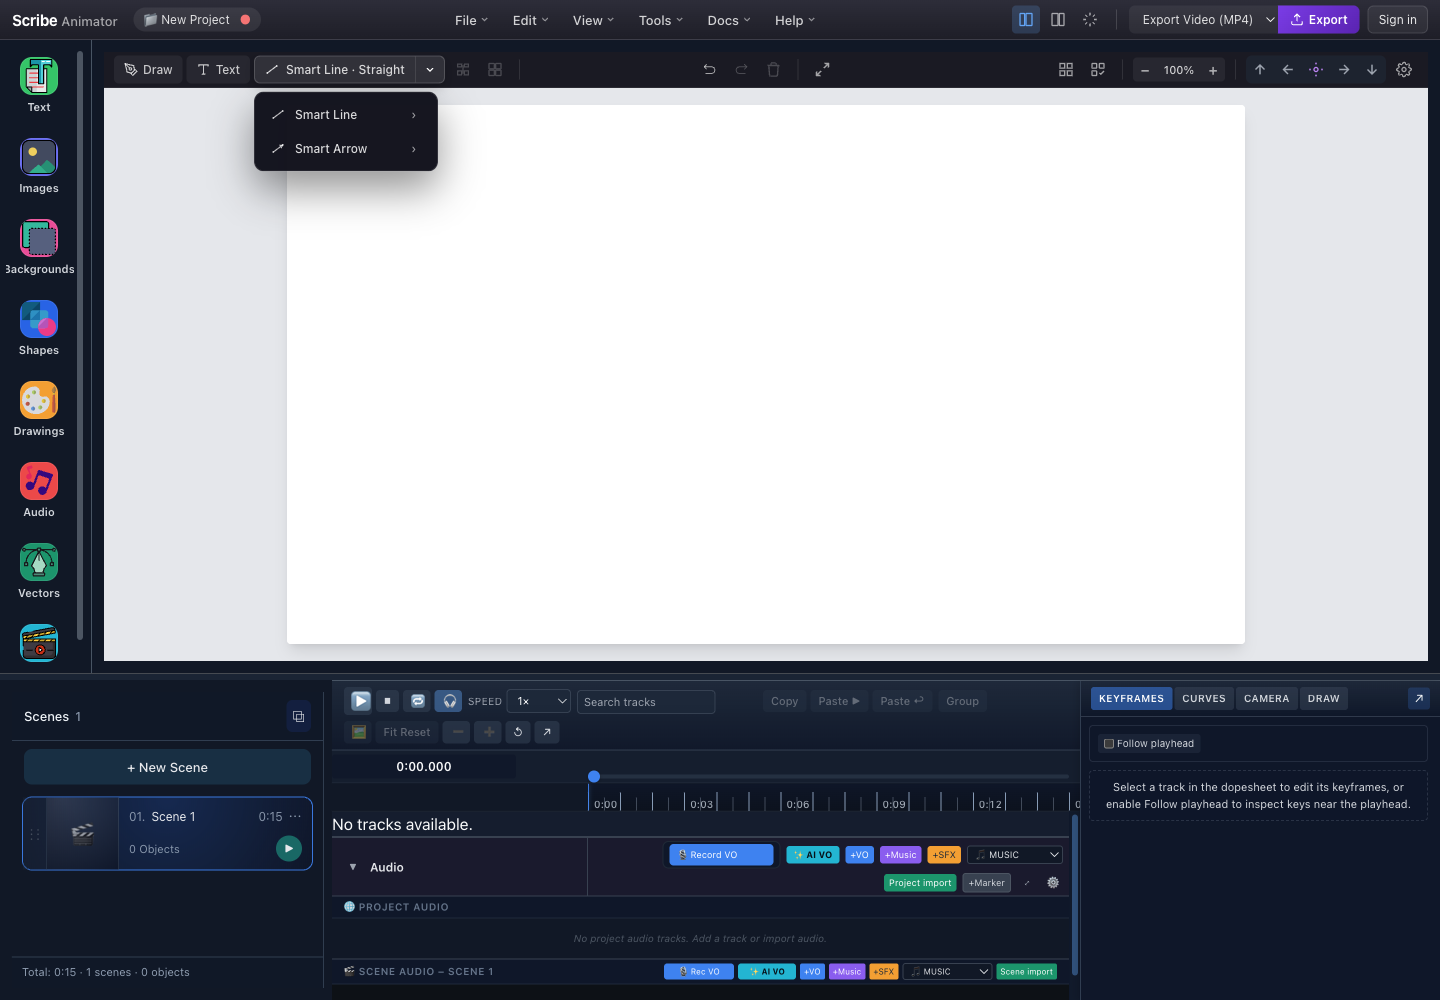
- Current connectorClick the main button to insert the displayed Smart Line or Smart Arrow route immediately.
- Variant chevronOpen the family menu without inserting an object.
- Smart LineChoose a non-directional connector, then select Straight, Curved, or Elbow.
- Smart ArrowChoose a directional connector with the same three route families.
This capture and its control locations were checked against the running desktop editor with browser-based UI review on July 26, 2026. For real selection, attachment, endpoint, waypoint, styling, Desktop, and Mobile Lite steps, follow Select, arrange, group, and connect objects.
Variants
Smart Lines and Smart Arrows support three route variants:
- Straight
- Curved
- Elbow
Use Smart Line for a non-directional relationship between ideas. Use Smart Arrow when you need to show flow, sequence, dependency, or cause and effect.
Route point, waypoint, or control point?
The editor and project model call the pink editable point a route point. Waypoint is also a useful plain-language name for it.
A route point is different from:
- an orange endpoint, which controls where the connector starts or ends; and
- a curve control handle, which adjusts the built-in Curved route without adding another waypoint.
Double-clicking a Smart Line or Smart Arrow stroke adds a route point and converts that connector to an editable multi-curve route. You can add more than one route point to create an arch, an S-curve, or a path around other canvas objects.
Common Uses
- Process diagram animation
- Concept maps
- Before/after flows
- Product walkthroughs
- Callouts
- Educational explainers
- Arrows between concepts
Basic Workflow
- Choose Smart Line or Smart Arrow from the toolbar.
- Choose a straight, curved, or elbow route.
- Place it on the canvas.
- Drag the orange endpoints to position the start and end.
- Double-click directly on the visible stroke to add a pink route point.
- Drag the route point to reshape the connector. Double-click another part of the stroke when you need another point.
- Edit the style, attachment, animation, or Draw In behavior.
Shape any Smart Line or Arrow with route points
Desktop: add and move a route point
- Pause playback and use the normal Select tool.
- Select an unlocked Smart Line or Smart Arrow.
- Double-click directly on the visible stroke where you want the route to bend.
- Look for the new pink route point.
- Drag that pink point until the connector follows the intended path.
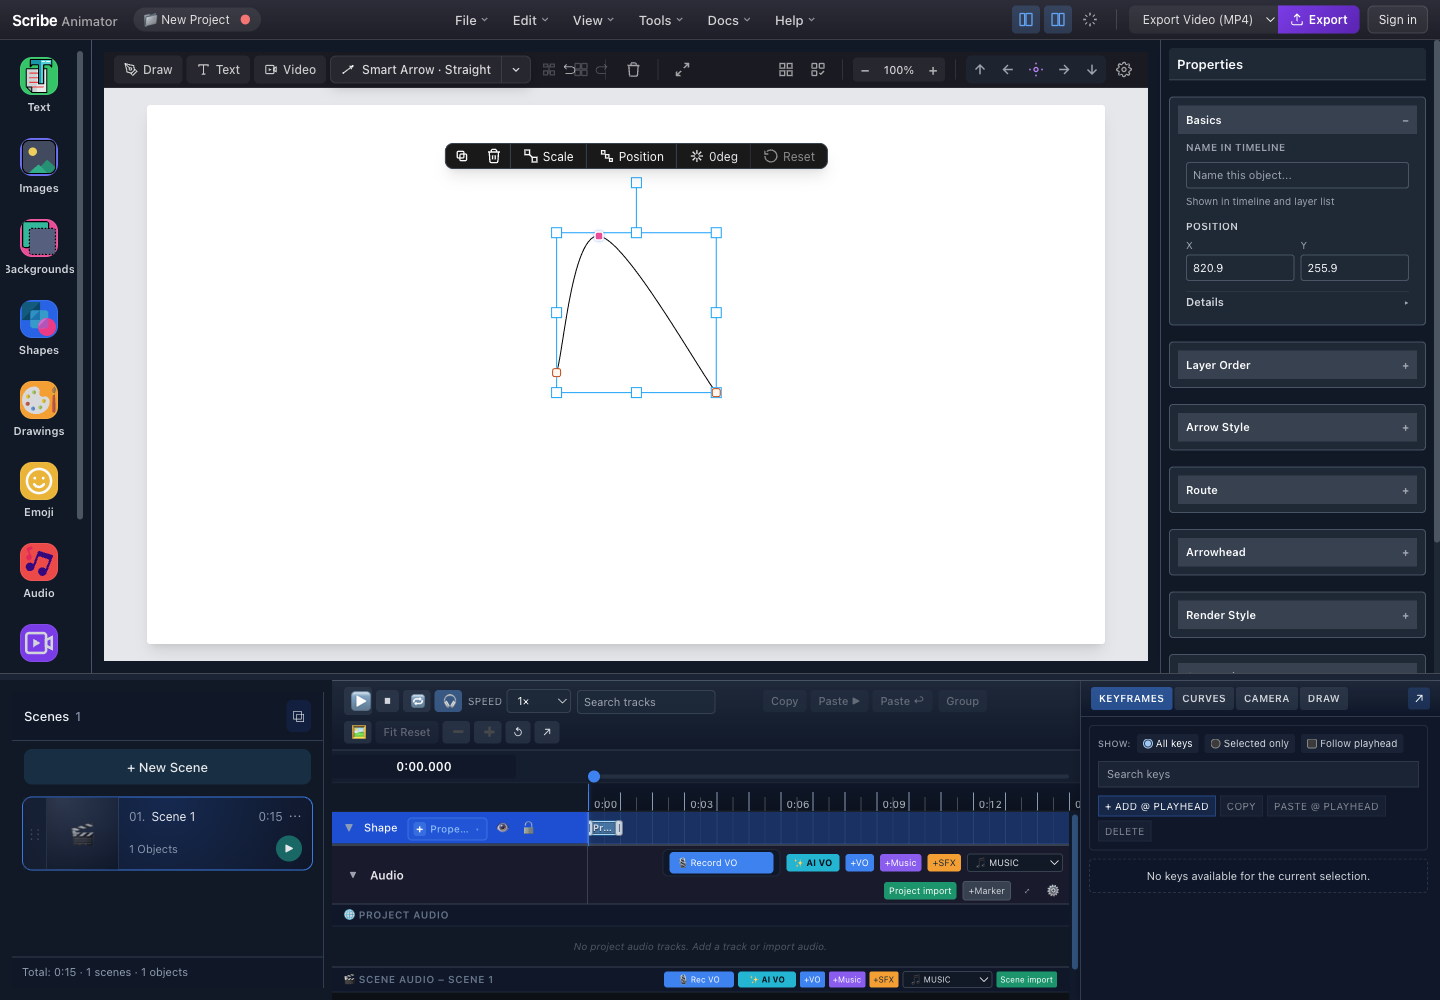
- Route point (waypoint)Drag the pink point to reshape the connector between its endpoints.
- Start and end handlesOrange handles position the endpoints; they are not route points.
The route-point action uses the connector's real path hit area. Double-clicking empty whitespace inside the blue selection rectangle intentionally does not add a point. If nothing happens, zoom in and double-click directly on the line or arrow stroke.
Add more points for a custom path
Repeat the same double-click on another part of the reshaped stroke. Each new route point becomes another pink handle you can drag independently.
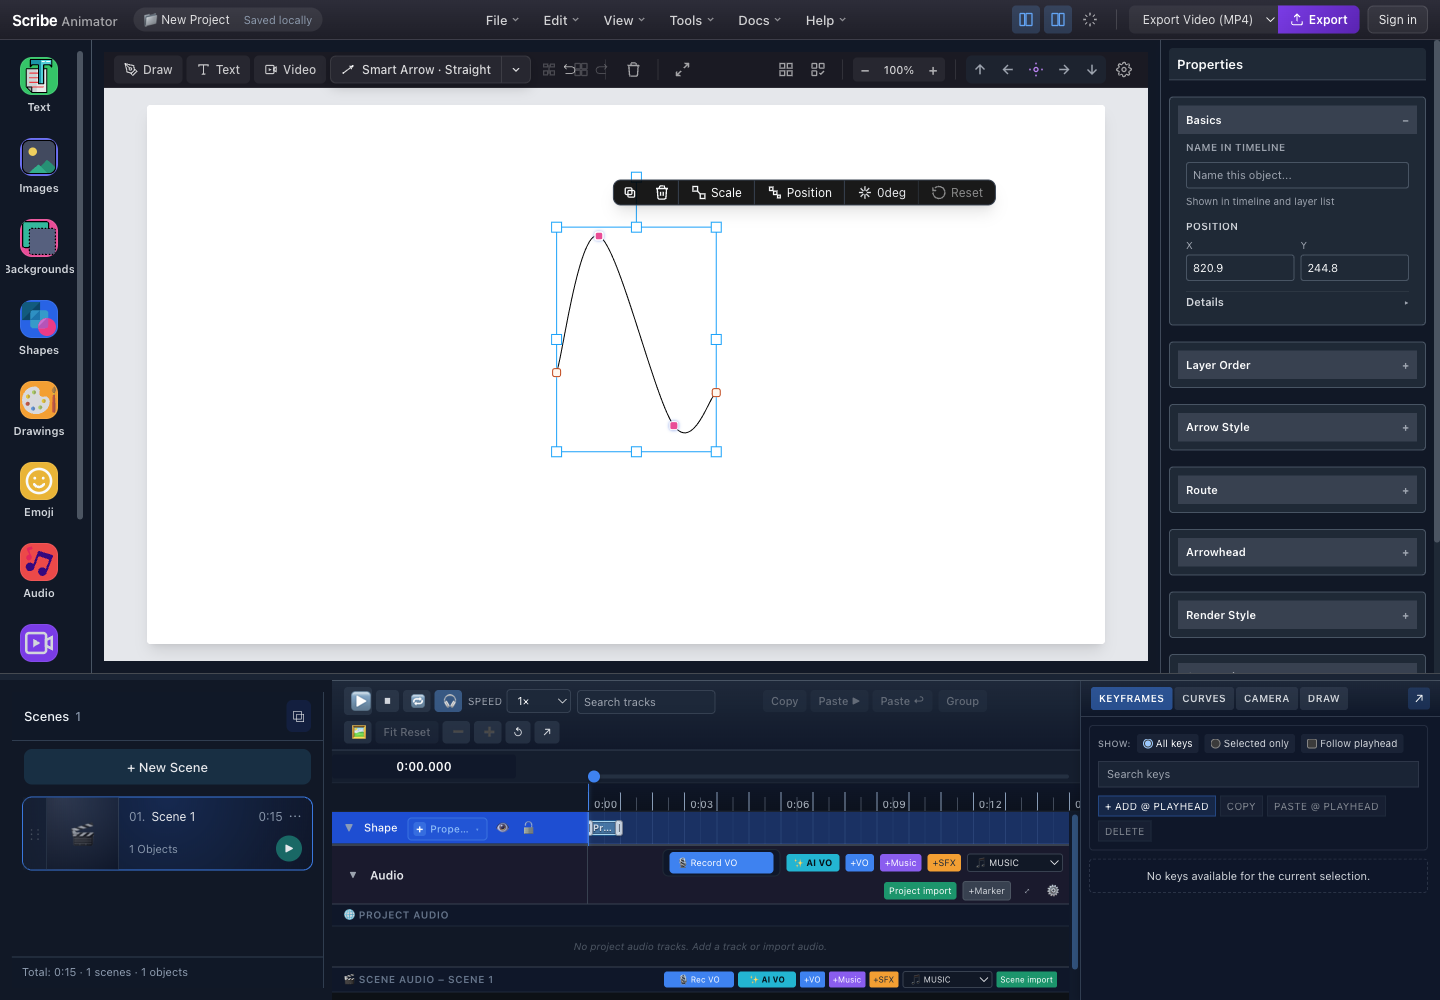
- First route pointThis waypoint pulls the first part of the route upward.
- Second route pointA second waypoint pulls the next part downward to form the S-curve.
Route-point editing keeps the connector native and editable. Its endpoint attachments, arrow settings, Draw In animation, camera behavior, and export rendering continue to use the updated route. Use Ctrl/Cmd+Z if you add or move a point accidentally.
Mobile Lite
Mobile Lite exposes the same project data without relying on a desktop double-click. Select the connector, open its expanded object actions, choose + Point, and then tap the route. Drag the new route point to reshape it; select a route point to expose Delete Point.
For the complete attachment and Mobile Lite workflow, see Select, arrange, group, and connect objects.
Template Authoring Guidance
When writing or generating templates, do not fake arrows with inline SVG if the intent is an editable relationship arrow.
Prefer native smartLine and smartArrow objects in AI-generated templates. They stay editable in the editor and work better for repeatable whiteboard explainer layouts.
Use AI JSON: Smart Lines, Smart Arrows & Connectors for tested standalone and attached examples, every supported anchor, Draw In semantics, and the portable props versus runtime properties boundary.