Make your first whiteboard video
Make your first whiteboard video
What you'll build
- A short 30s explainer clip
- SVG stroke-by-stroke reveal animation
- Basic camera move for emphasis
- A clean MP4 export ready to share
Steps
- Create a new project from a template
- Import an SVG using the Vector Import panel
- Configure animation timing in the Inspector
- Set up camera mode for your scene
- Export MP4 and preview the output
Getting Started
Step 1: Create a New Project
Open Scribe Animator and click File → New Project (or press ⌘N).

You'll see the template gallery with 25+ built-in templates organized by use case and format.
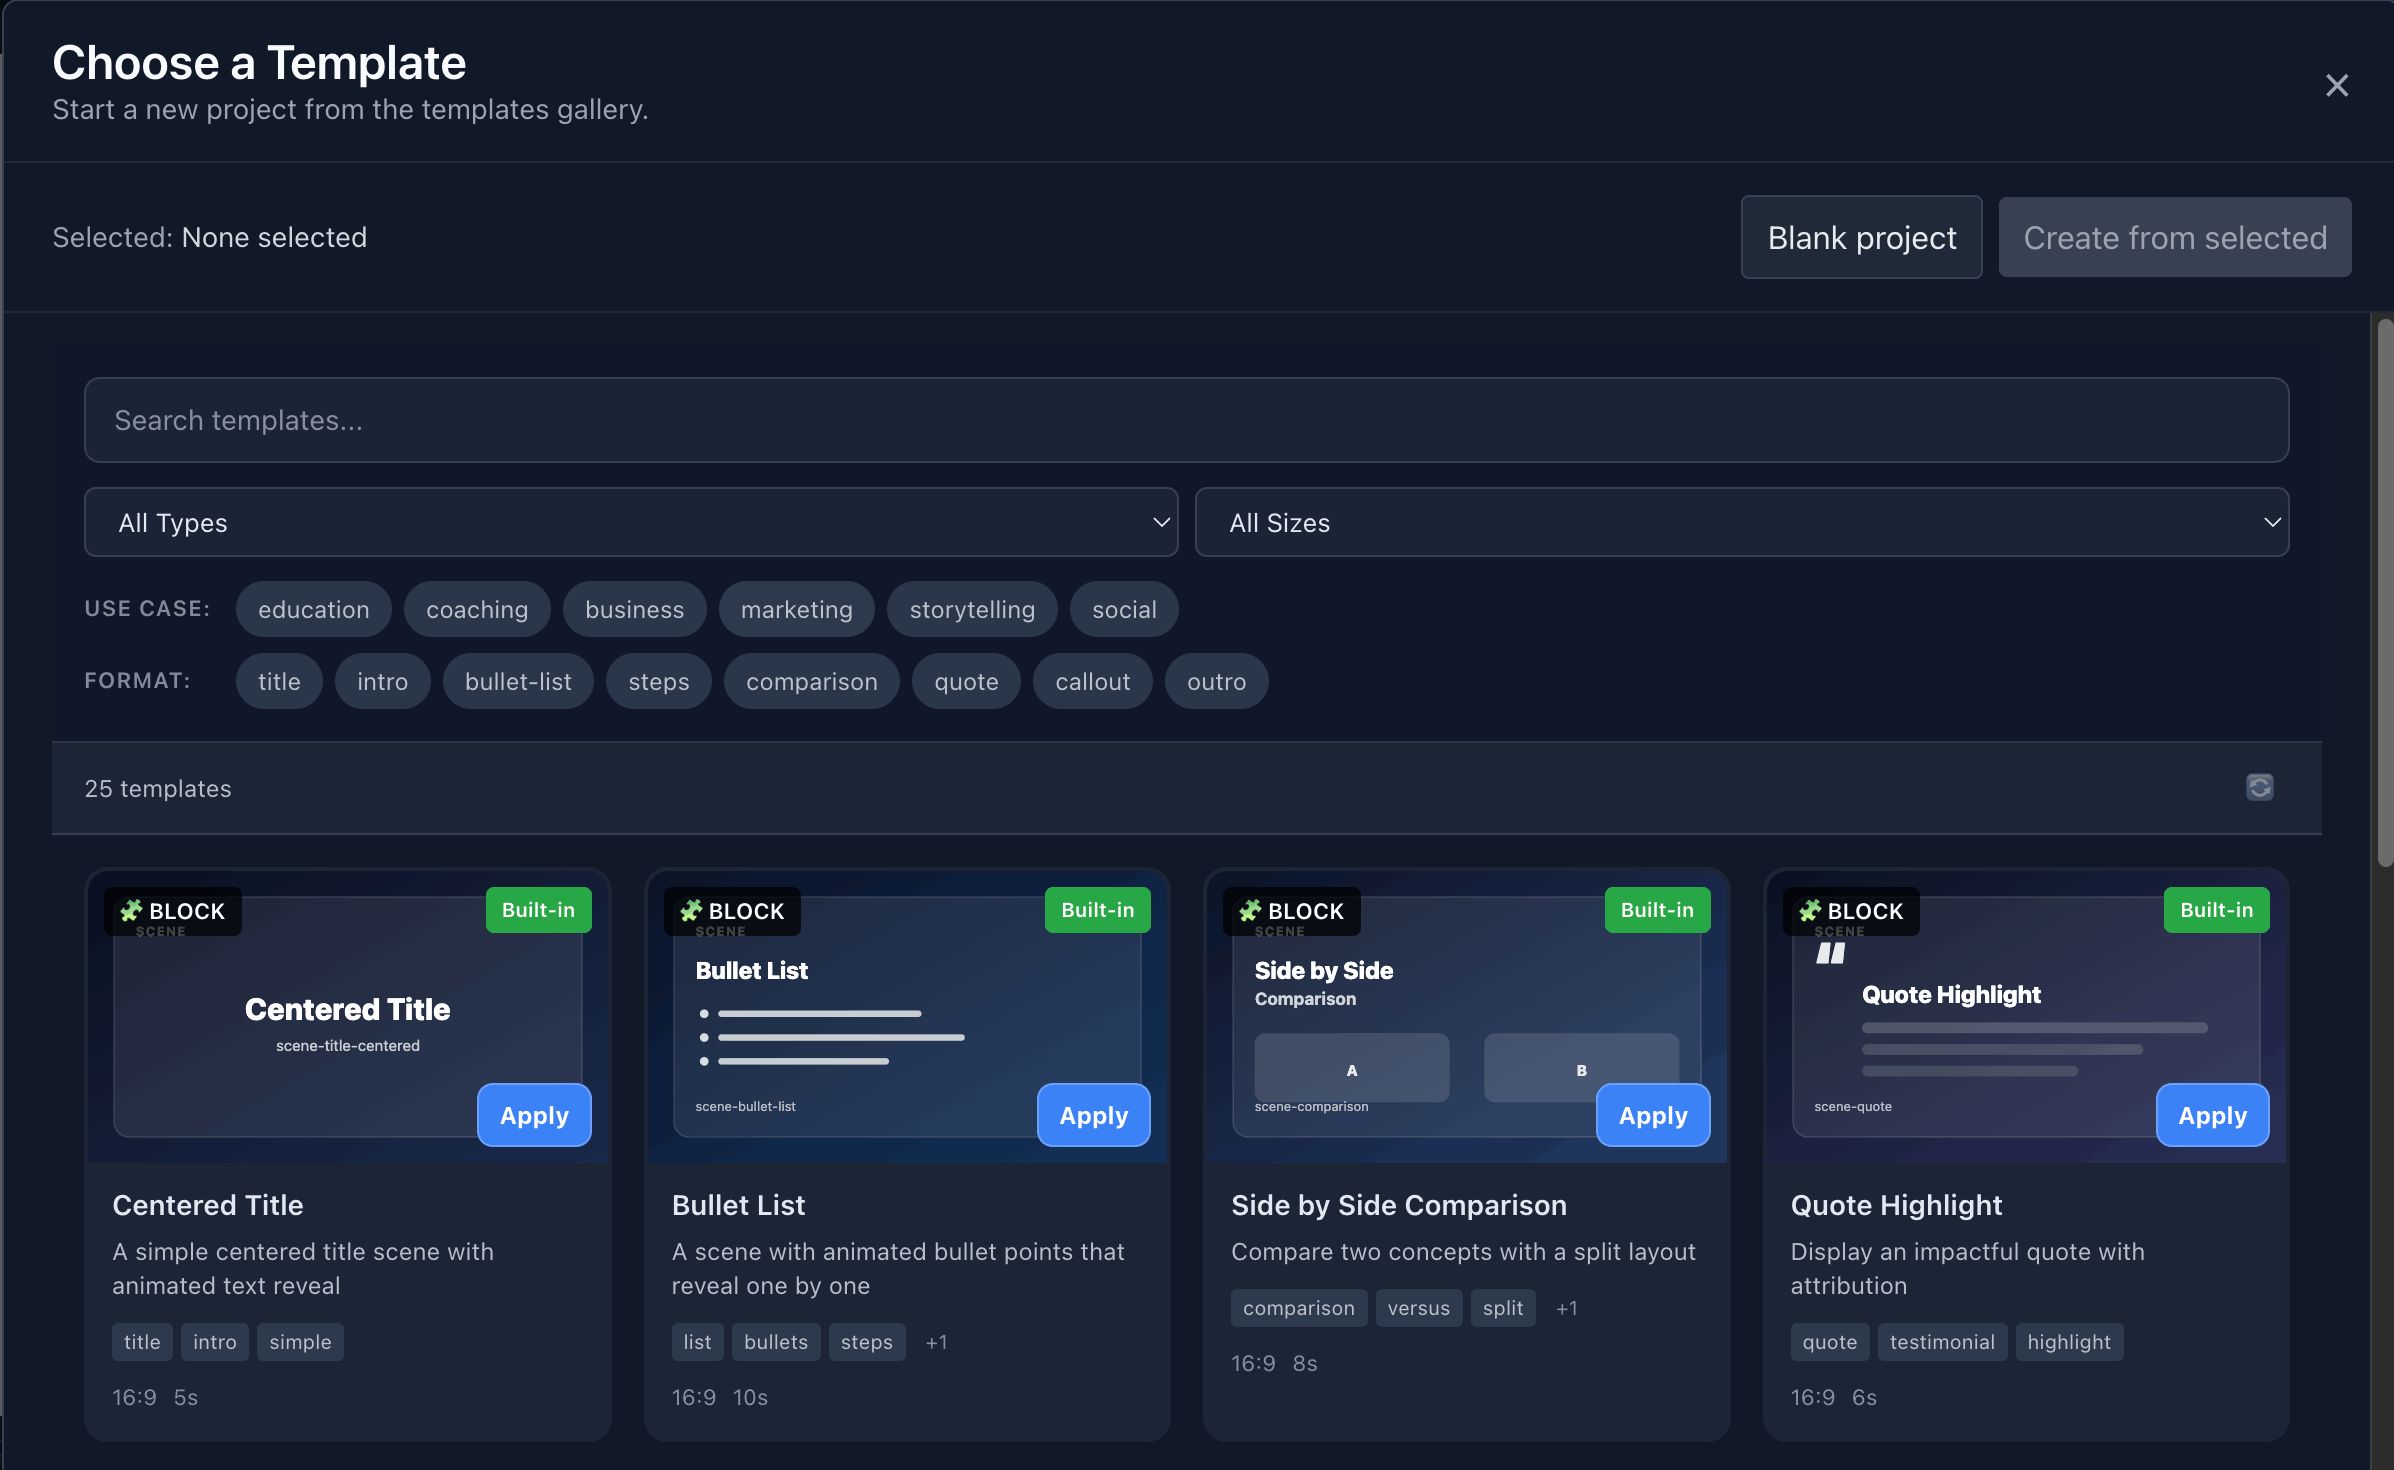
For your first video, try the Centered Title or Bullet List template — they're simple and work great for quick explainers!
Select a template and click Apply, or choose Blank project to start from scratch.
Step 2: Import Your SVG
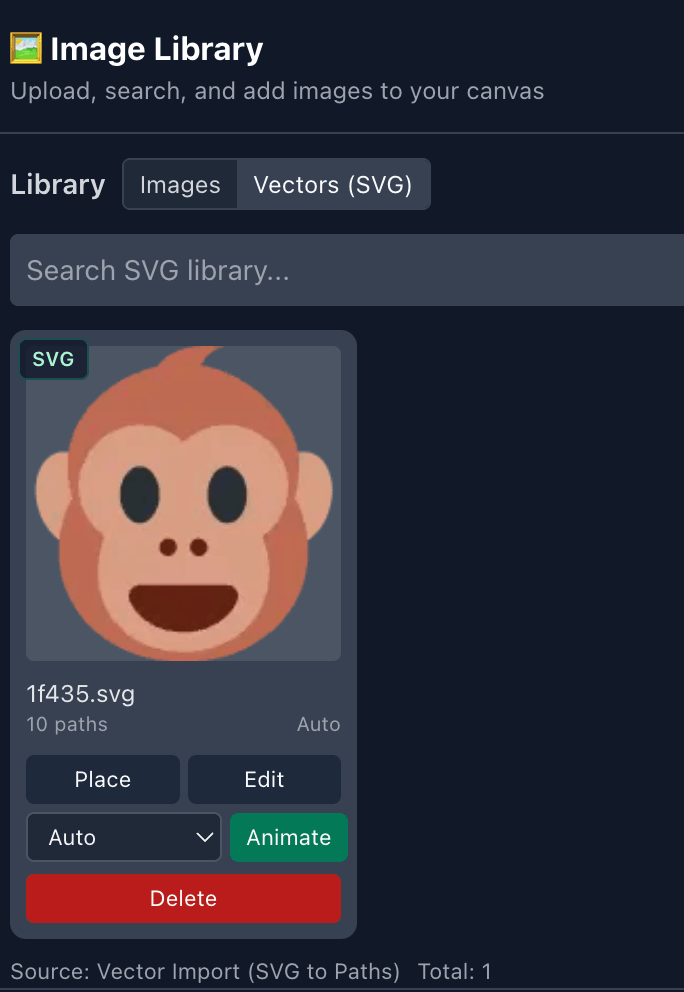
In Scribe Animator, you import SVGs through the Vectors panel in the left sidebar. Click the Vectors icon to open it.

Click to open the Vector Import panel. You can either:
- Click Choose file to browse your files
- Drag & drop an SVG, PNG, JPG, WEBP, GIF, BMP, or TIFF directly

Scribe supports both vector (SVG) and raster images. SVGs work best for the hand-drawing animation effect, while raster images are great for photos and backgrounds.
Once imported, your SVG appears in the Images section of the sidebar where you can manage it.
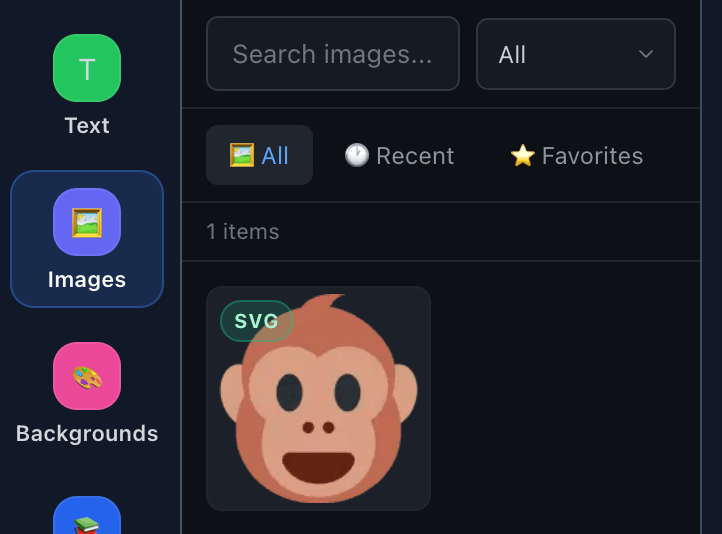
Click on an image to see options like Place, Edit, Animate, and Delete.
Step 3: Configure Animation Timing
Select your SVG on the canvas, then open the Inspector panel (right sidebar). Find the Animation section to configure:

- Animator: Choose the drawing hand style (LUT)
- Start Time: When the drawing animation begins (in seconds)
- Duration: How long the stroke-by-stroke reveal takes
- Animation Type: Select the animation style
- Easing: Add smooth acceleration/deceleration
Step 4: Set Up Camera Mode
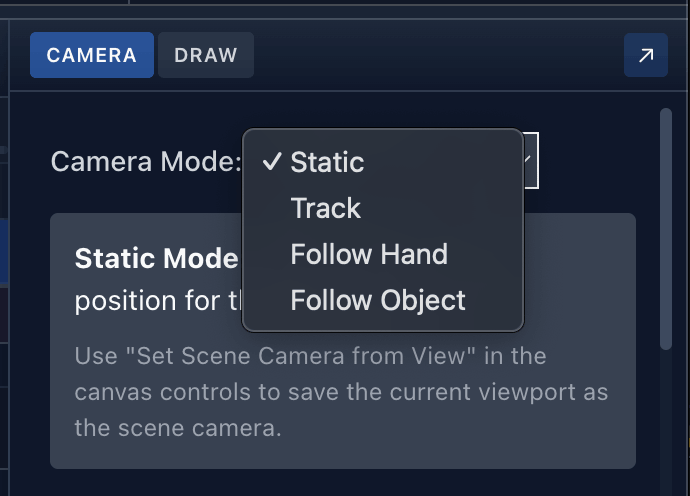
For dynamic scenes, configure the camera in the Camera panel. You have several modes:
| Mode | Description |
|---|---|
| Static | Fixed camera position for the entire scene |
| Track | Camera follows a predefined path |
| Follow Hand | Camera smoothly follows the drawing hand |
| Follow Object | Camera tracks a specific element |
For your first video, Static mode is easiest. Use "Set Scene Camera from View" to save your current viewport as the scene camera.
Step 5: Export Your Video
When you're happy with the animation, click File → Export to open the export dialog.

Choose your settings:
| Setting | Recommended |
|---|---|
| Resolution | 720p (1280×720) or 1080p |
| Frame Rate | 30 fps (Standard) |
| Quality | High (10 Mbps) |
| Format | MP4 (H.264) |
Export works best on Chrome and Edge. Other browsers may have limitations with video encoding.
Click Export and wait for the render to complete. Your MP4 will be ready to download!
Next Steps
Now that you've created your first video, try these tutorials:
- Add voiceover — Sync audio narration with your animations
- Advanced timeline — Layer multiple elements with complex timing
- Custom draw paths — Create hand-drawn effects for any shape
Questions? Check out our Documentation or visit app.ohotech.com to start creating!